Tag Archives: vhf

Some VHF Tinkering

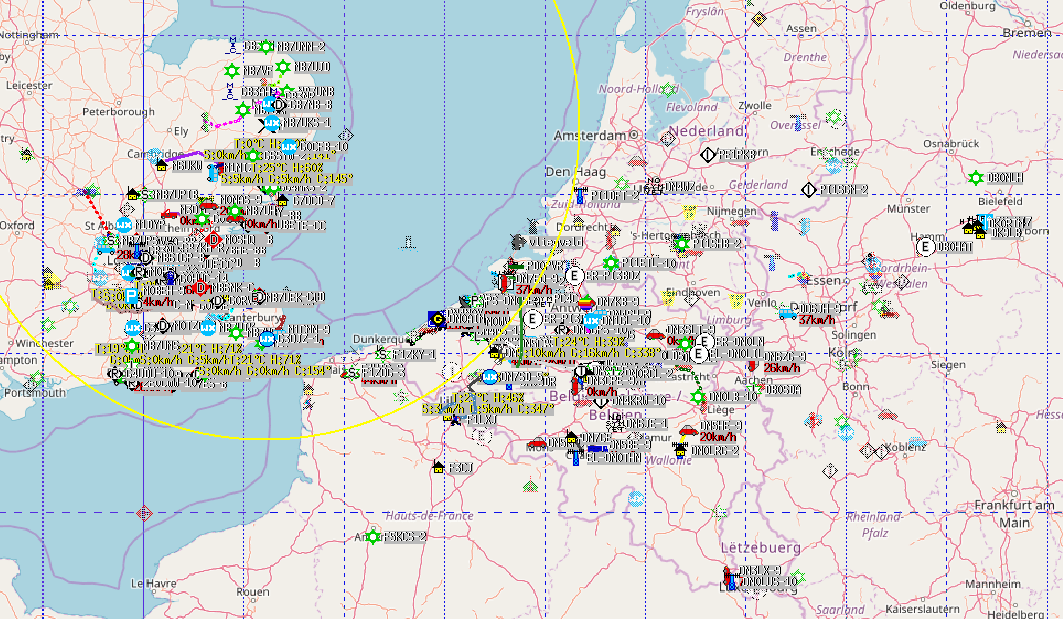
On the way home from work on Friday, my attention was brought to my mobile APRS setup, which was showing received callsigns from Germany, Netherlands, Belgium and France. Once home I decided to connect up my KAM KPC-9612+ TNC to an old Kenwood PMR and see what I heard. The antenna is just a loft-mounted Diamond V-2000, so nothing fancy. About 1 metre of RG58 into the radio. The map is pretty impressive, showing what good conditions were around on VHF at the time. The orange circle shows the ALOHA circle (local reliable APRS network size) – more here – basically the area to which your transmissions would normally be in contention with.


My usual small station EME setup consists of two 9 element DK7ZB Yagi’s bayed at 13 metres. Combined with a Yaseu G5400 Az/El, K3NG’s Arduino rotator interface and YO3SMU’s PstRotator, this is a reasonable attempt at a small station EME setup. Of course you can do it with less, but, it becomes somewhat laborious. With the moon tracking facility of PstRotator, I can set up once, and allow the software to keep the antennas pointing in the correct direction.

The antennas look like this:

At least we don’t have neighbours!

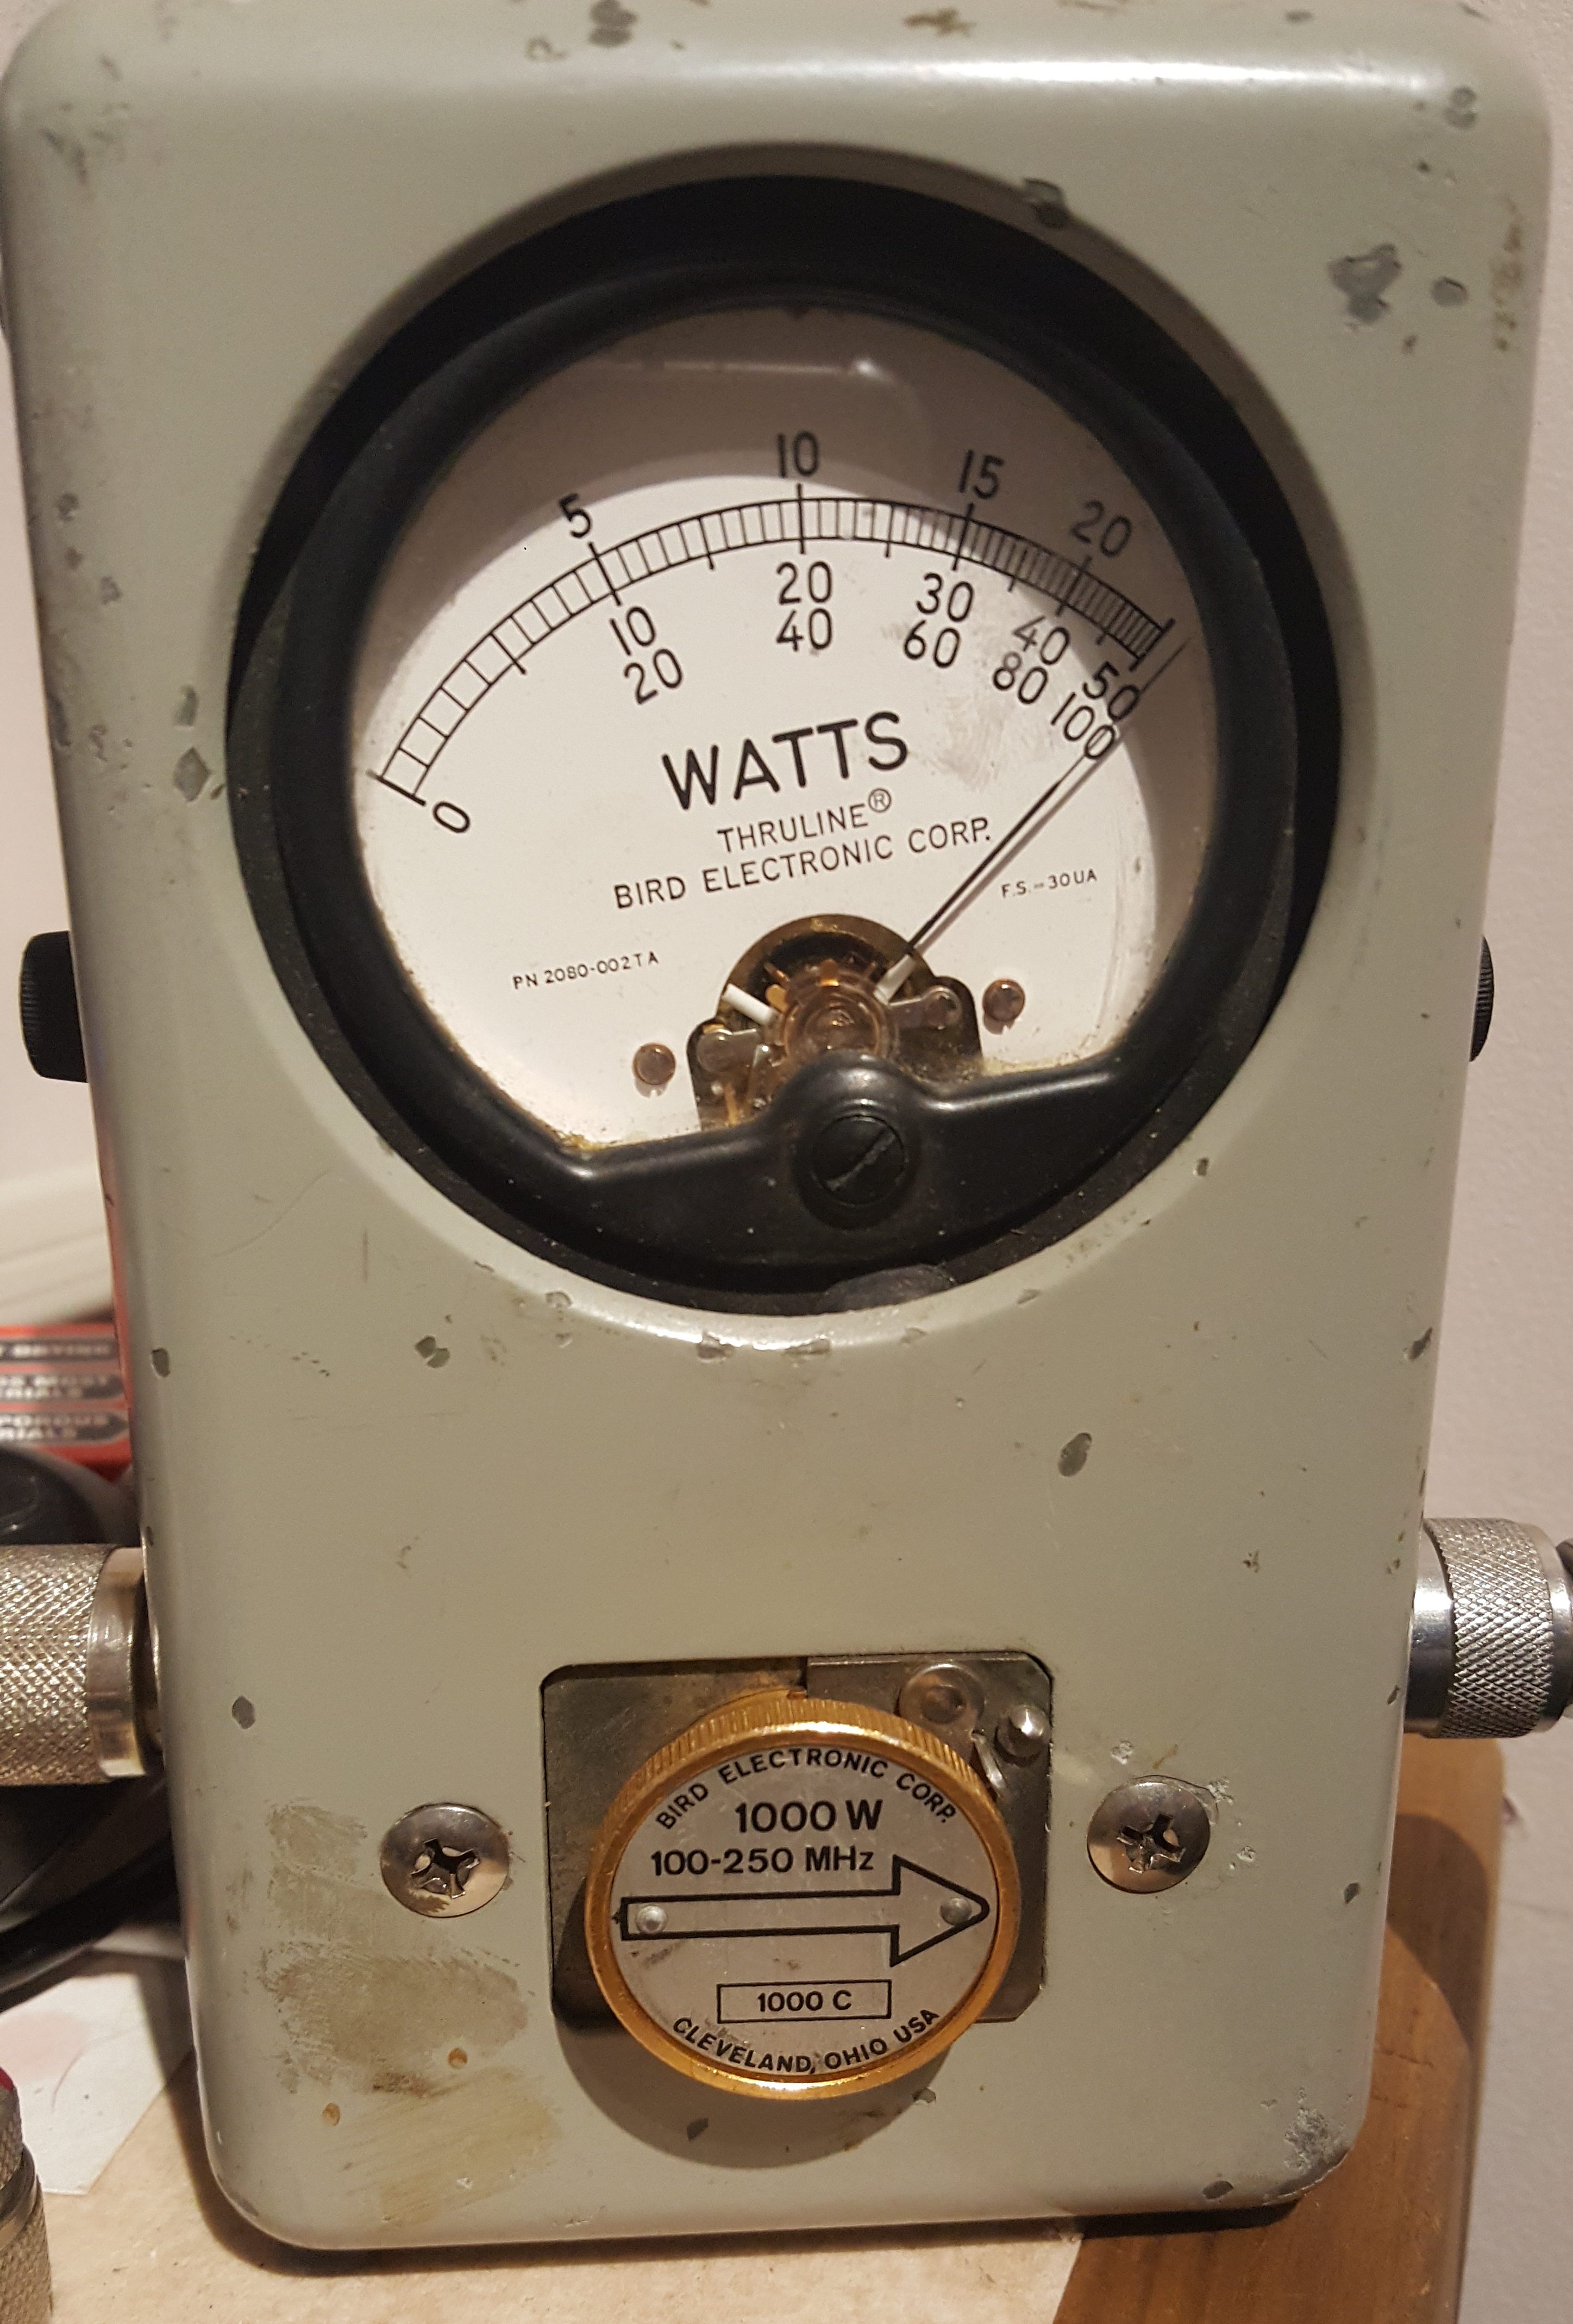
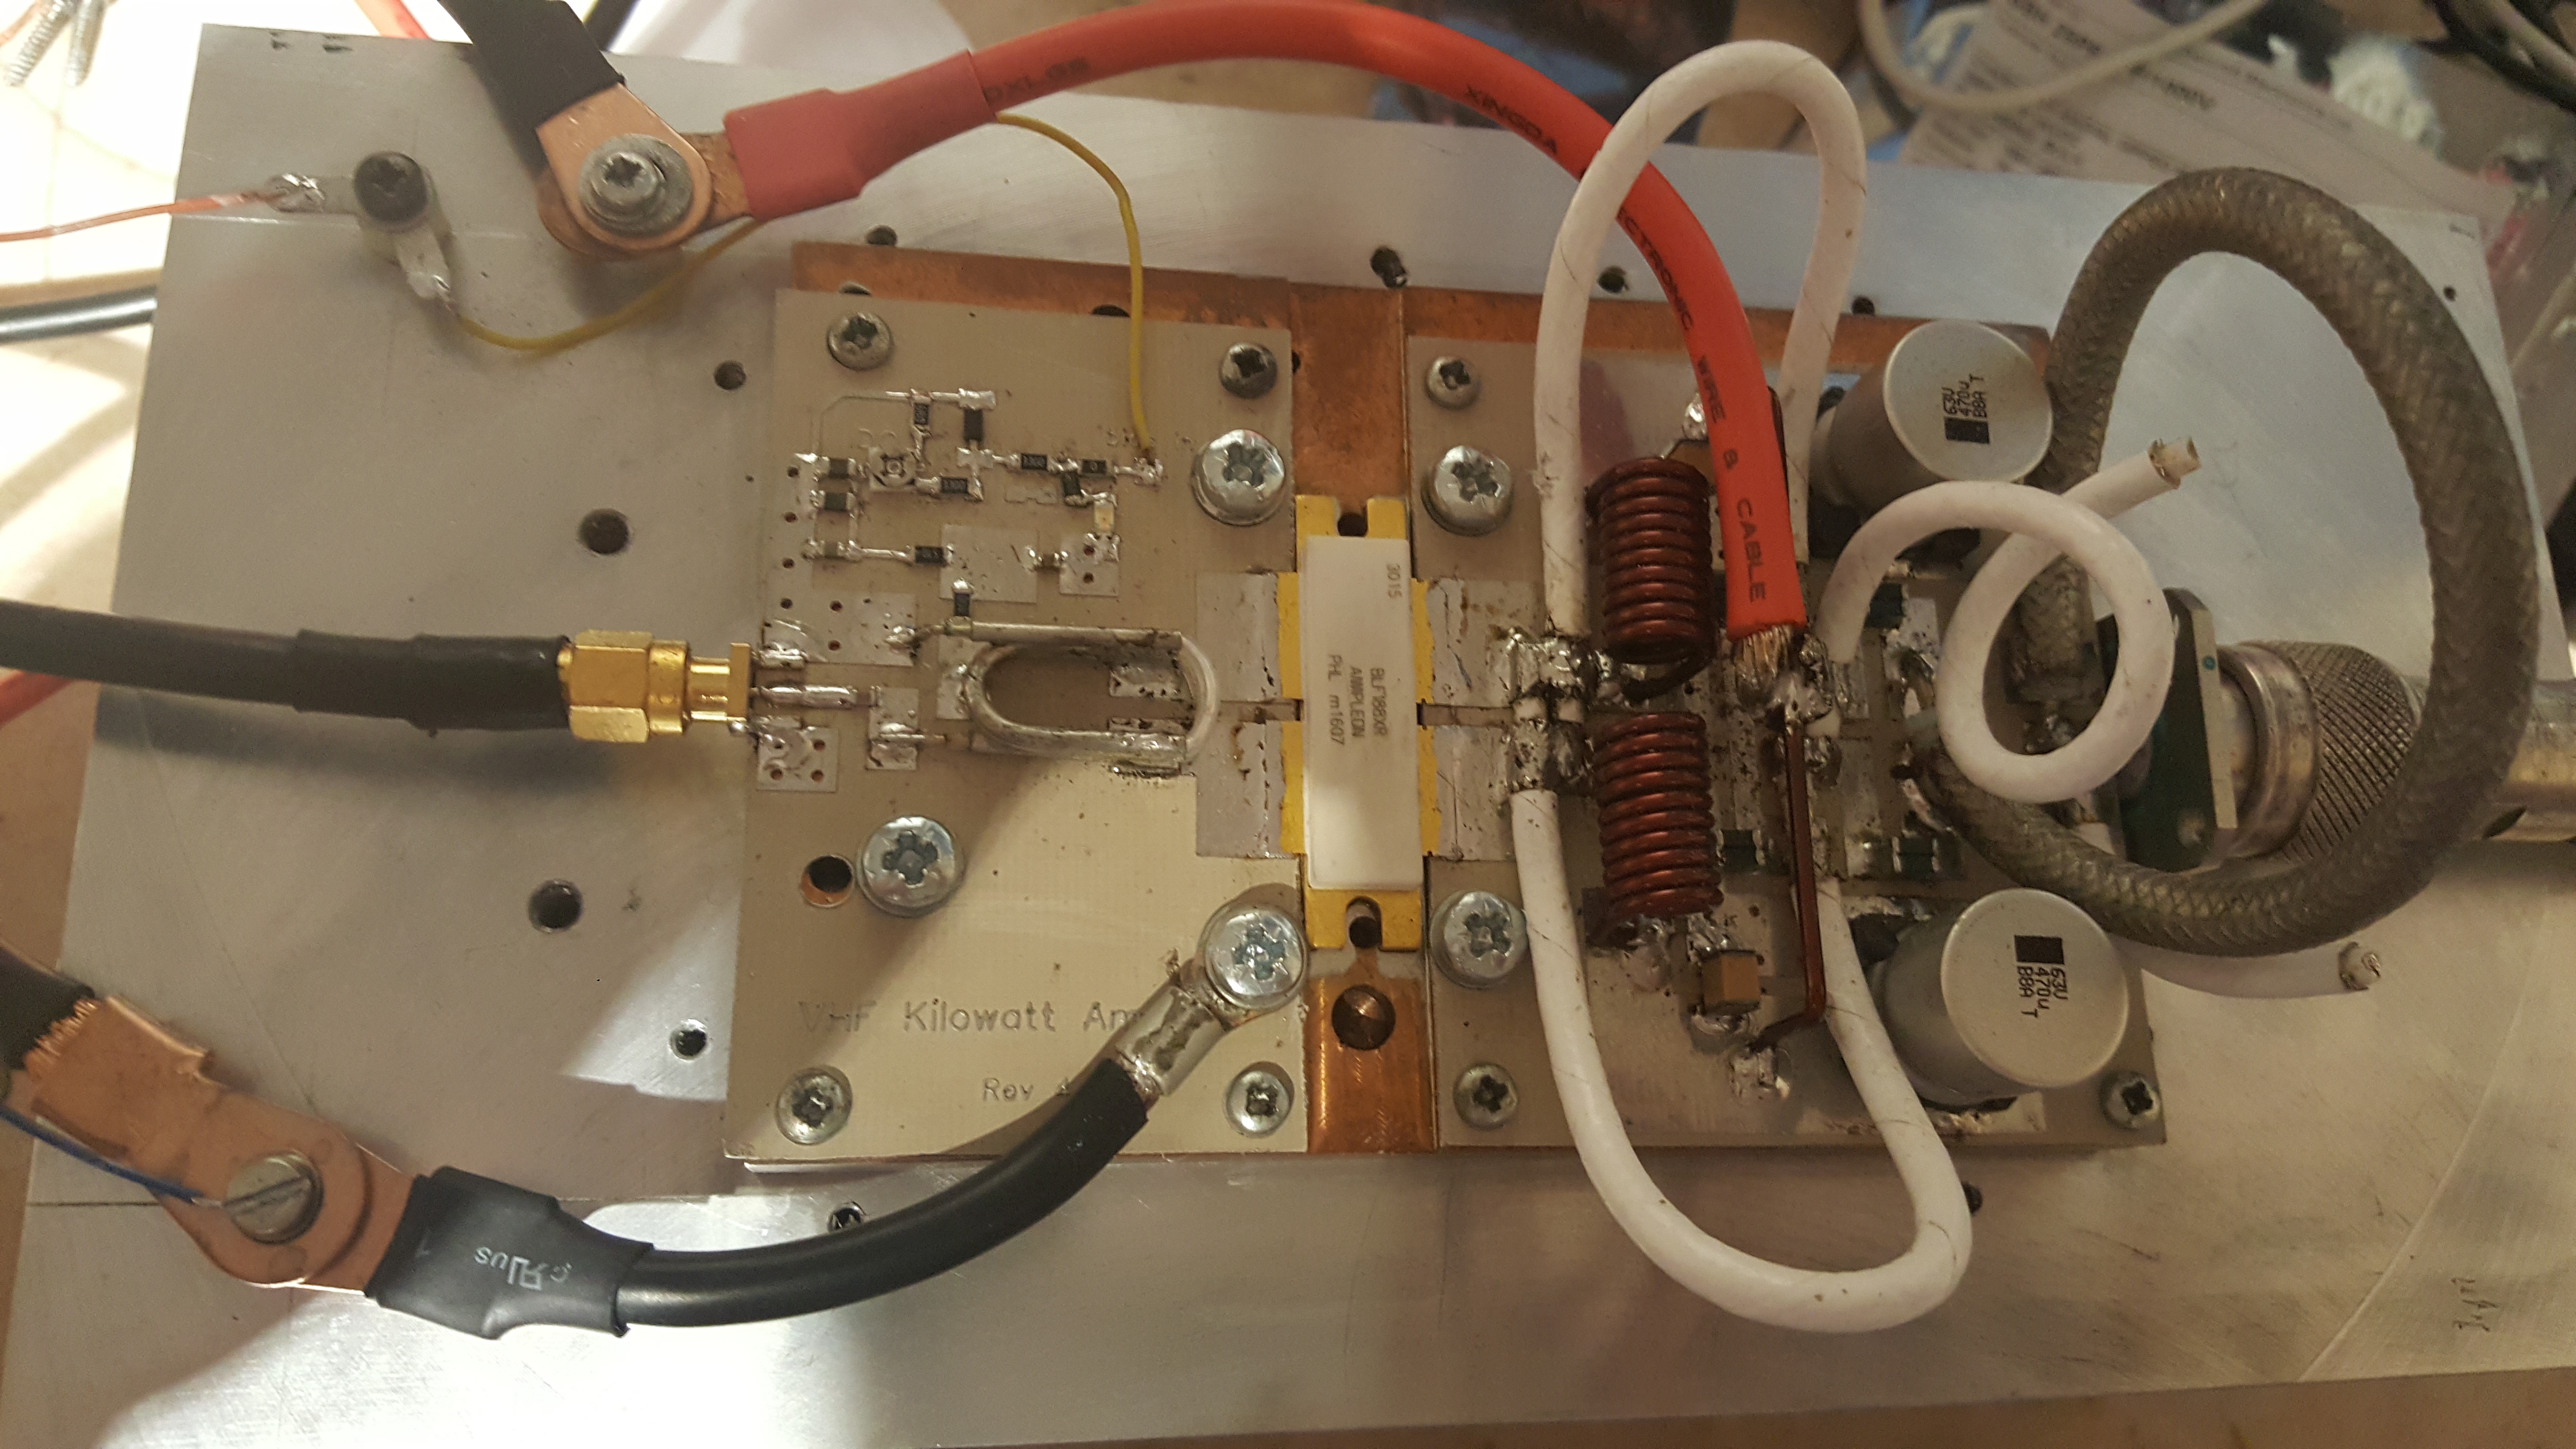
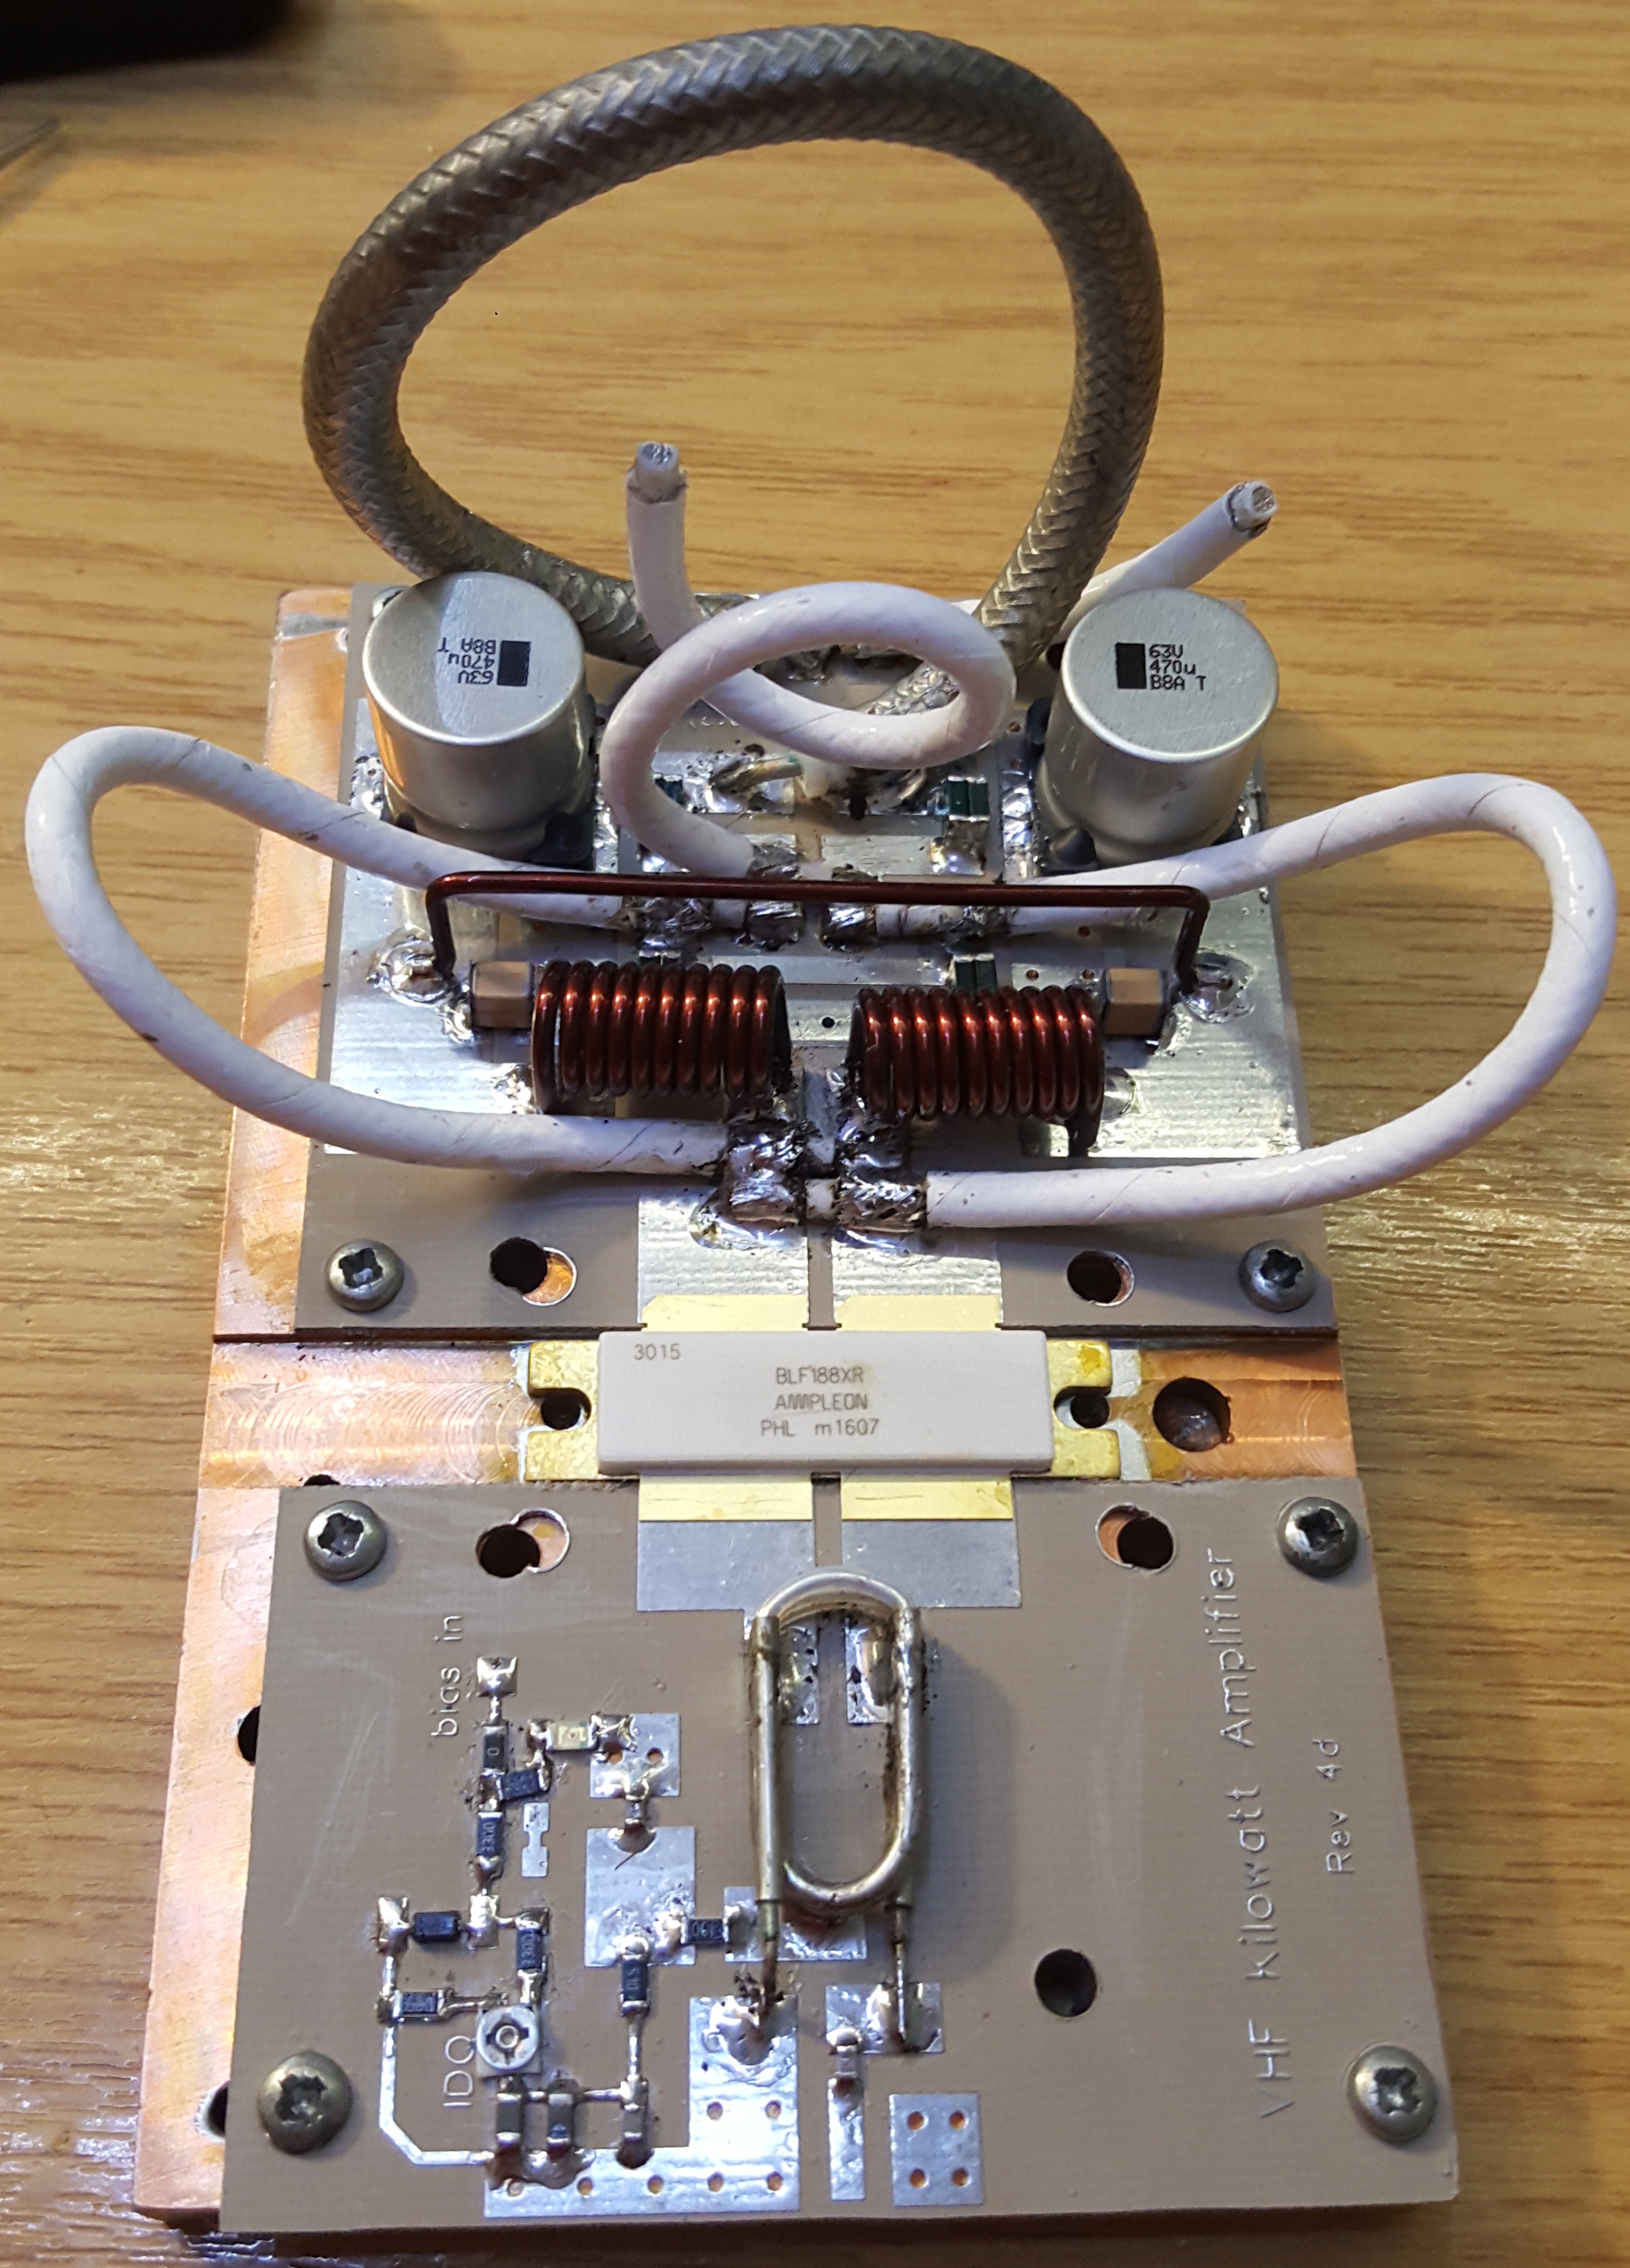
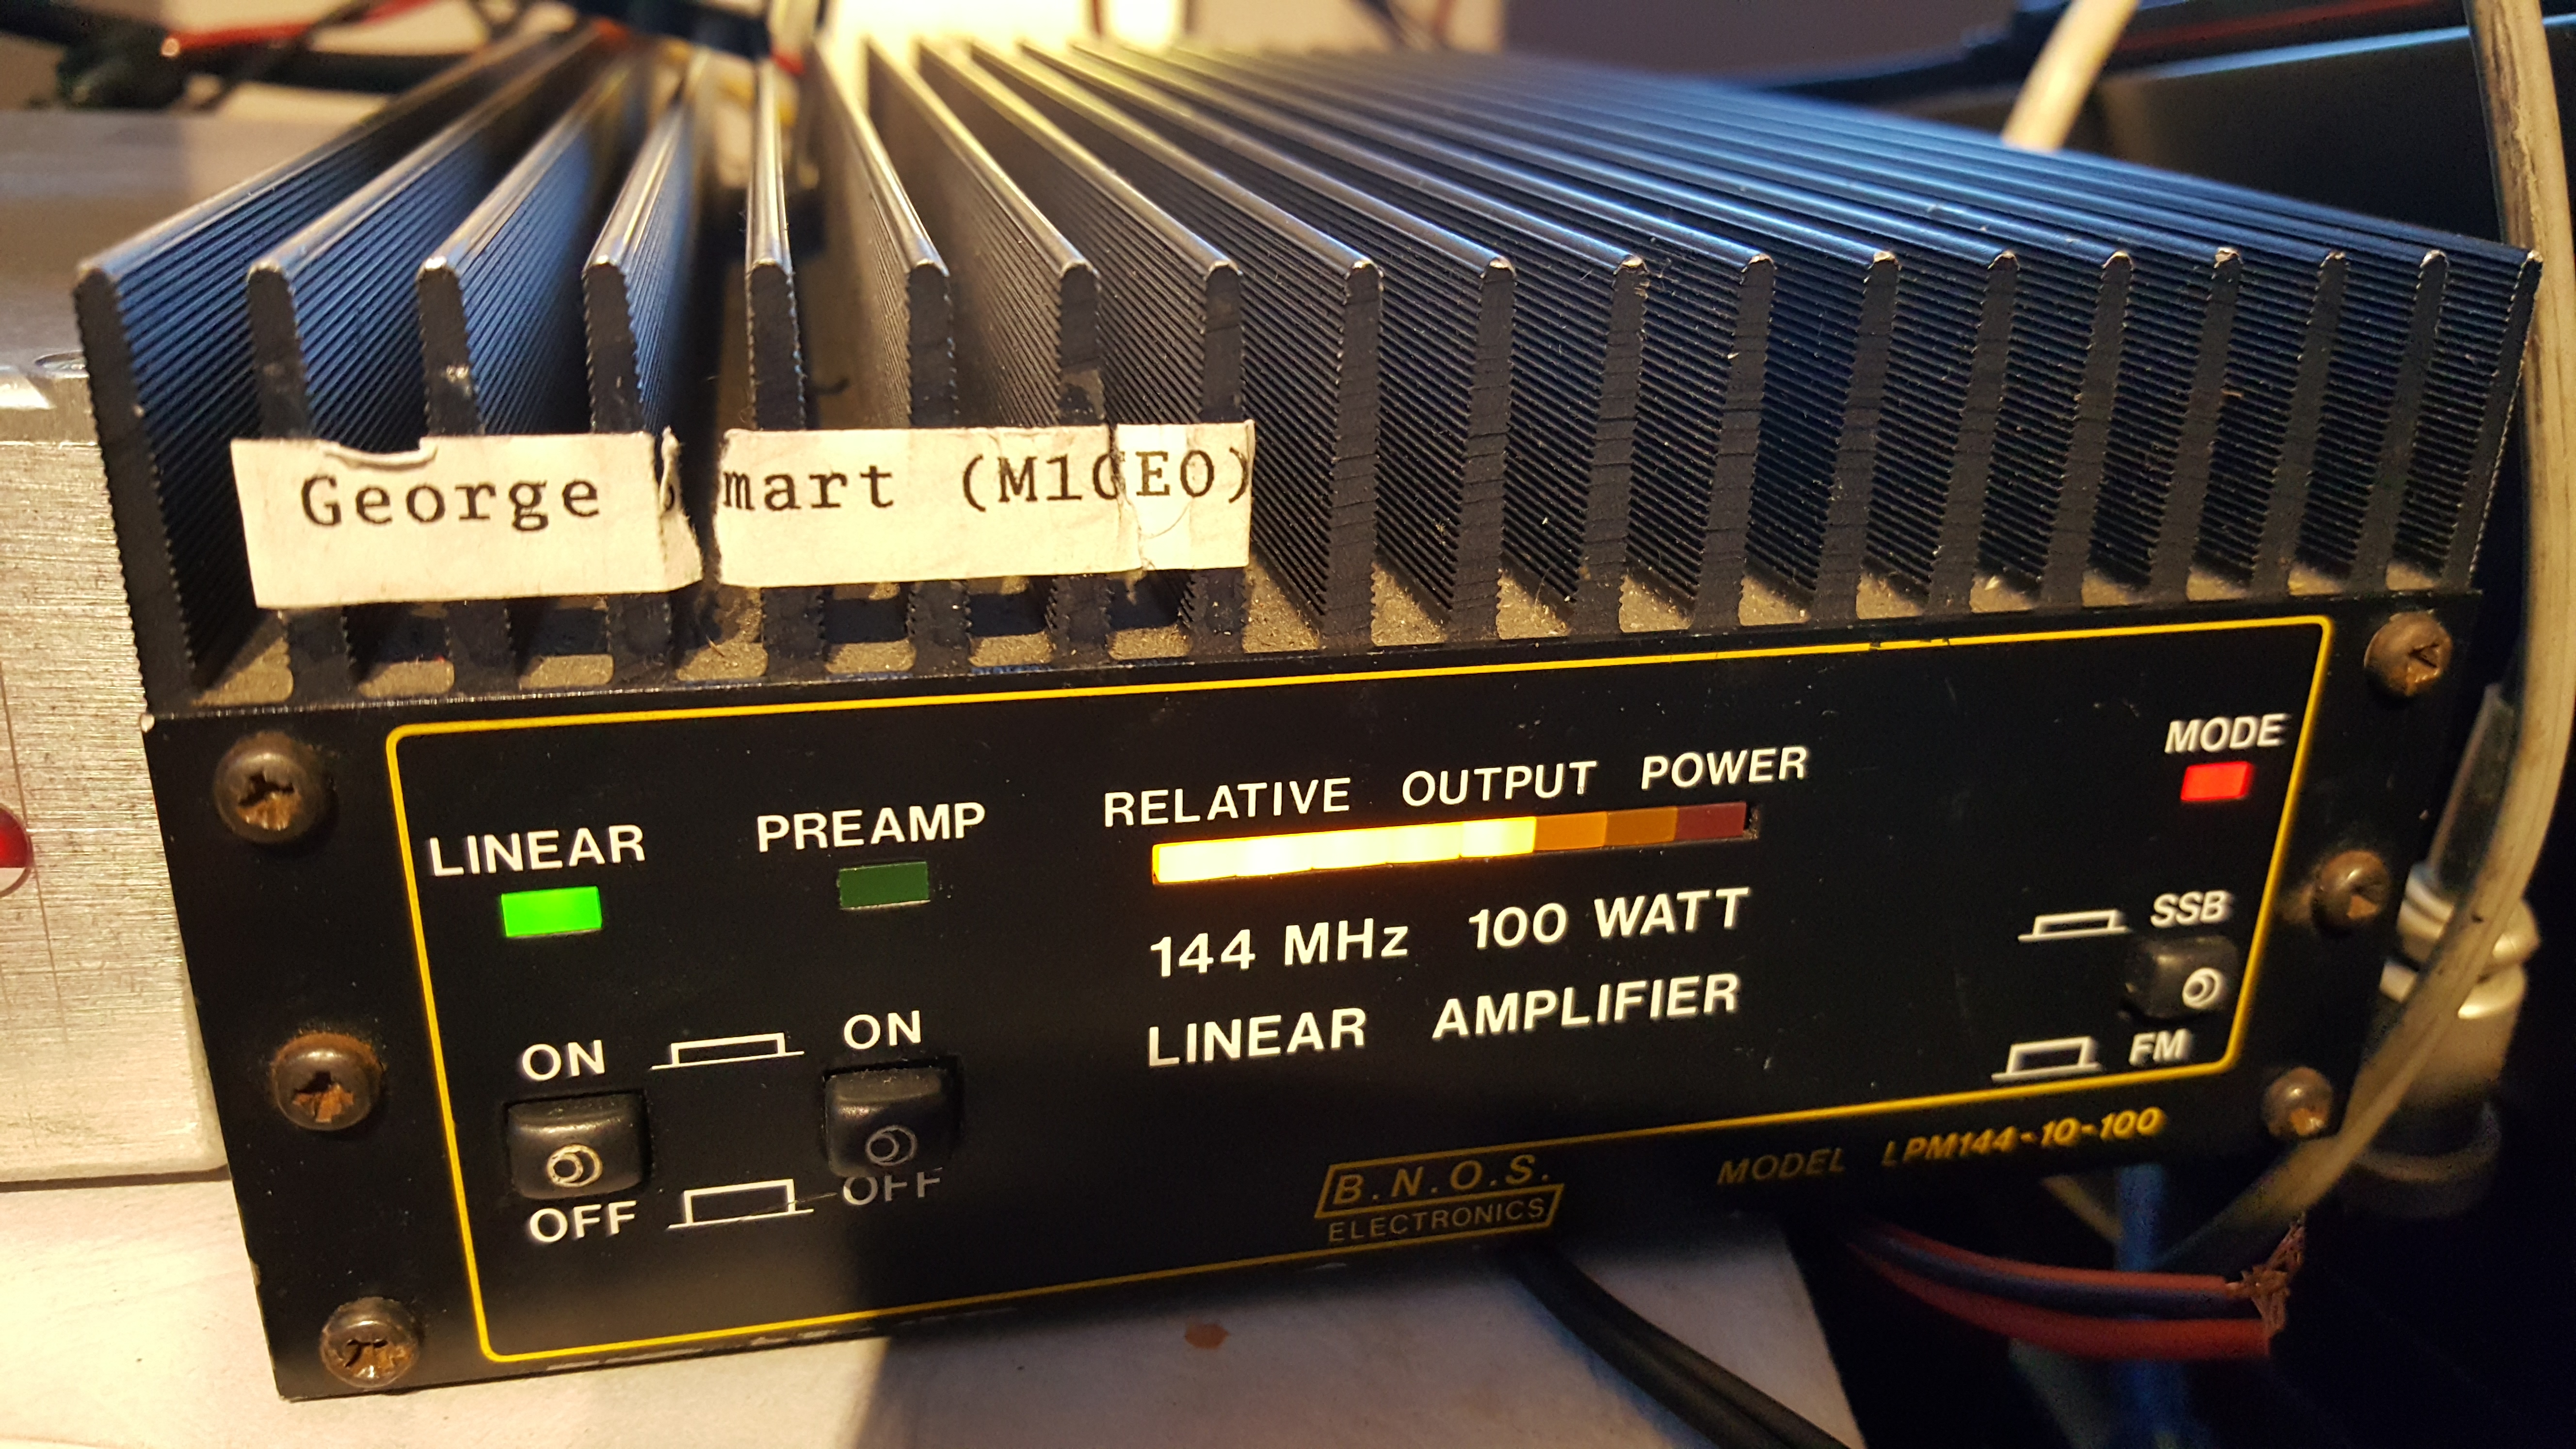
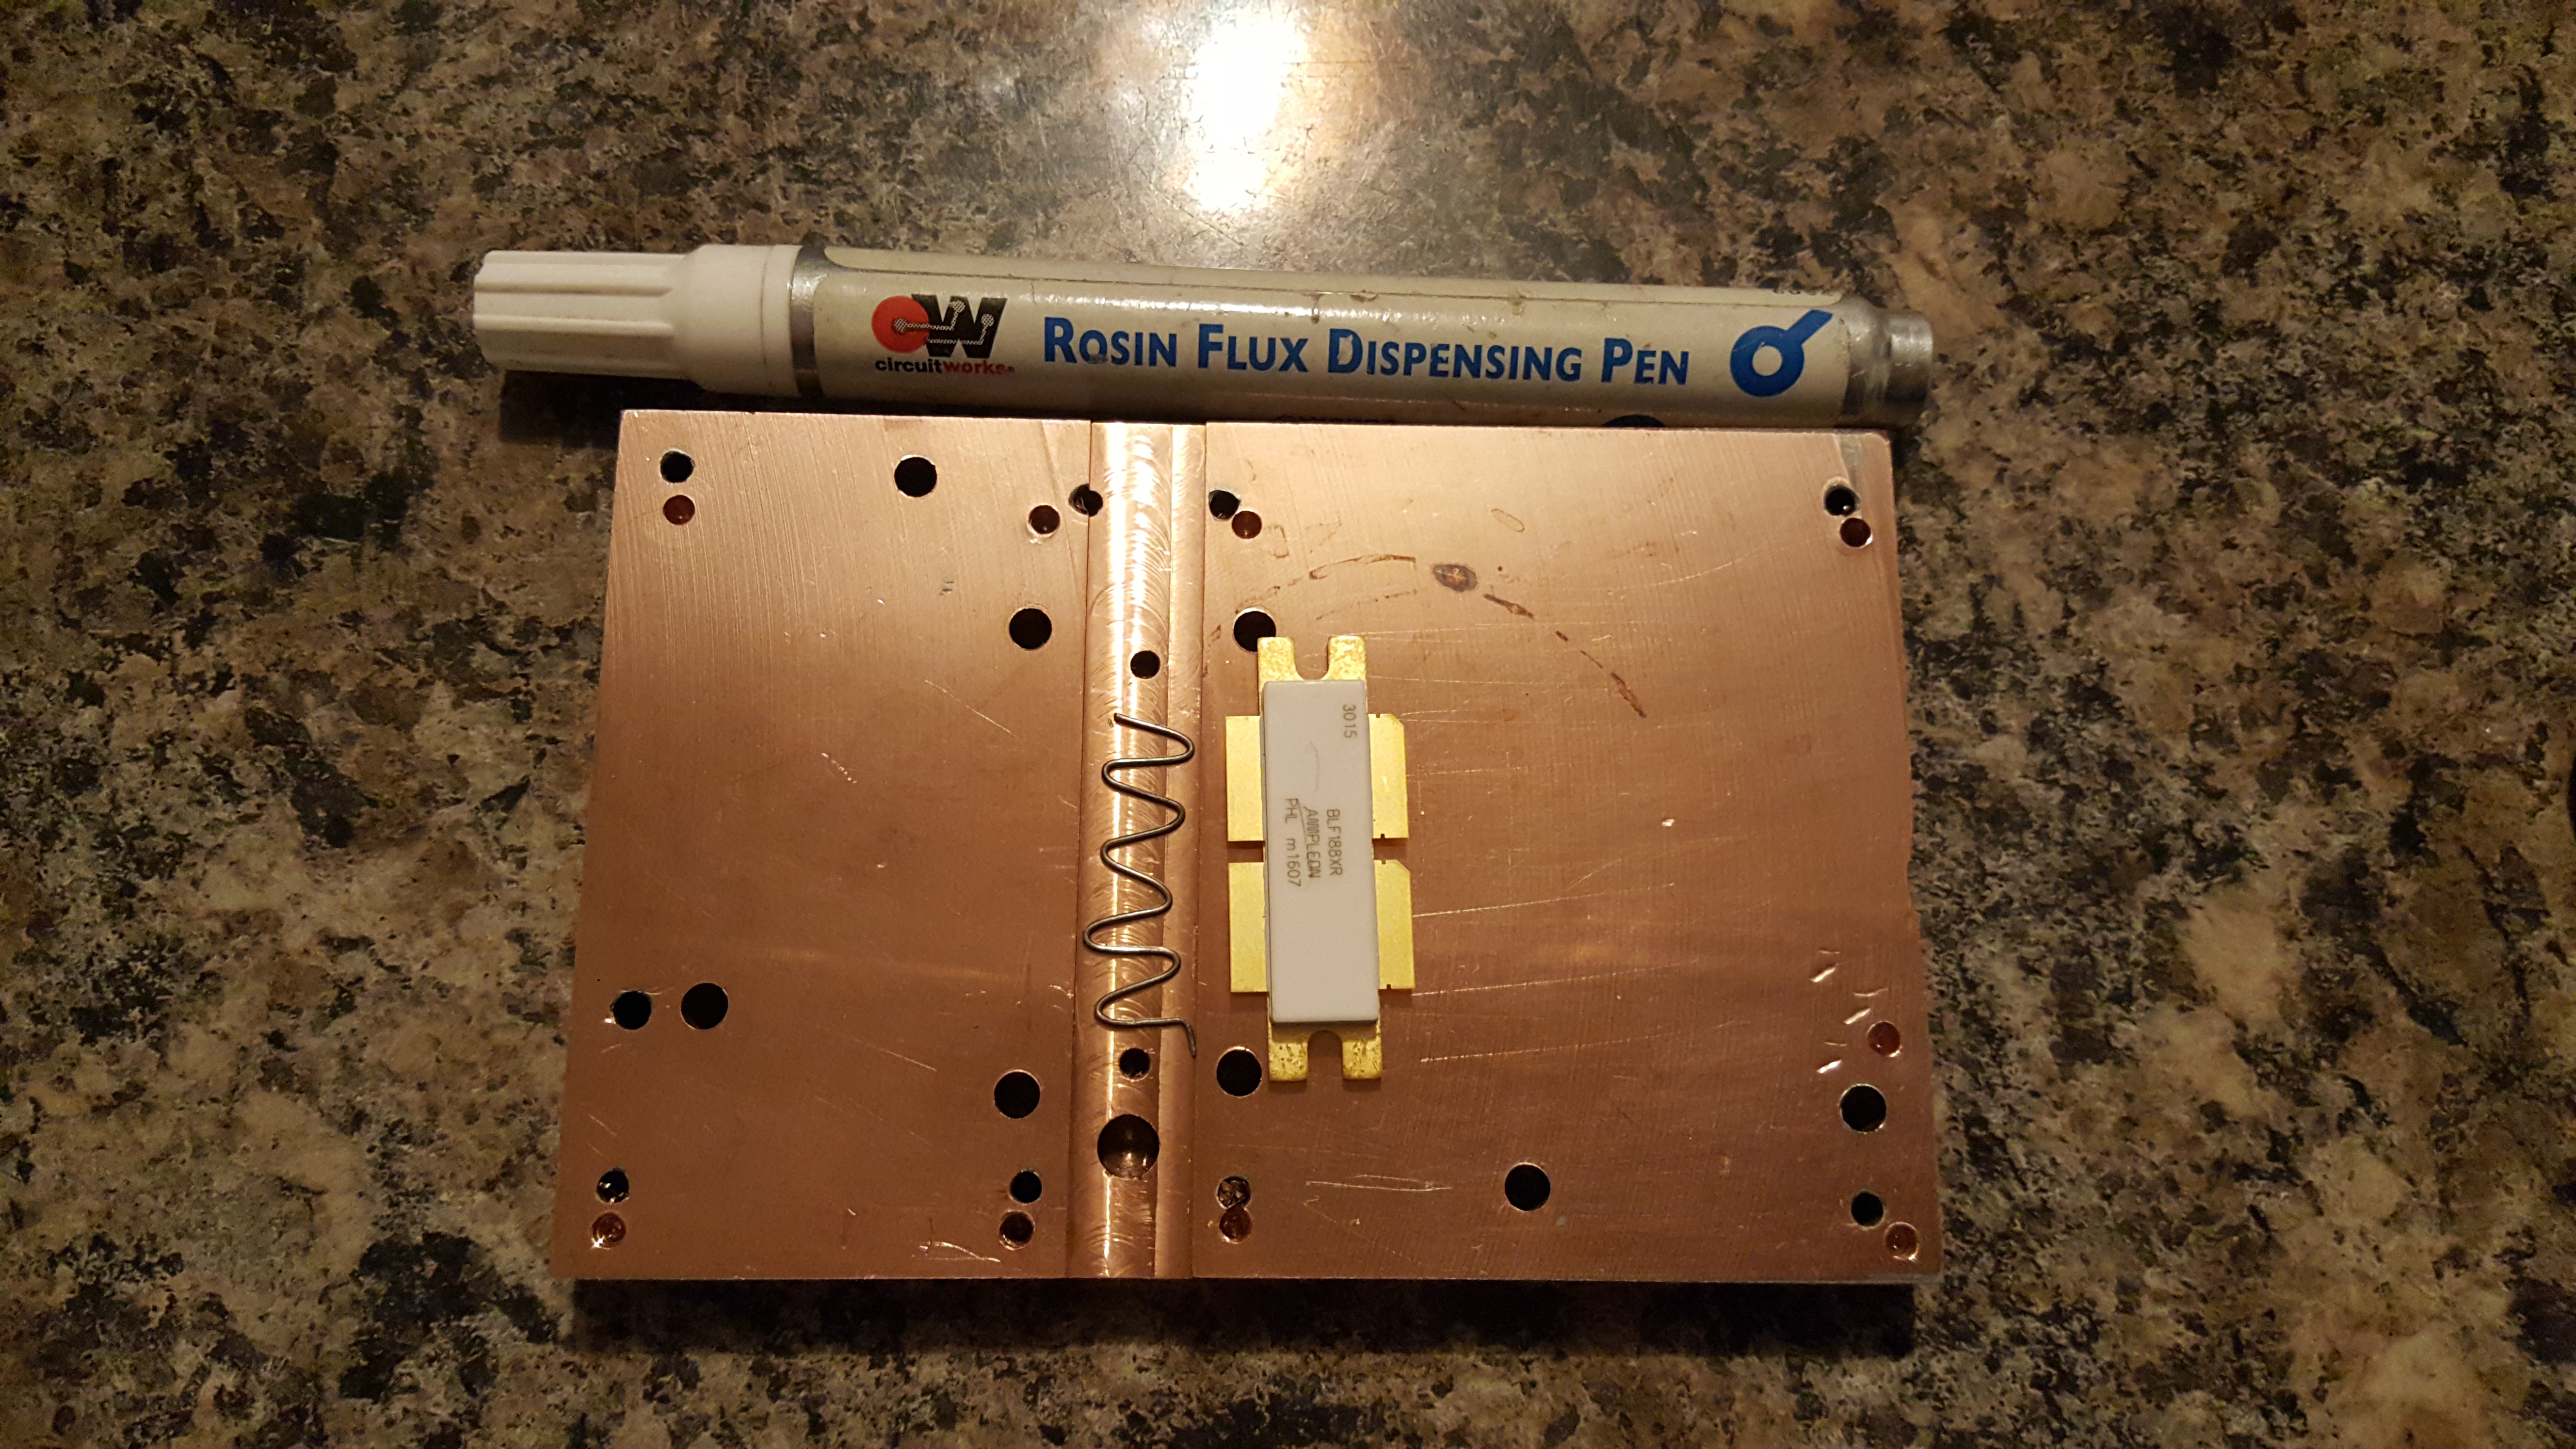
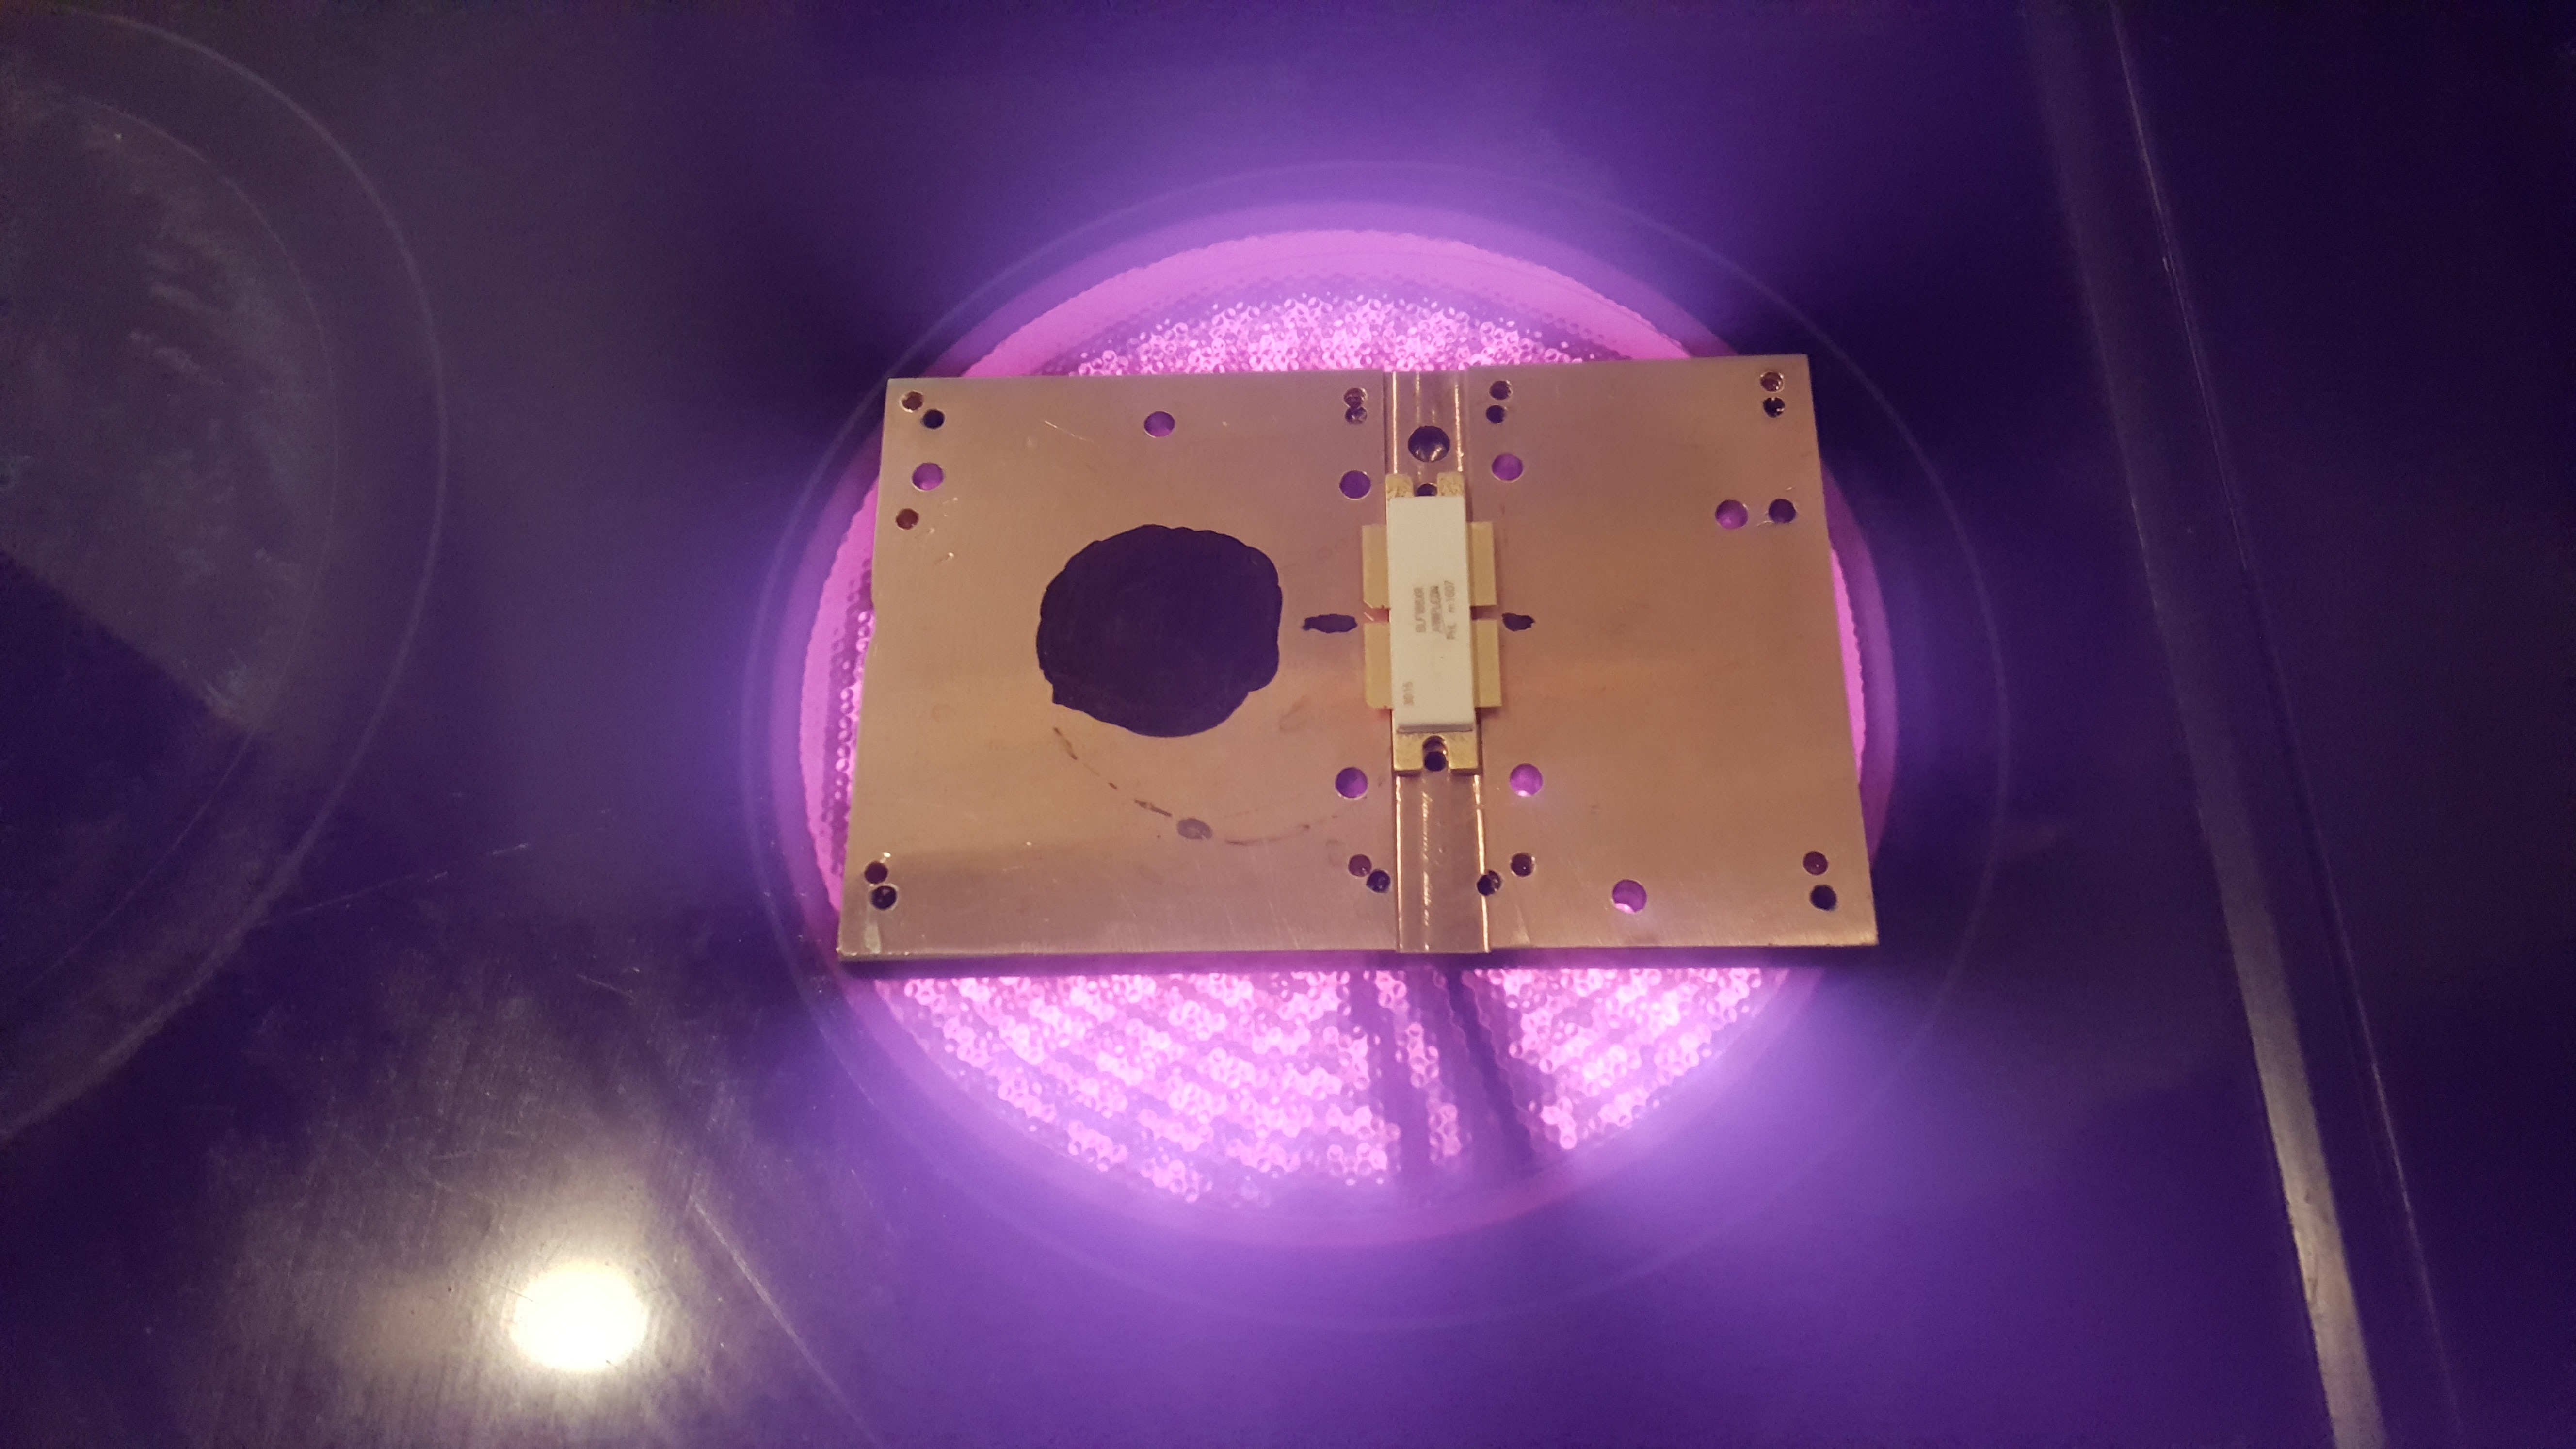
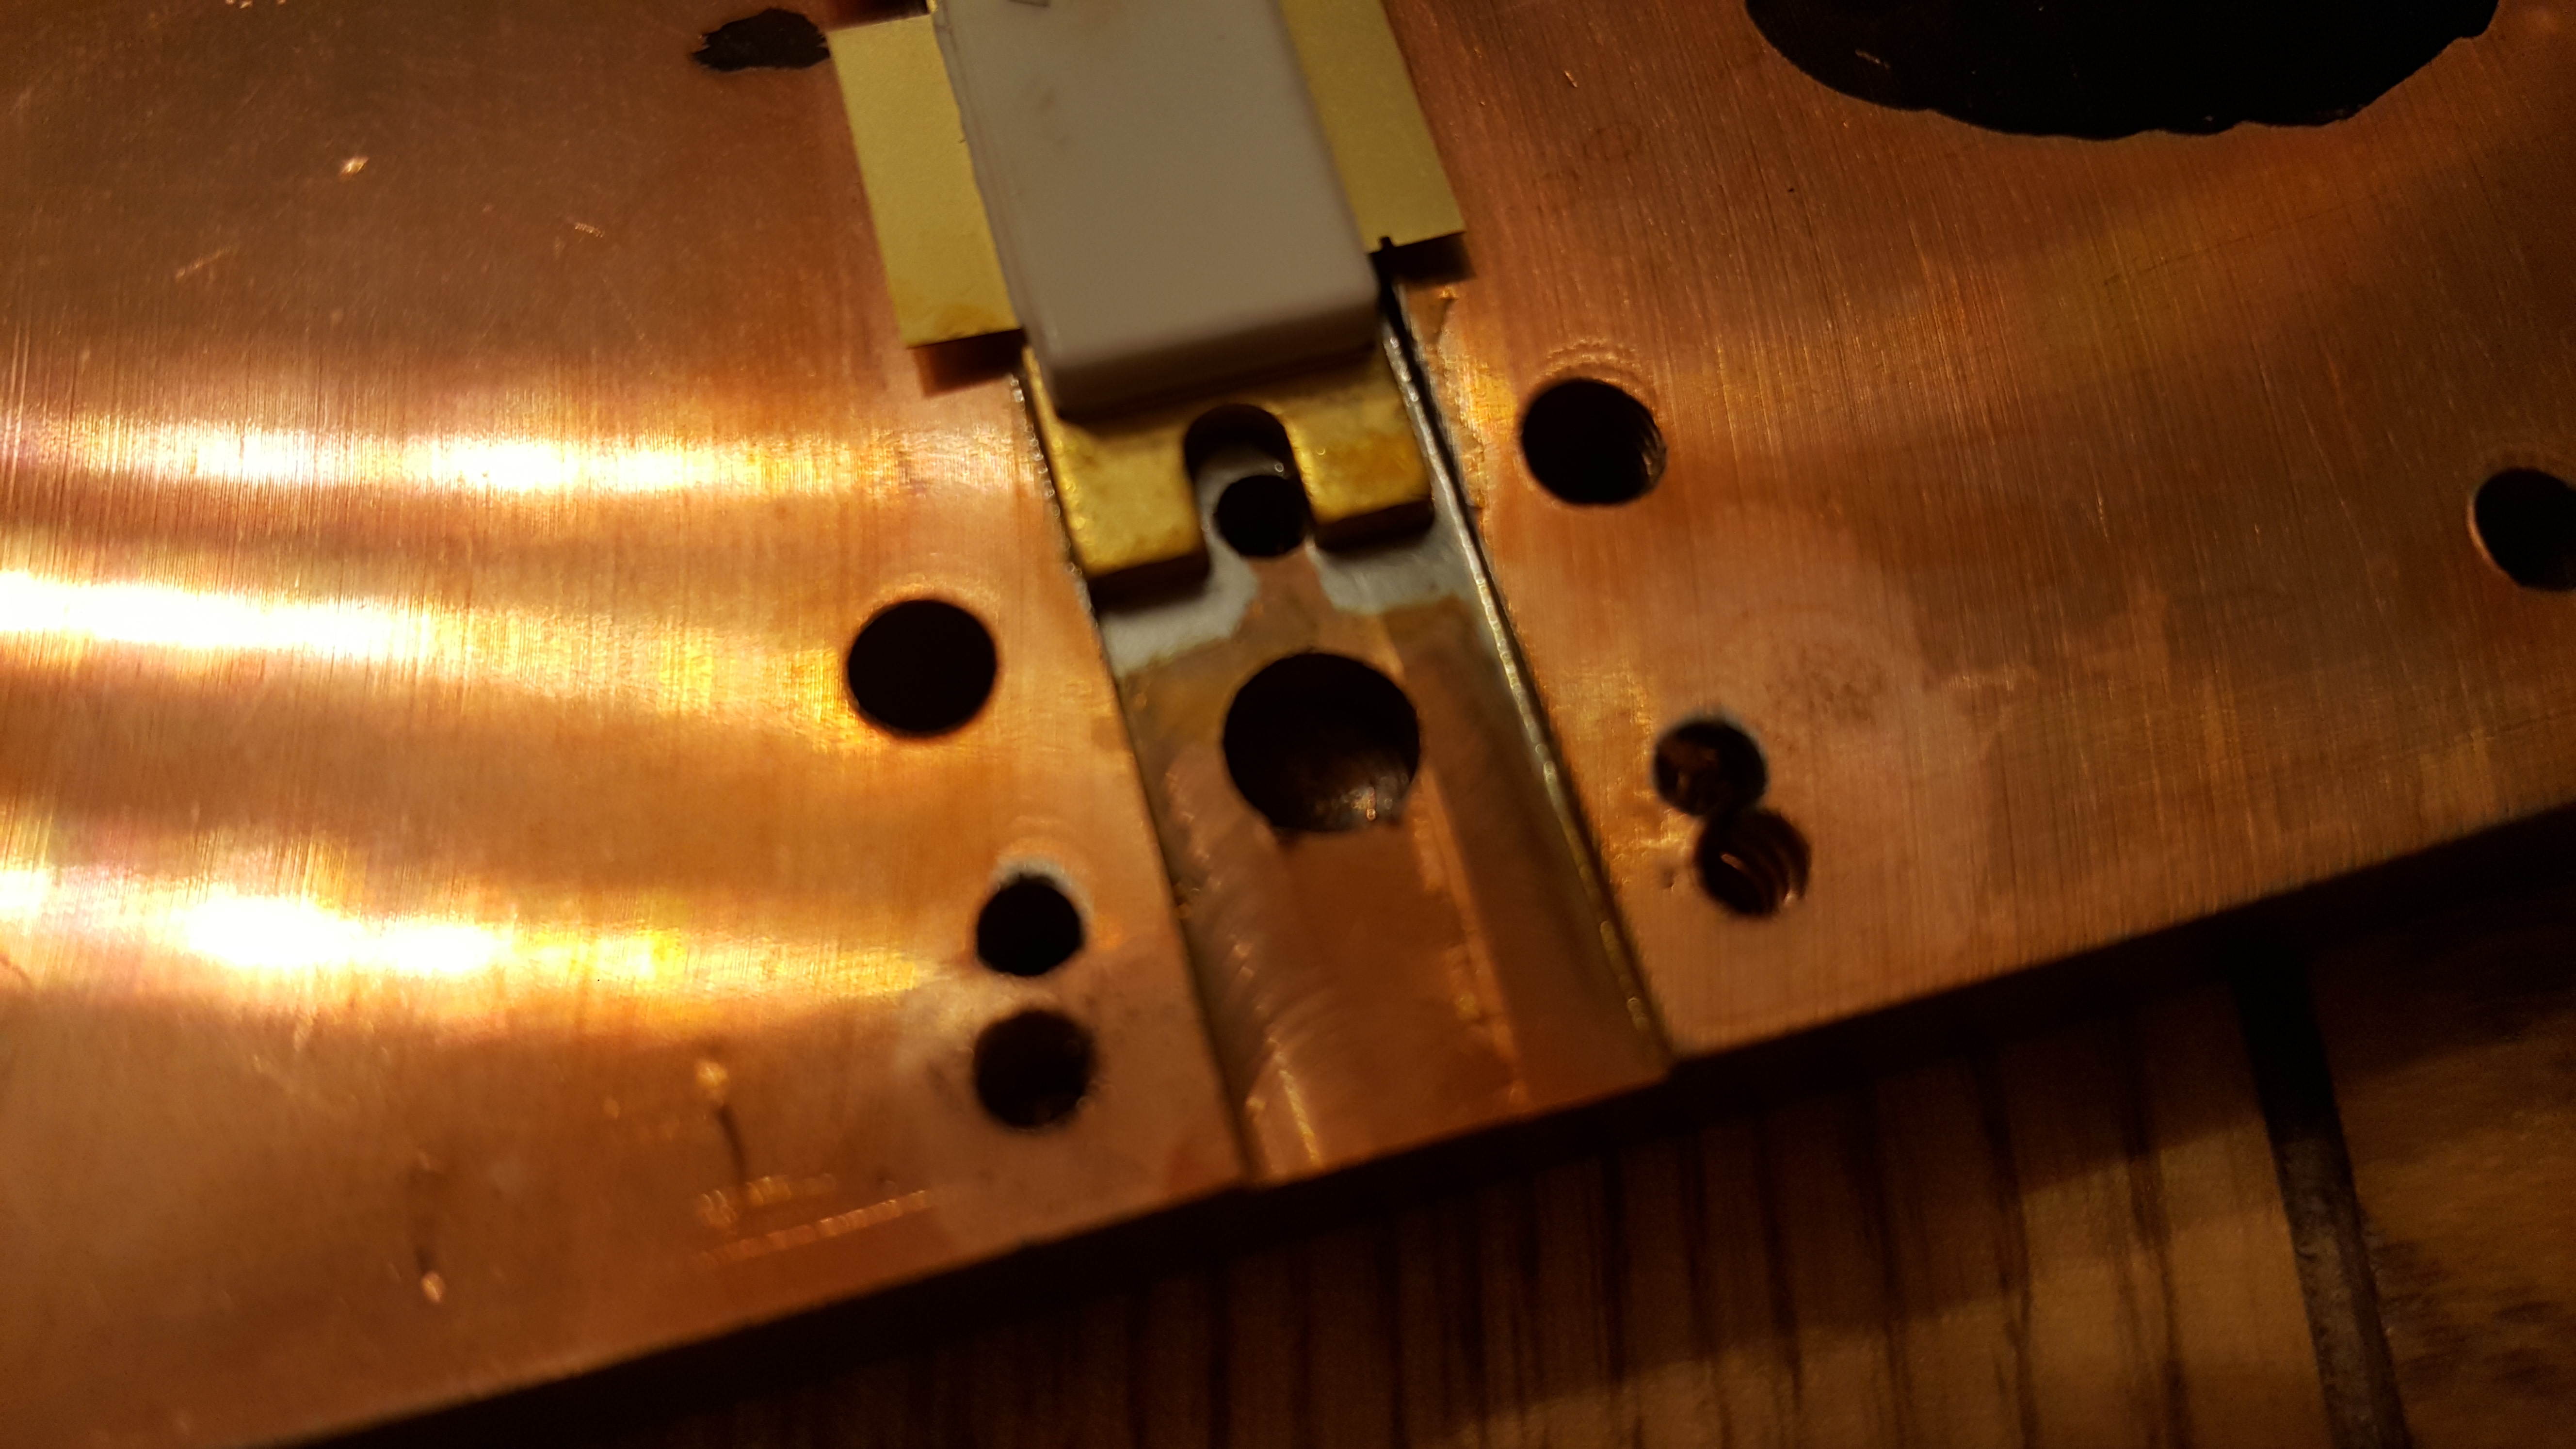
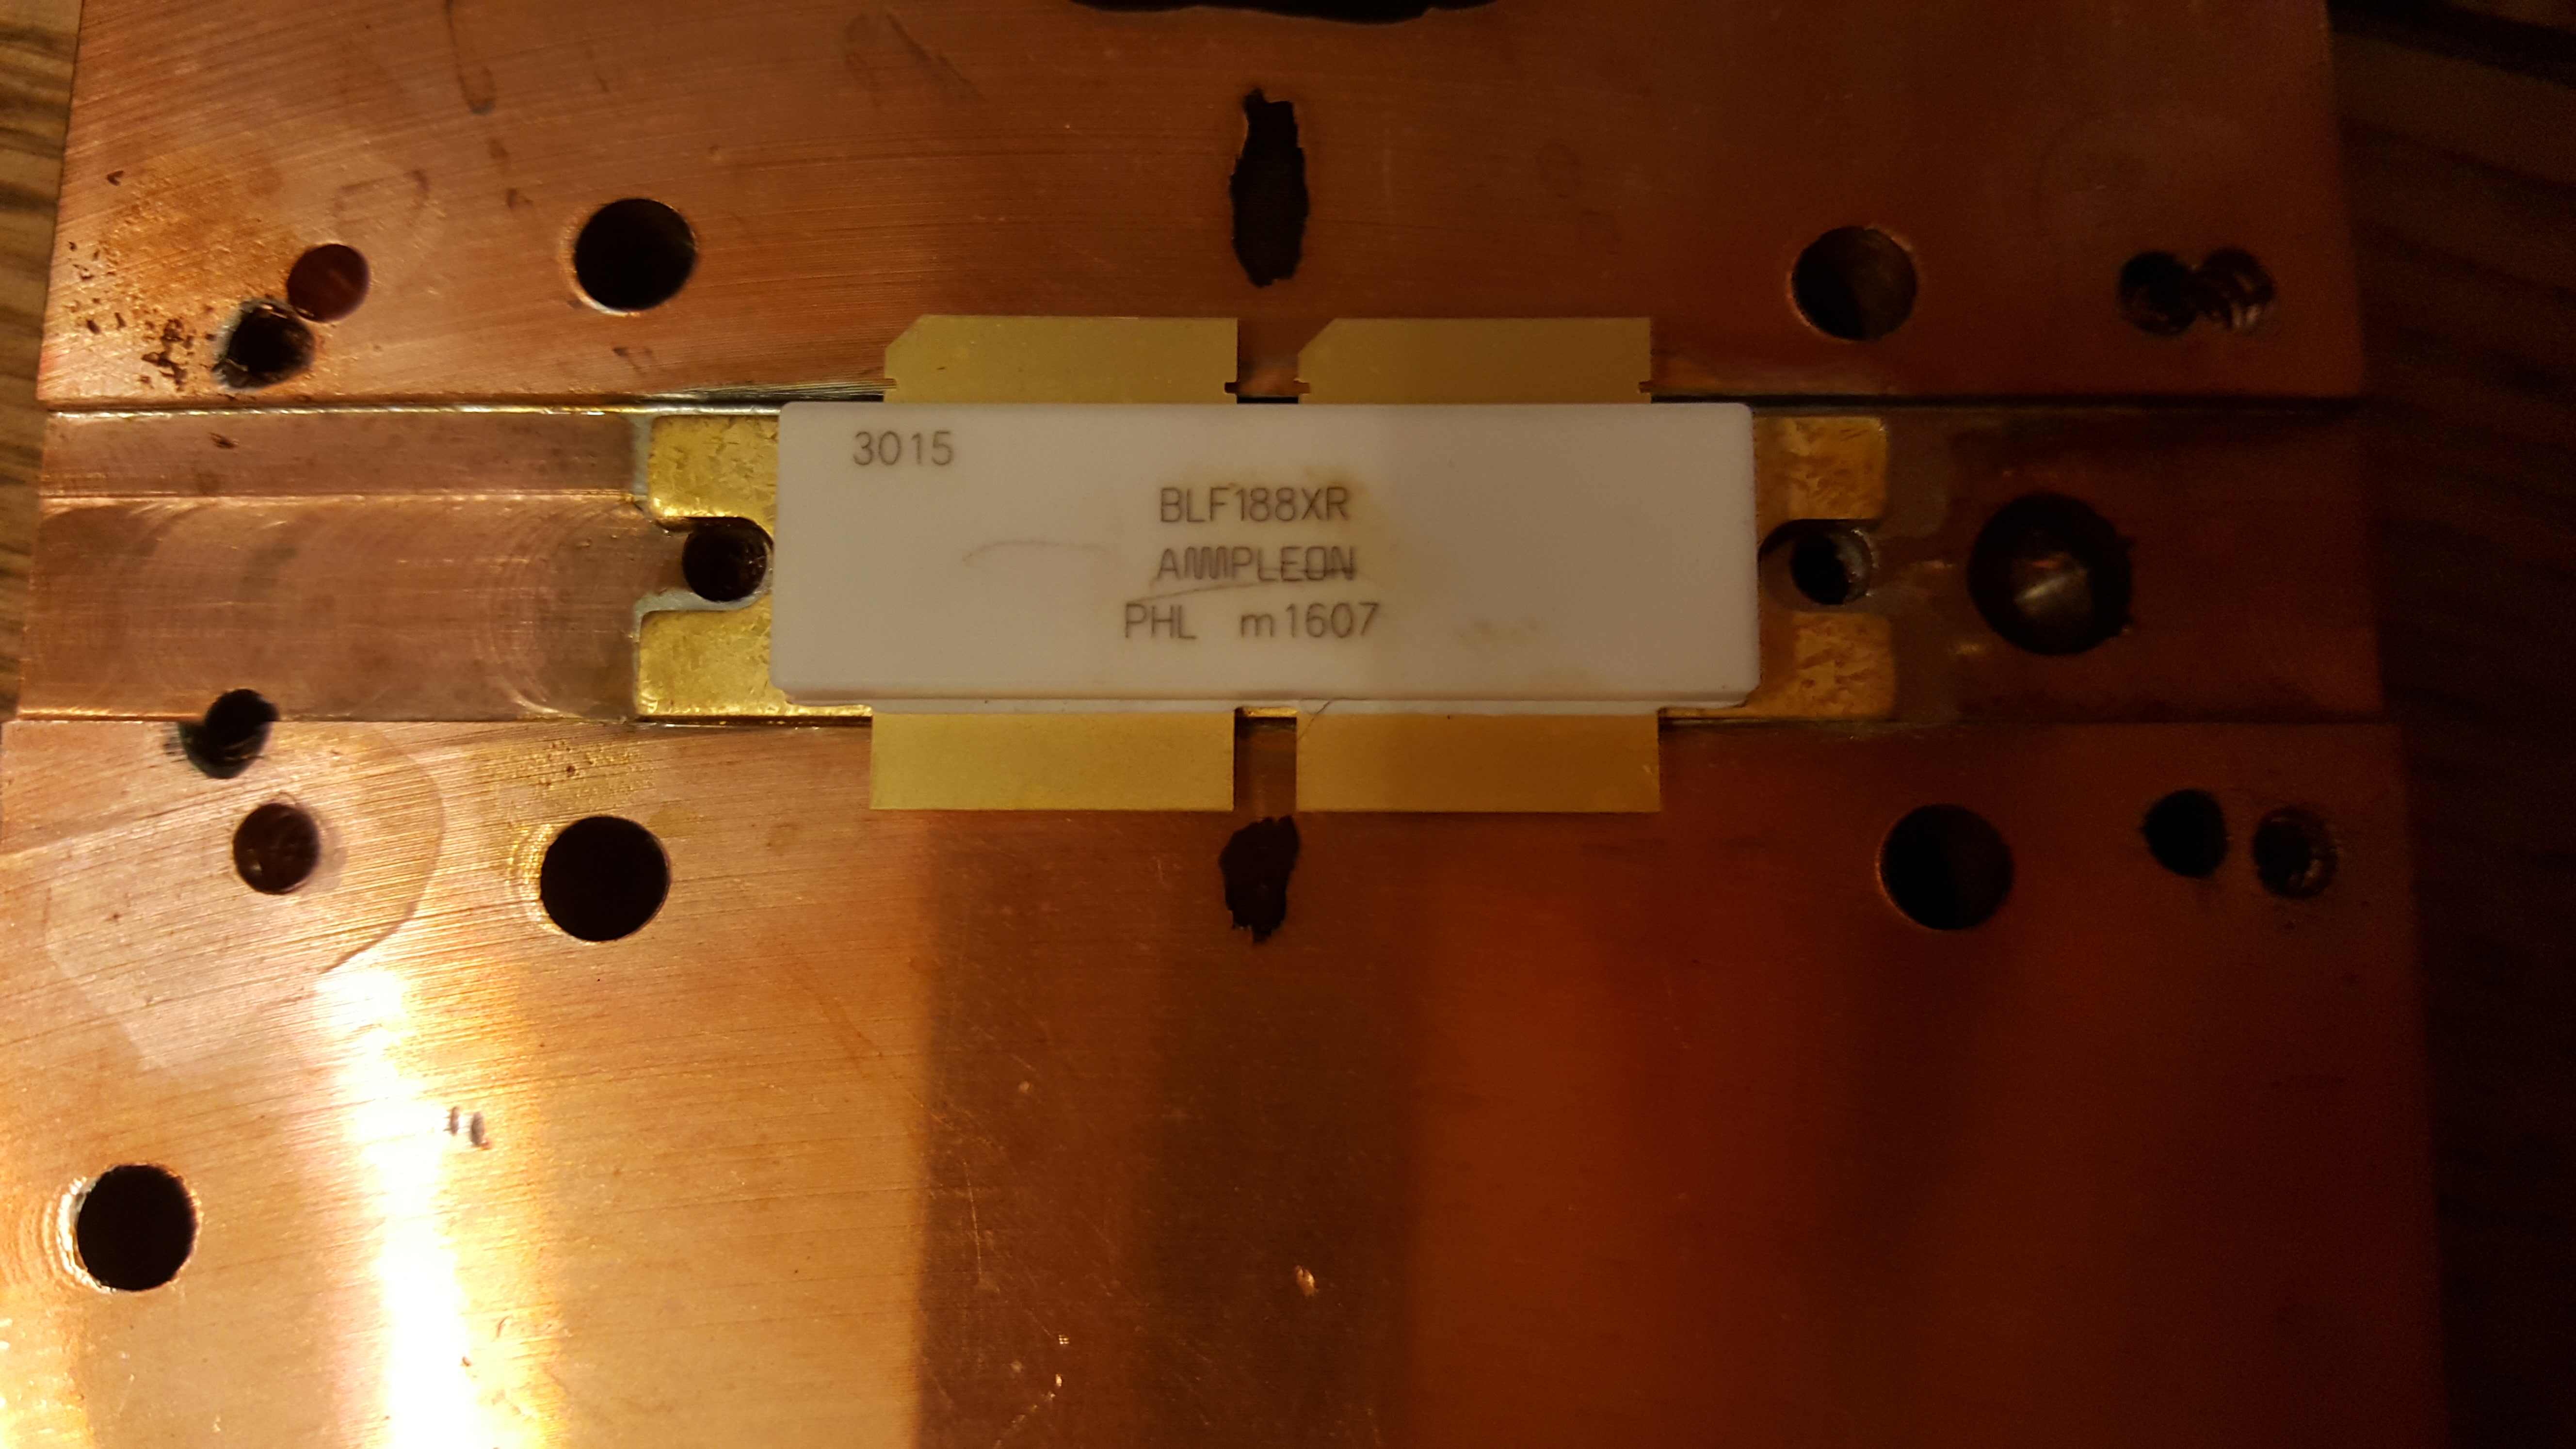
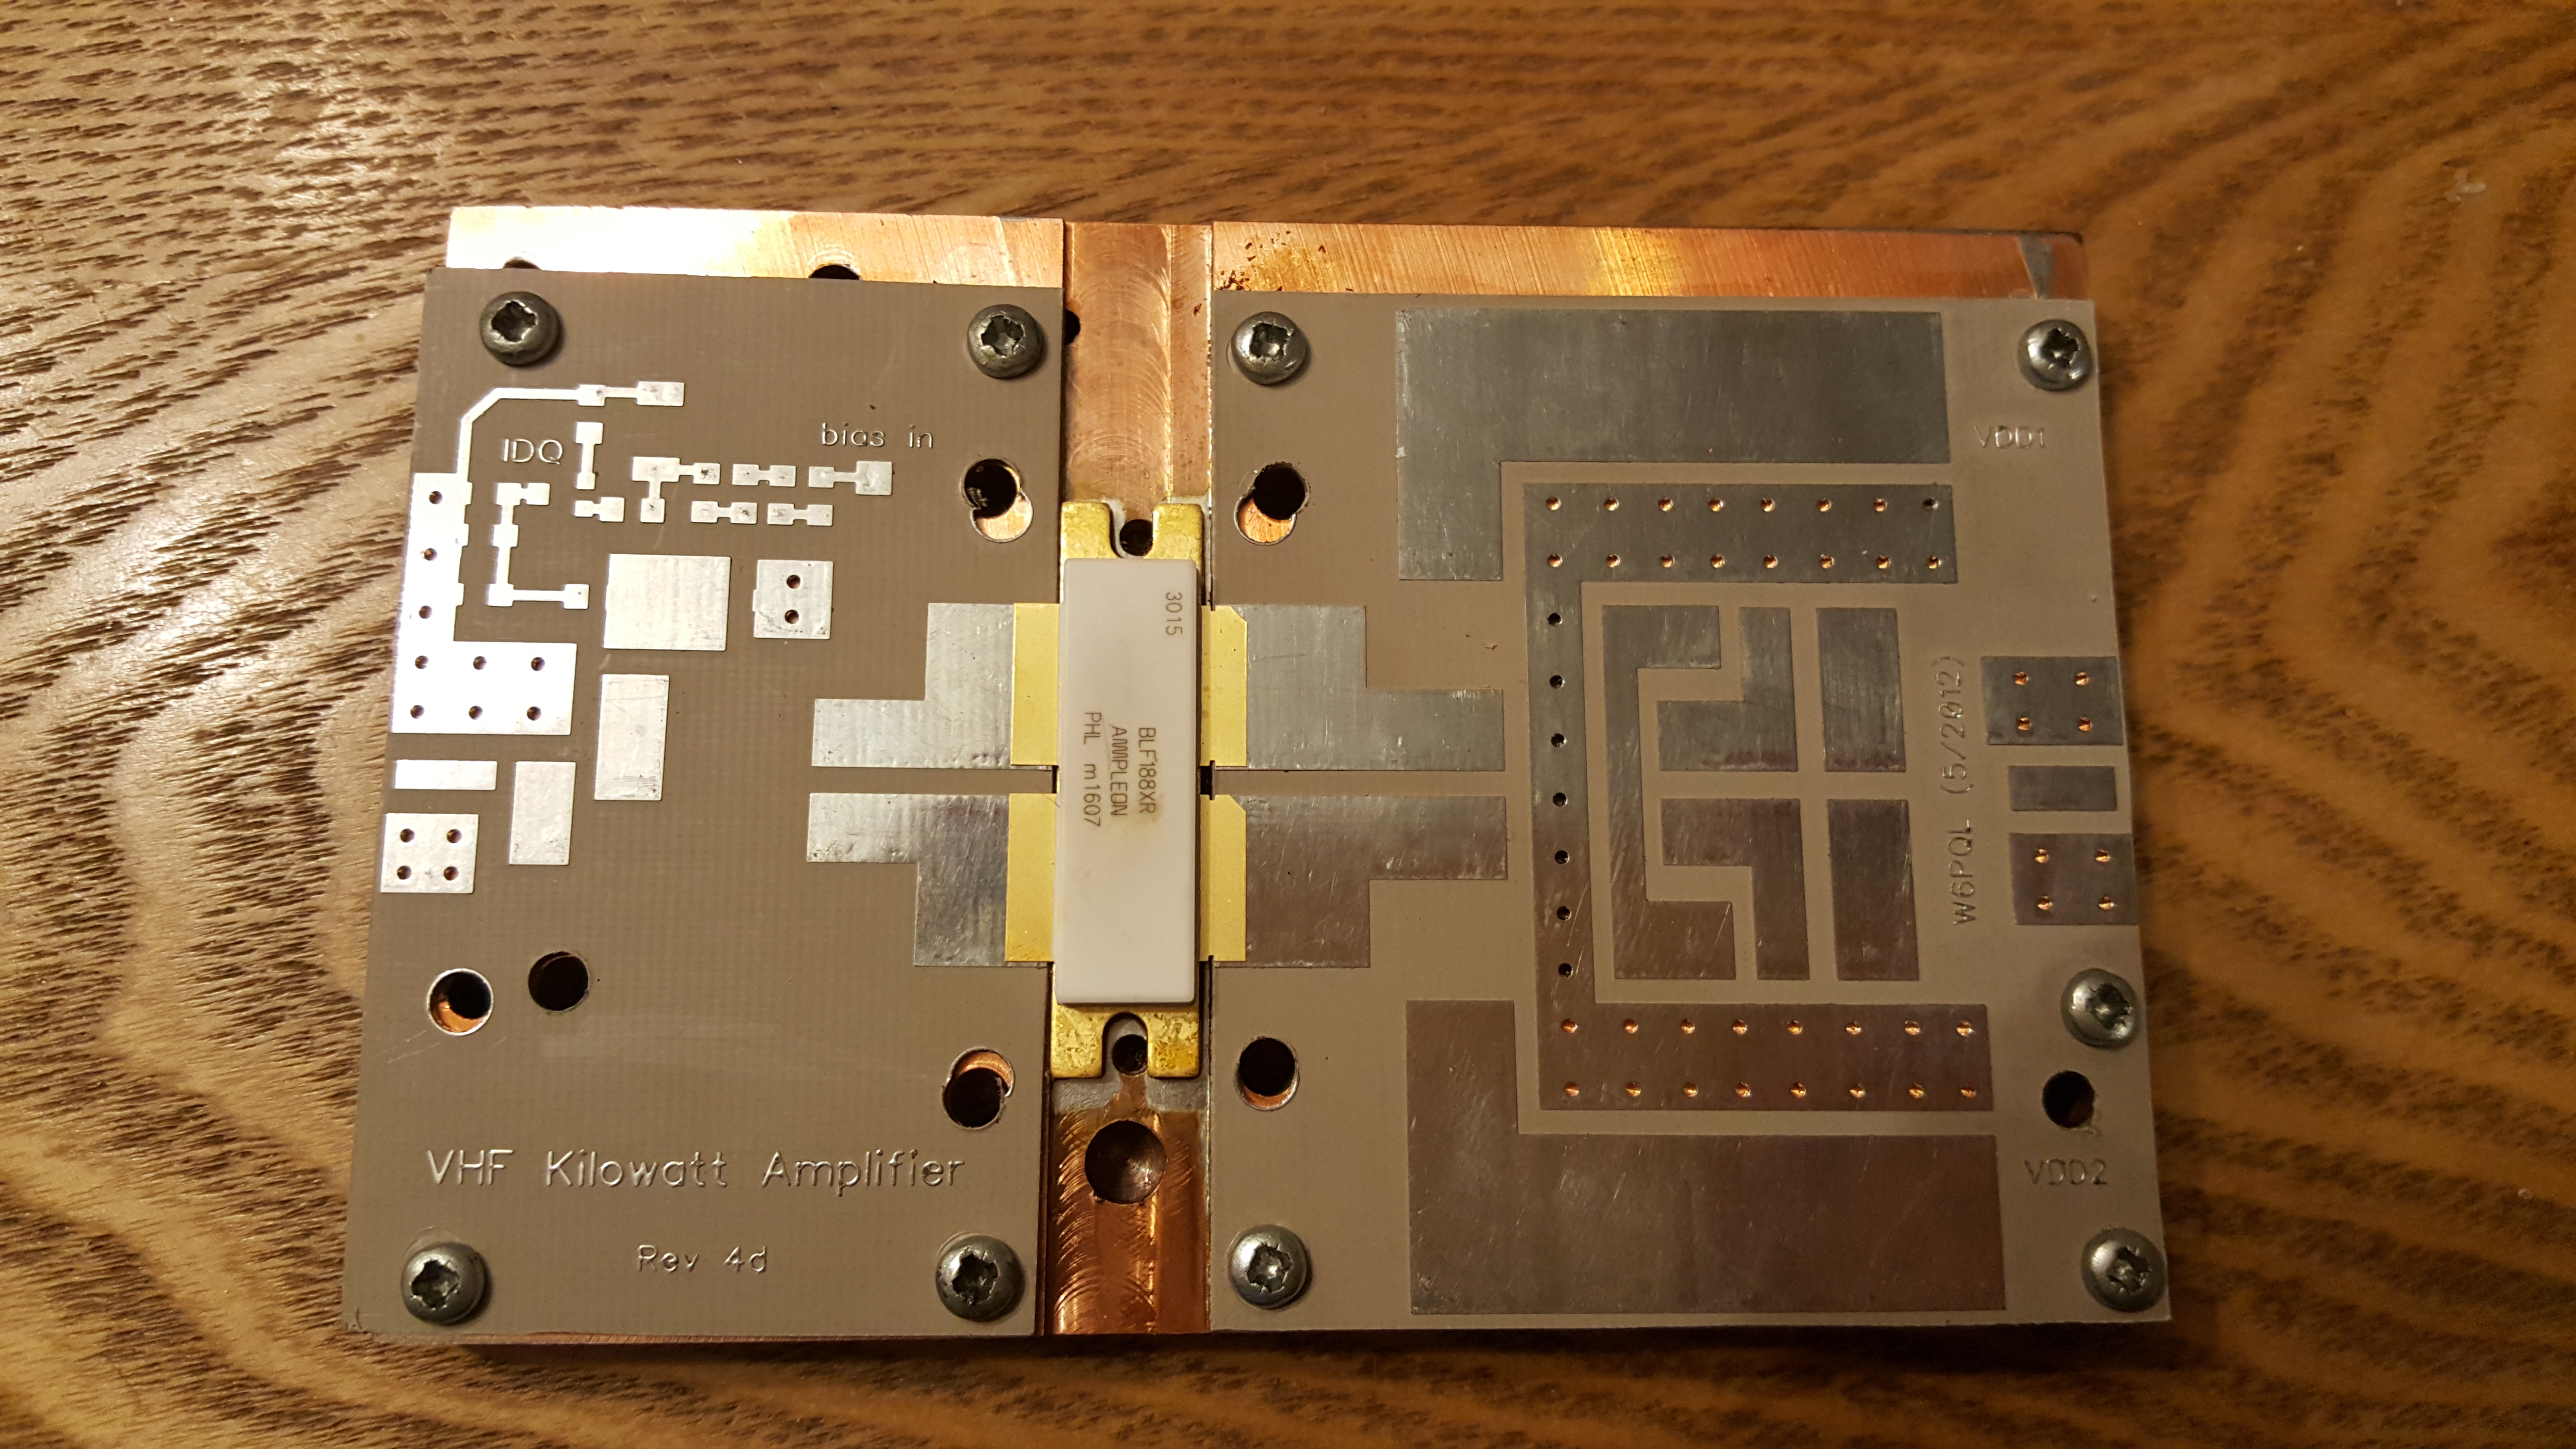
In the shack, I used my Icom IC7100 (since my Anglian transverter was having issues), a homebrew 1kW solid state amplifier, and PGA144 preamp based on the PGA-103+.

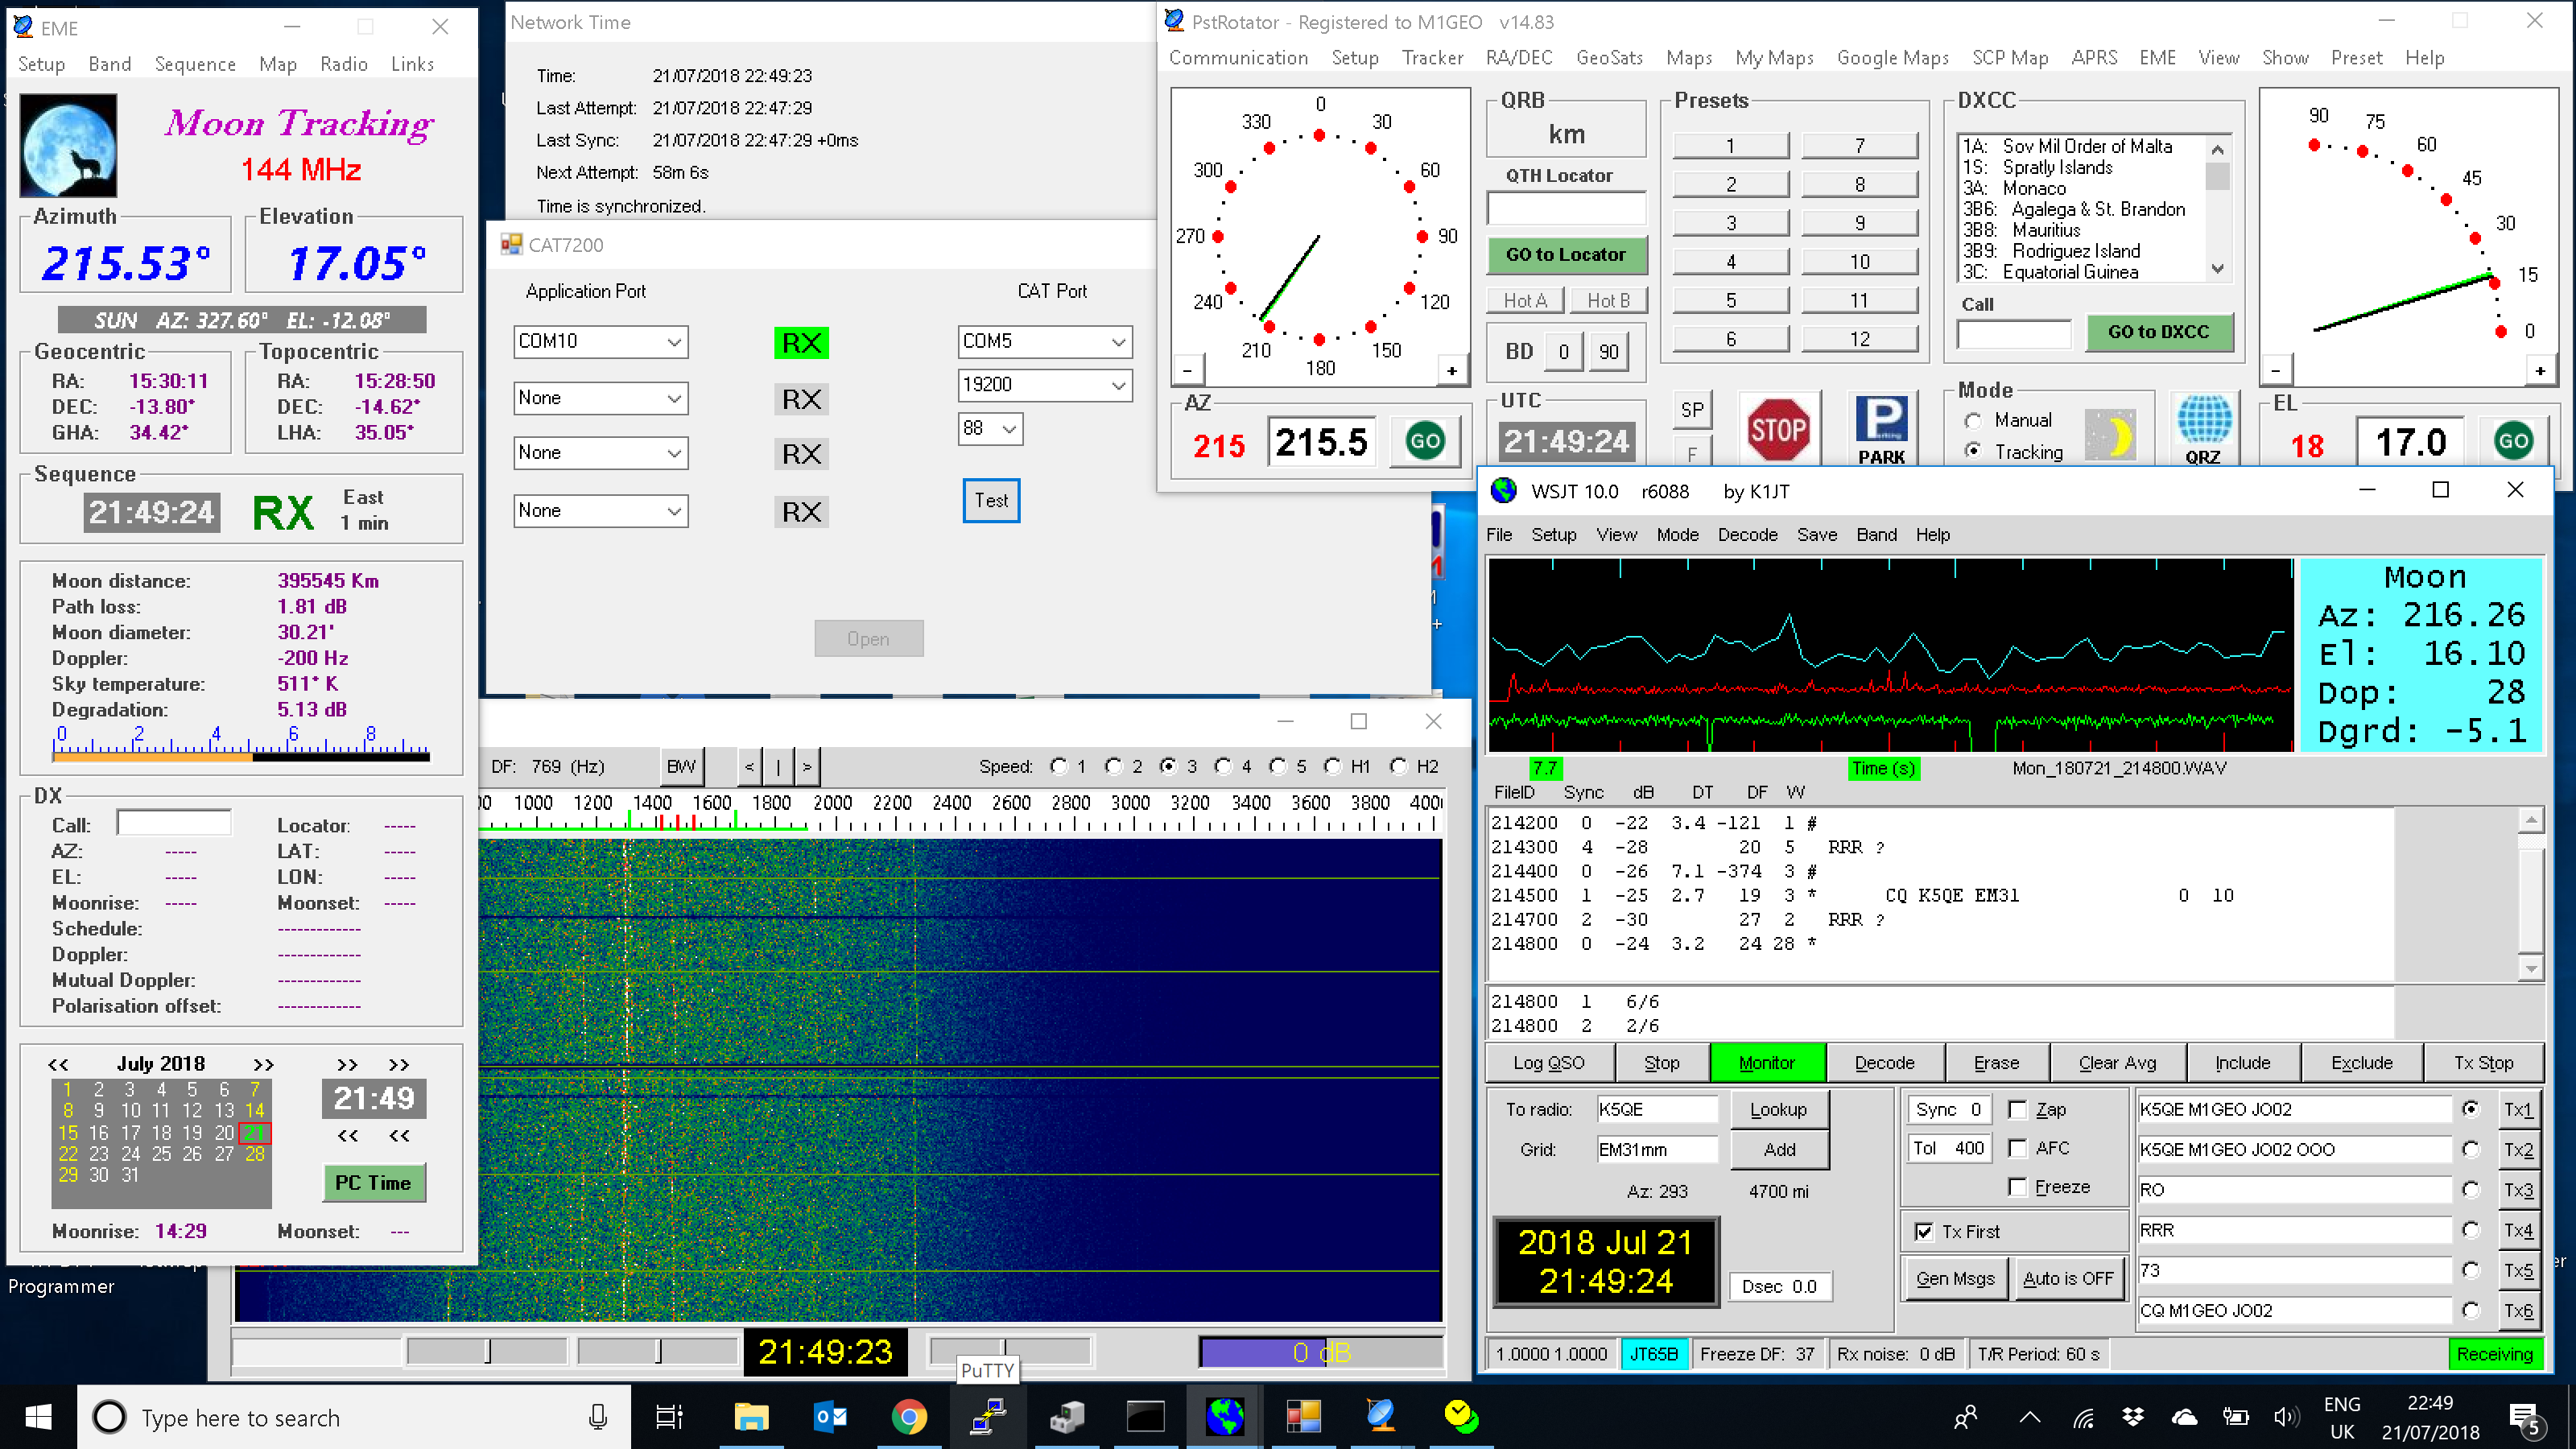
Most of the spare time during the weekend was taken up by relearning everything I had forgotten since I last tried EME and VHF data modes. I was able to confirm the setup was working correctly using GB3NGI beacon as well as some others on the make-more-miles on VHF site. Within around an hour I was successfully receiving SP4KM, ZS4TX and K5QE via the moon on 144 MHz.

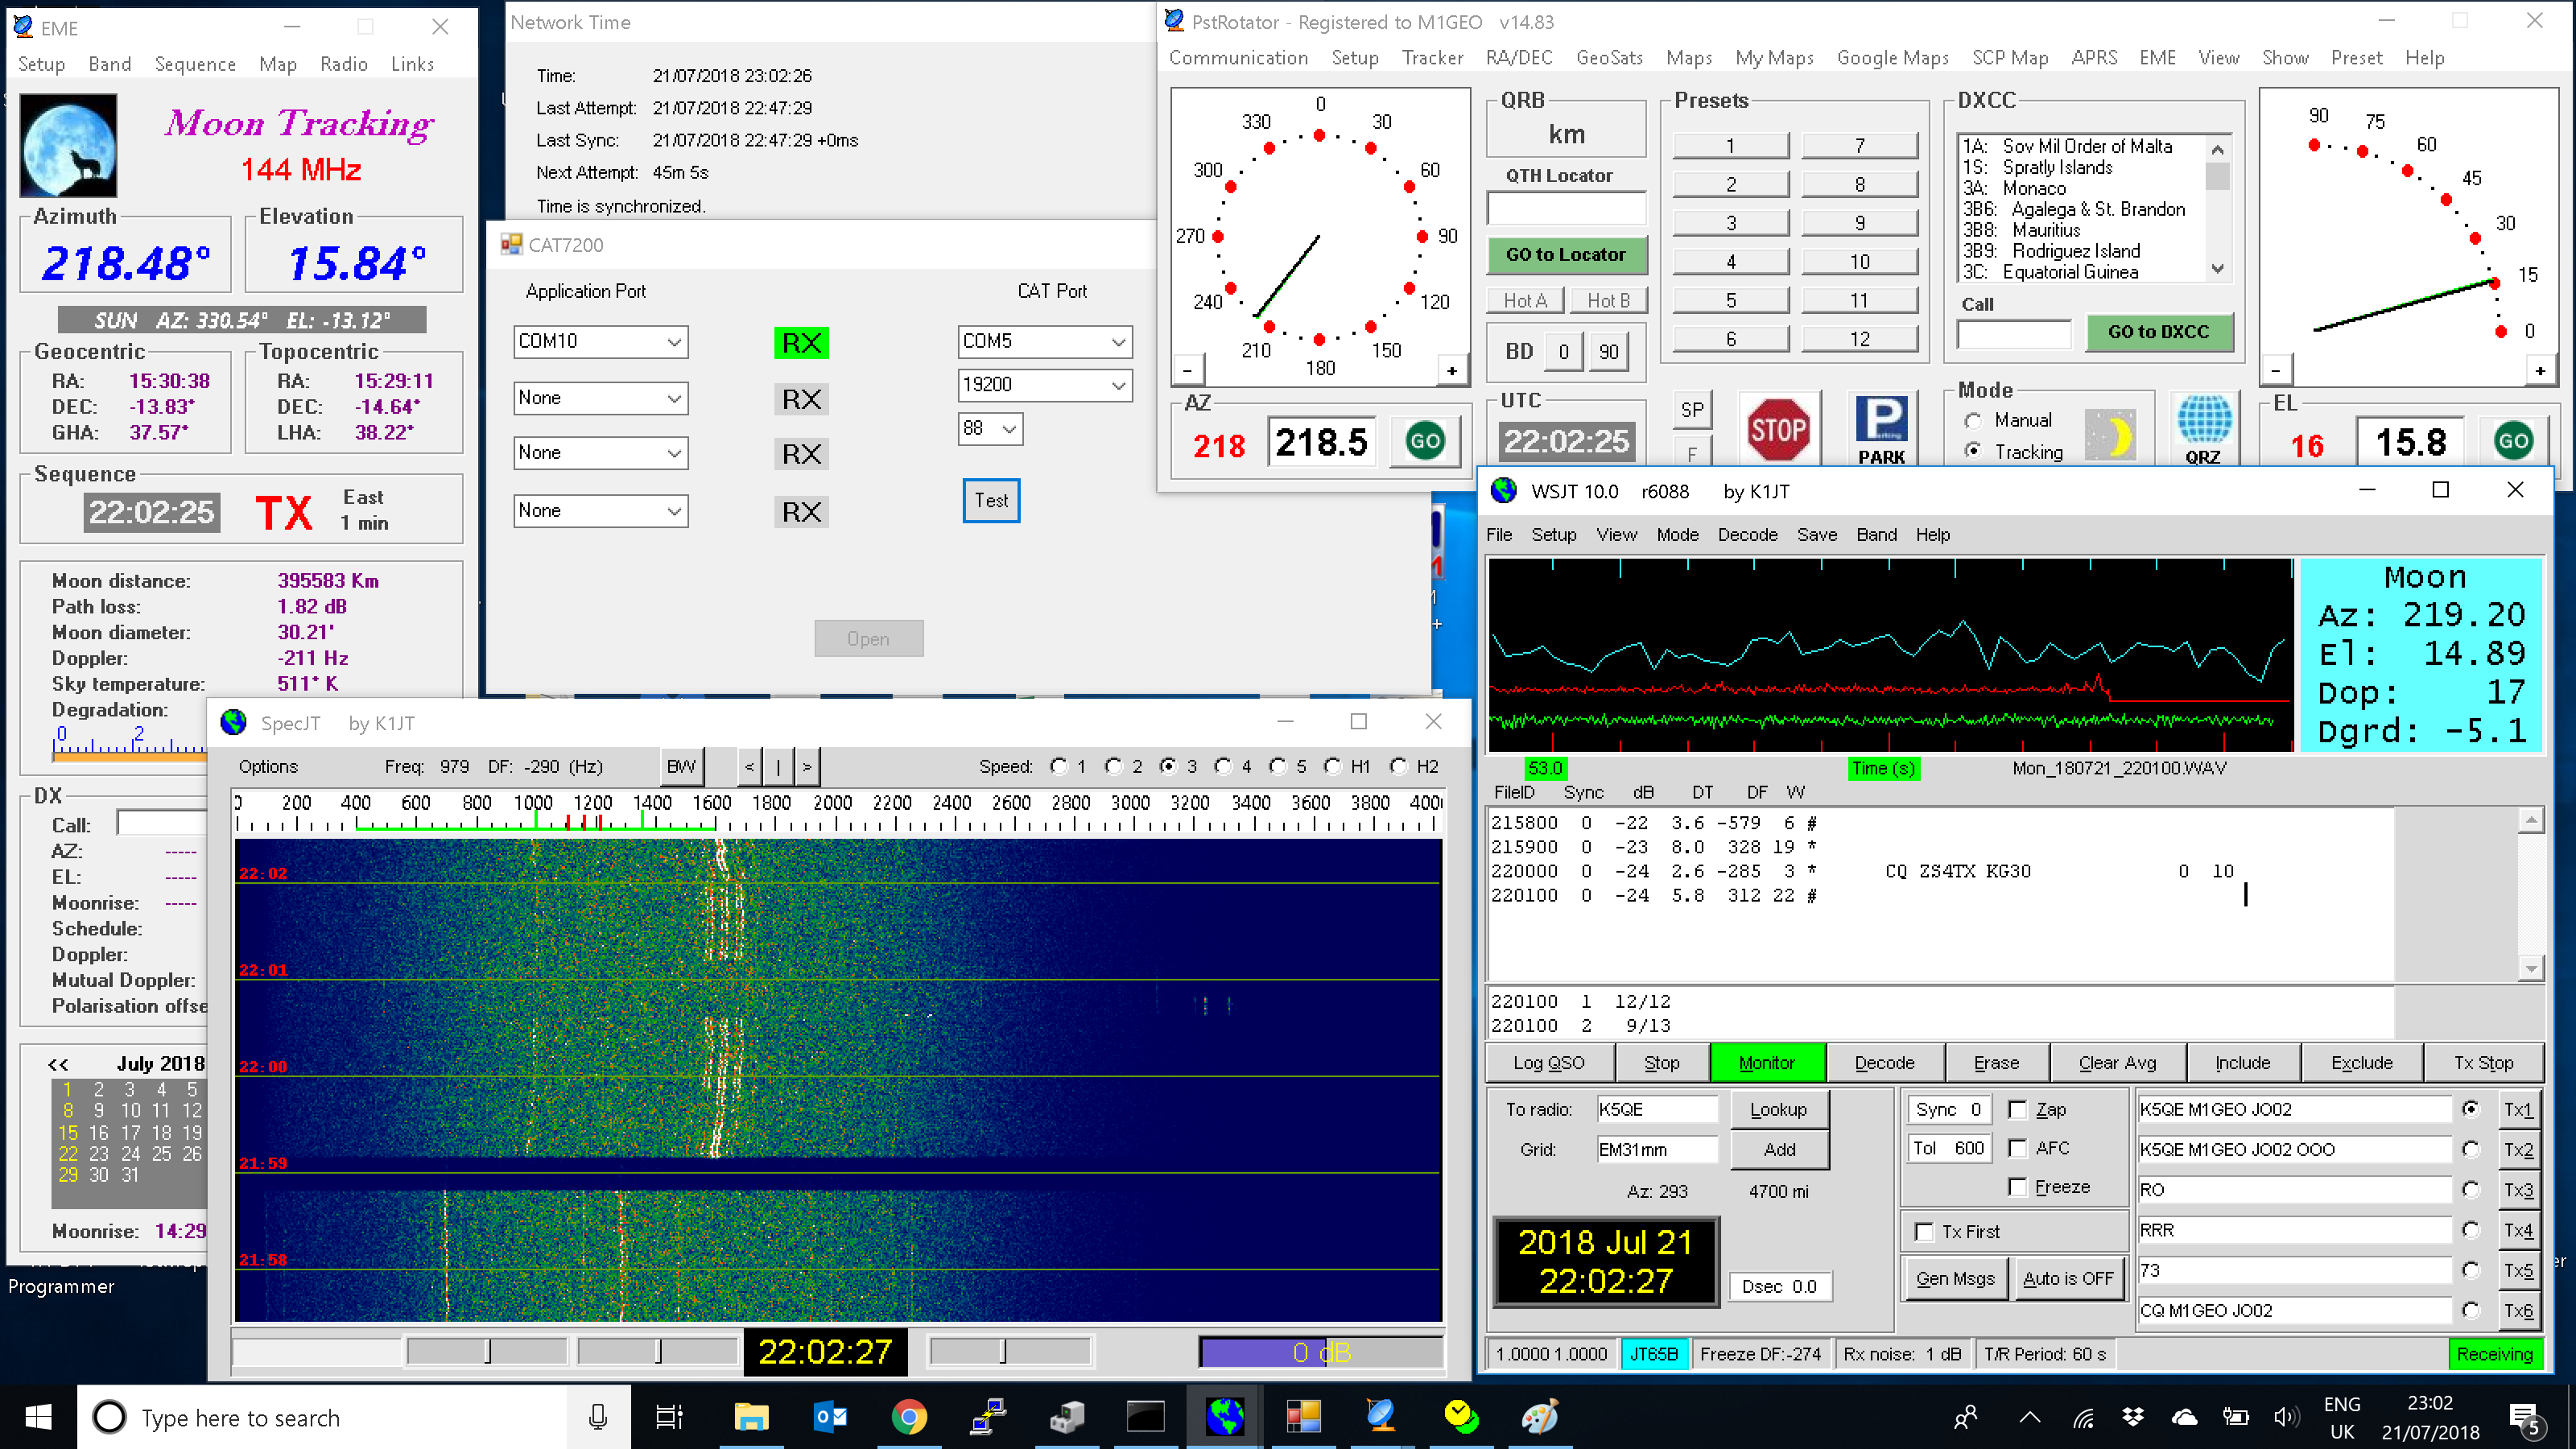
The screens above are rather busy with the rotator controller, NetworkTime program for keeping the PC clock synchronised via NTP, and CAT7200 which usefully translates the DTS/RTS line style PTT interface to a newer CAT/CI-V instruction.

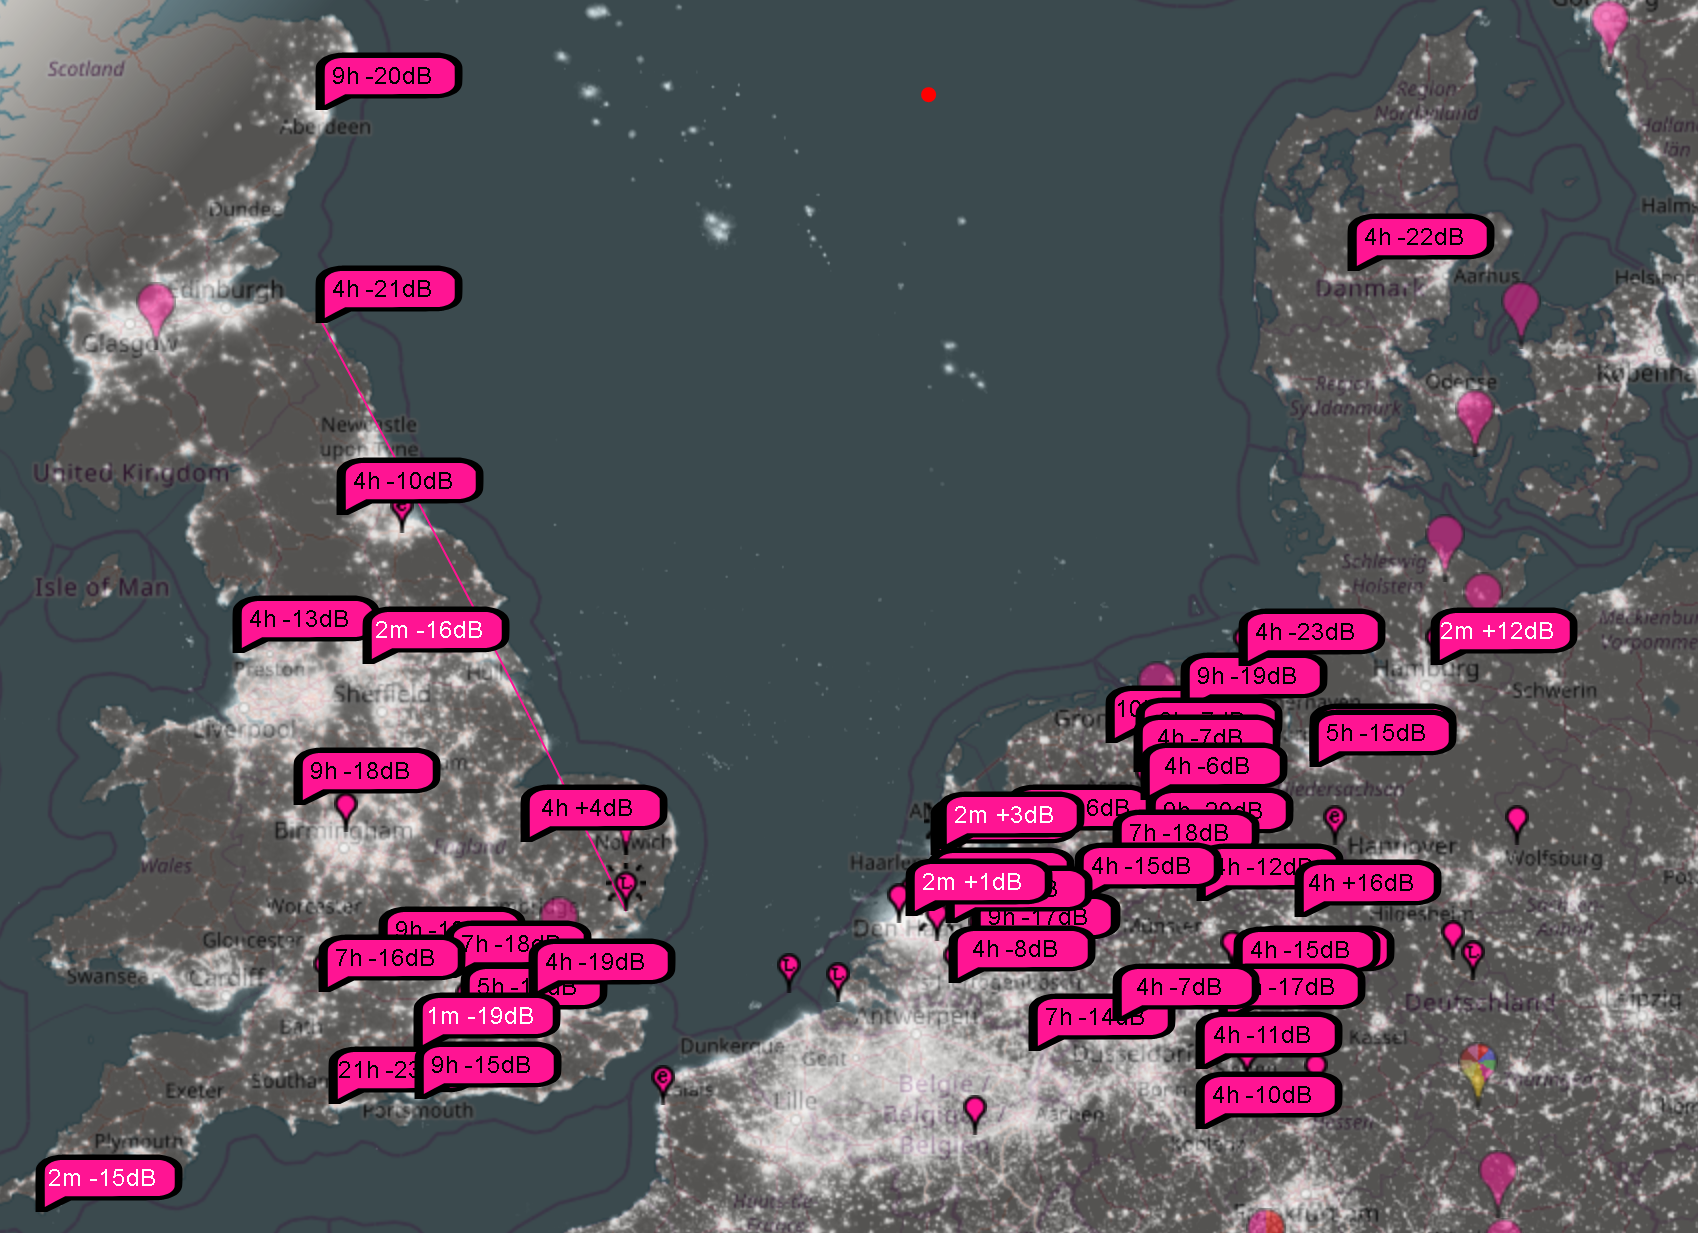
As mentioned, when the moon was below the horizon, I also played around with other modes. SSB resulted in few contacts, but more than the ‘none’ I managed on CW. I quickly found my feet again on FT8, working into Germany, Denmark and the Netherlands. At the end of the weekend, PskReporter was showing the below map for M1GEO on VHF:

I have promised myself two things:

  1. To get on VHF more often. Well, do do more radio, basically!
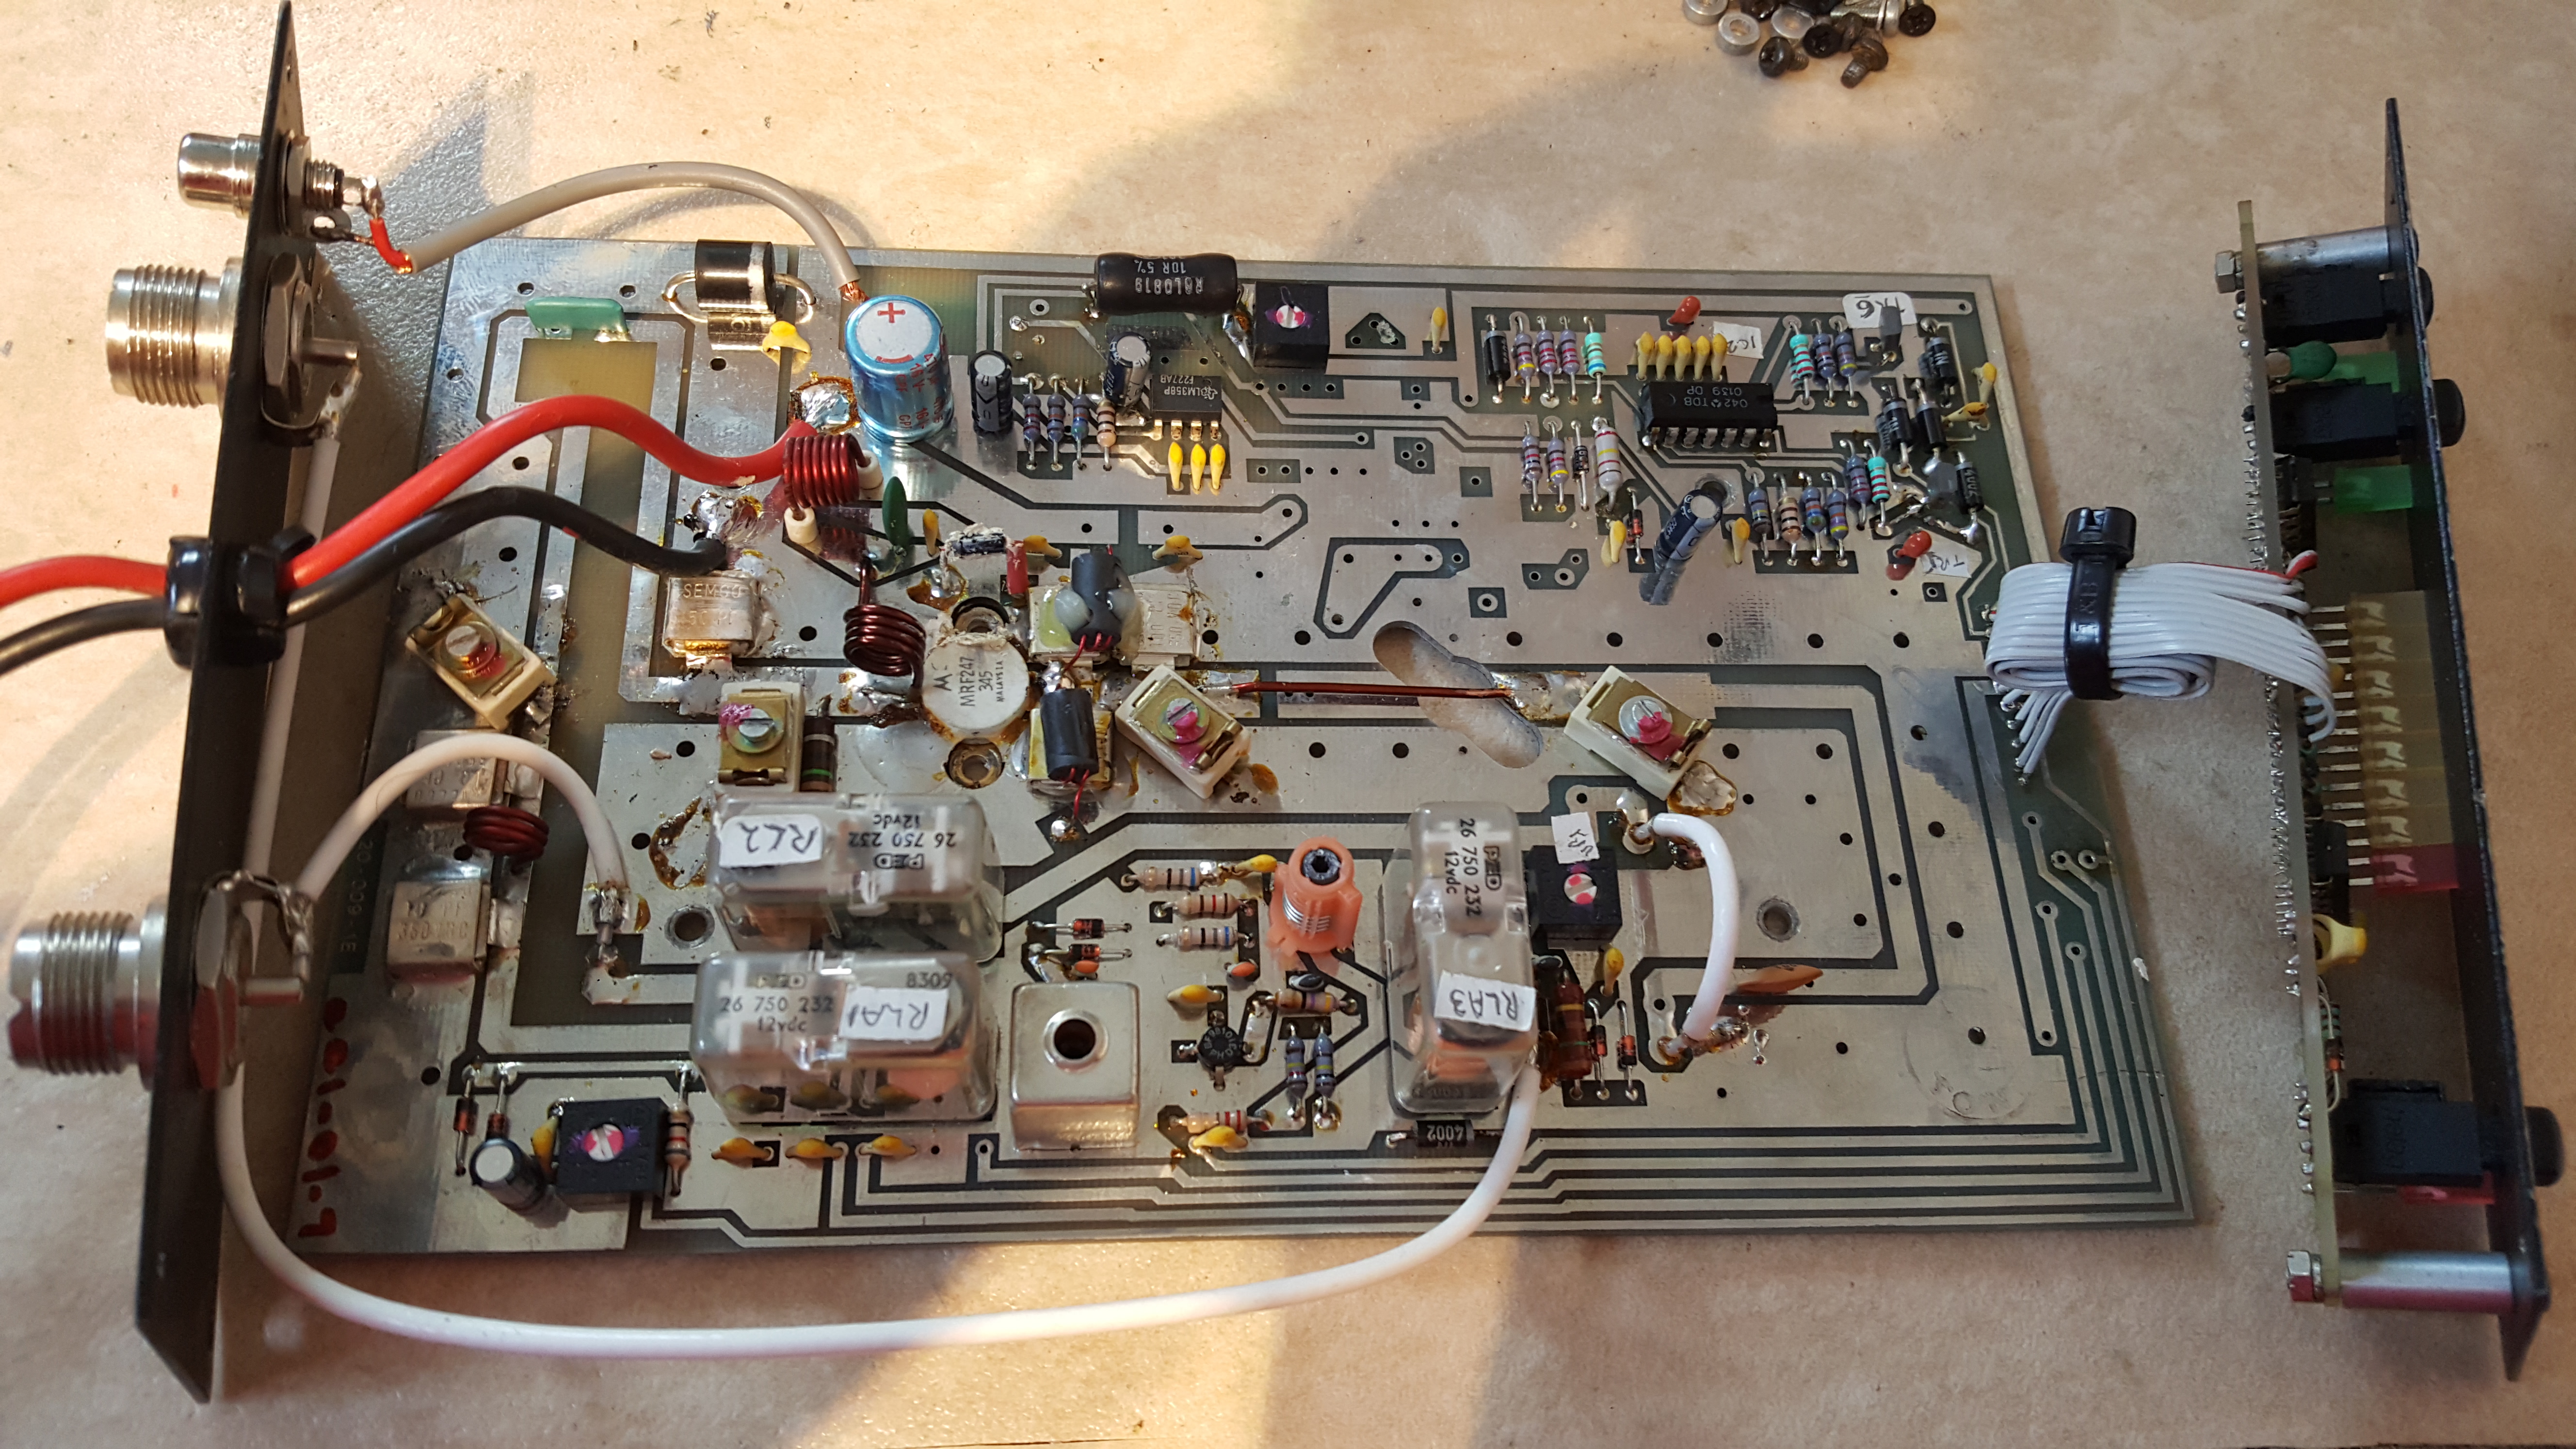
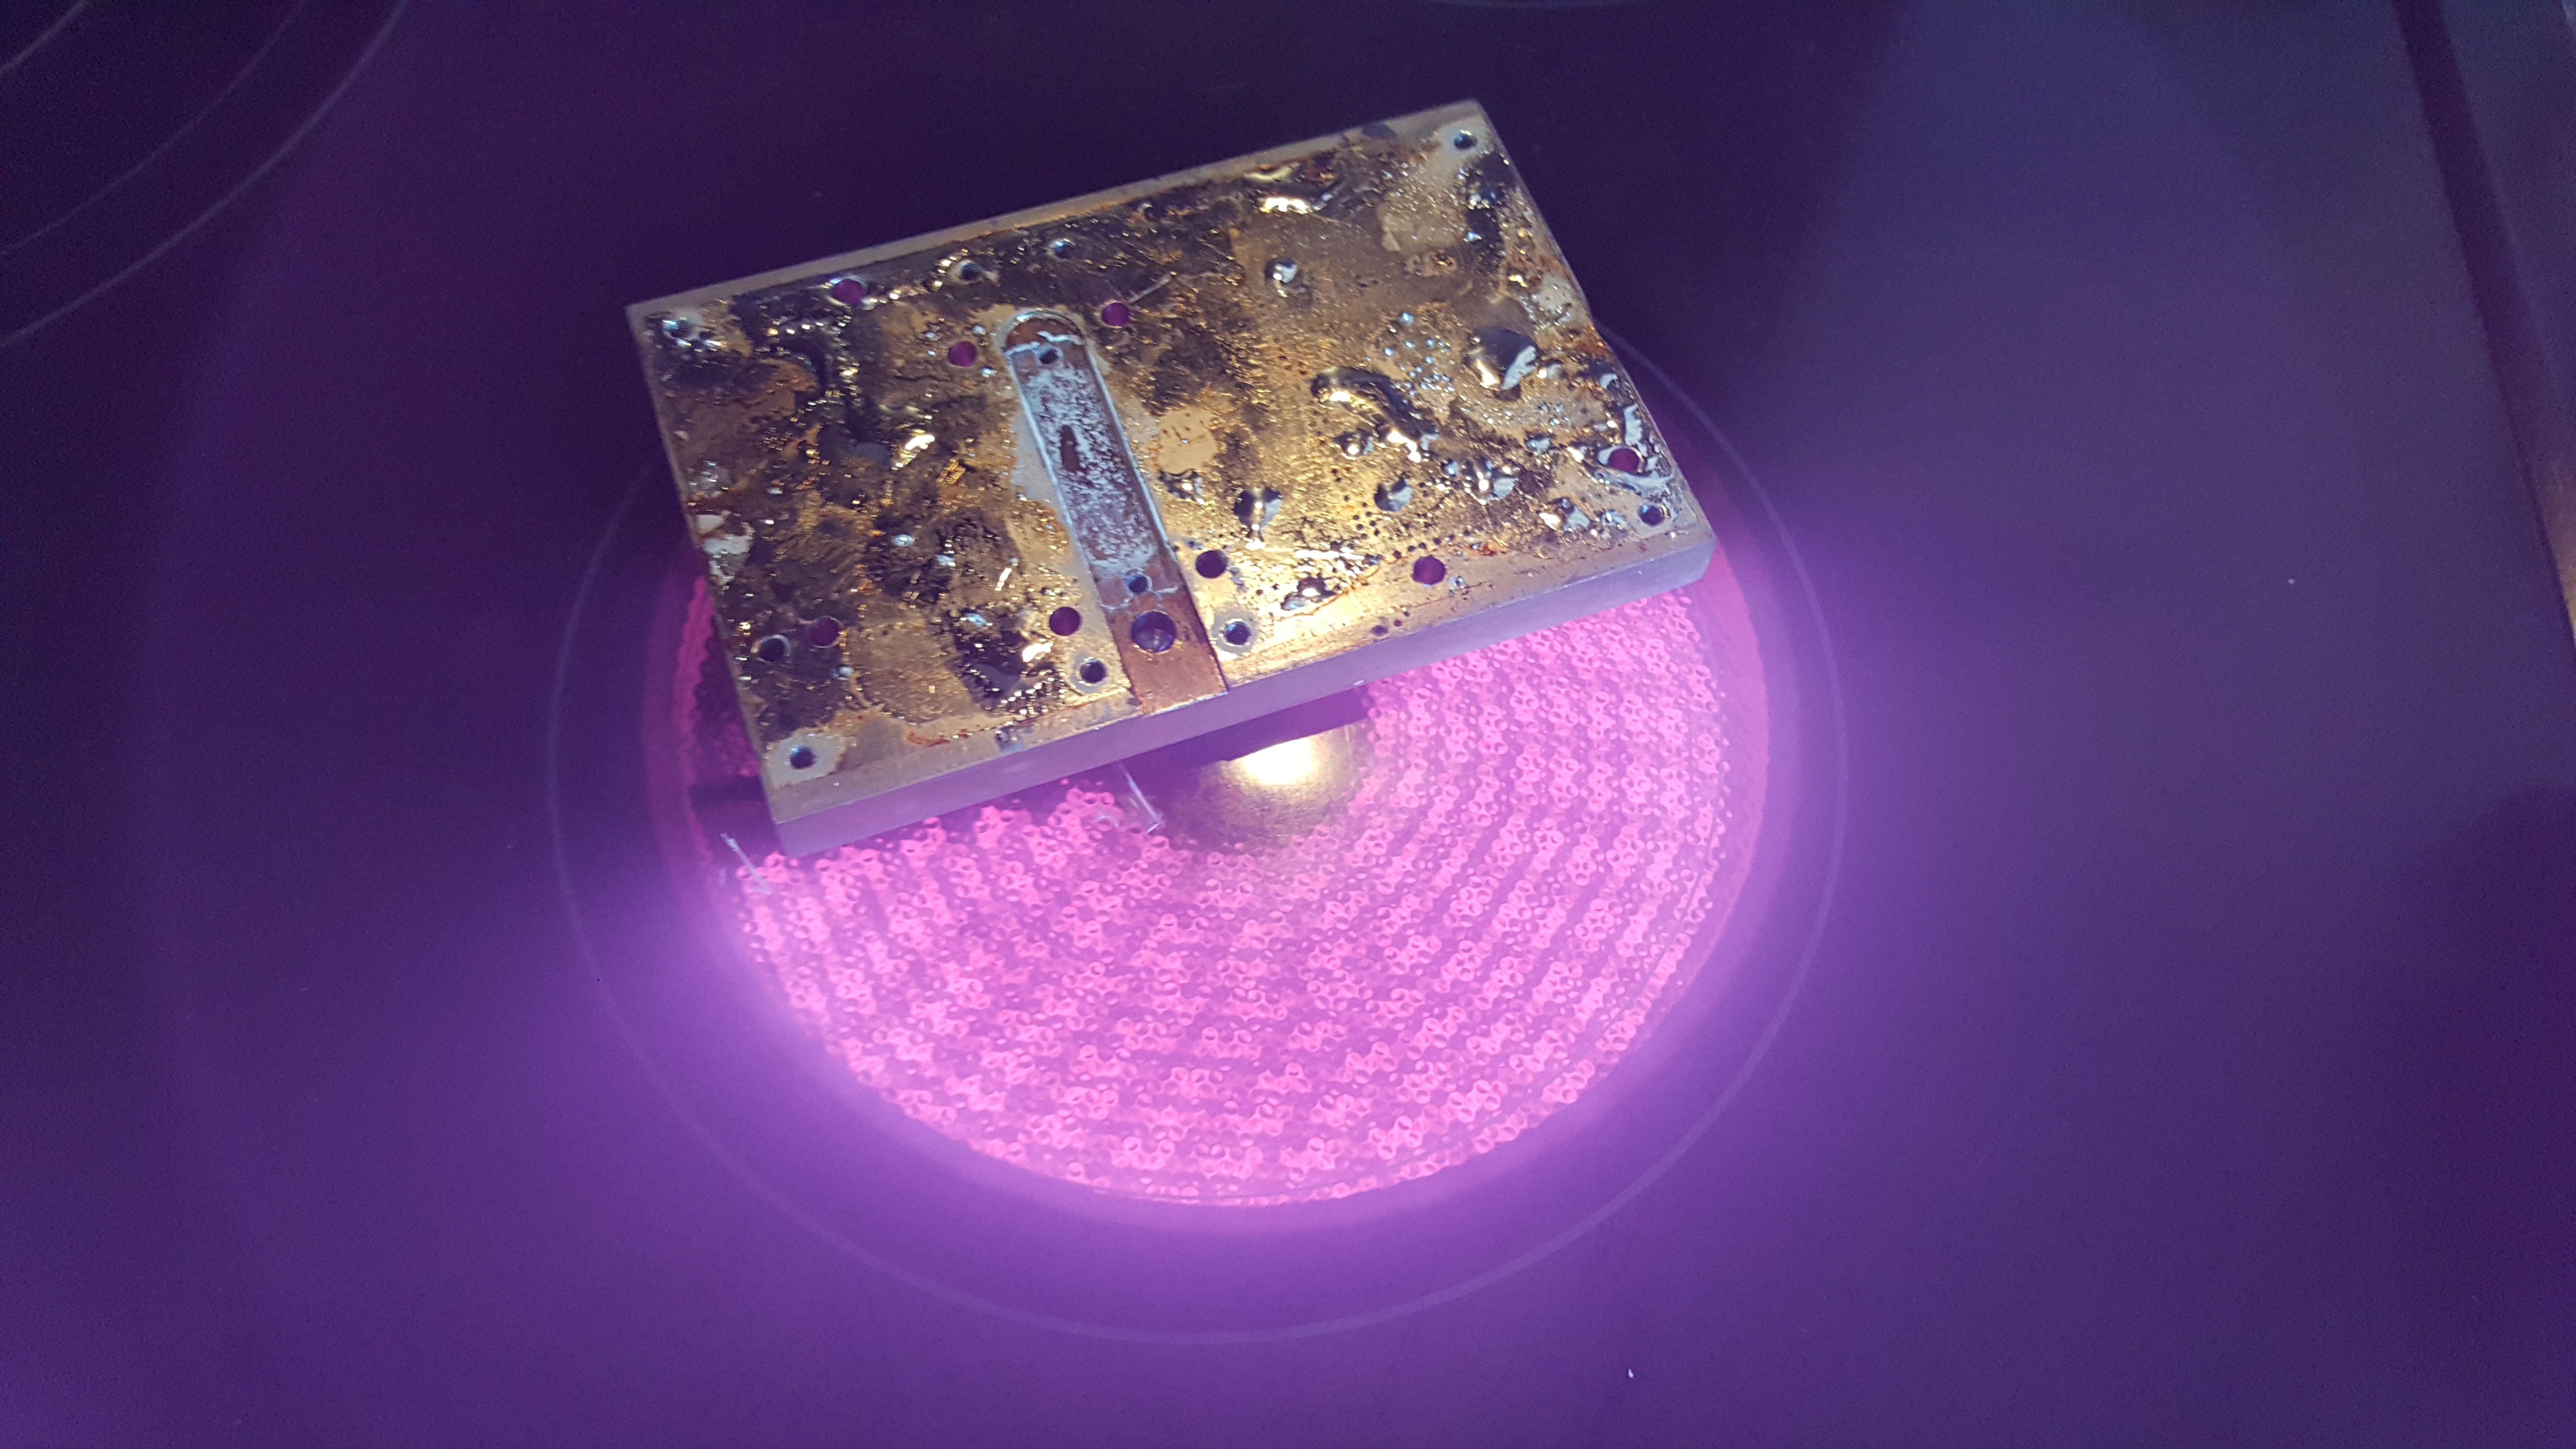
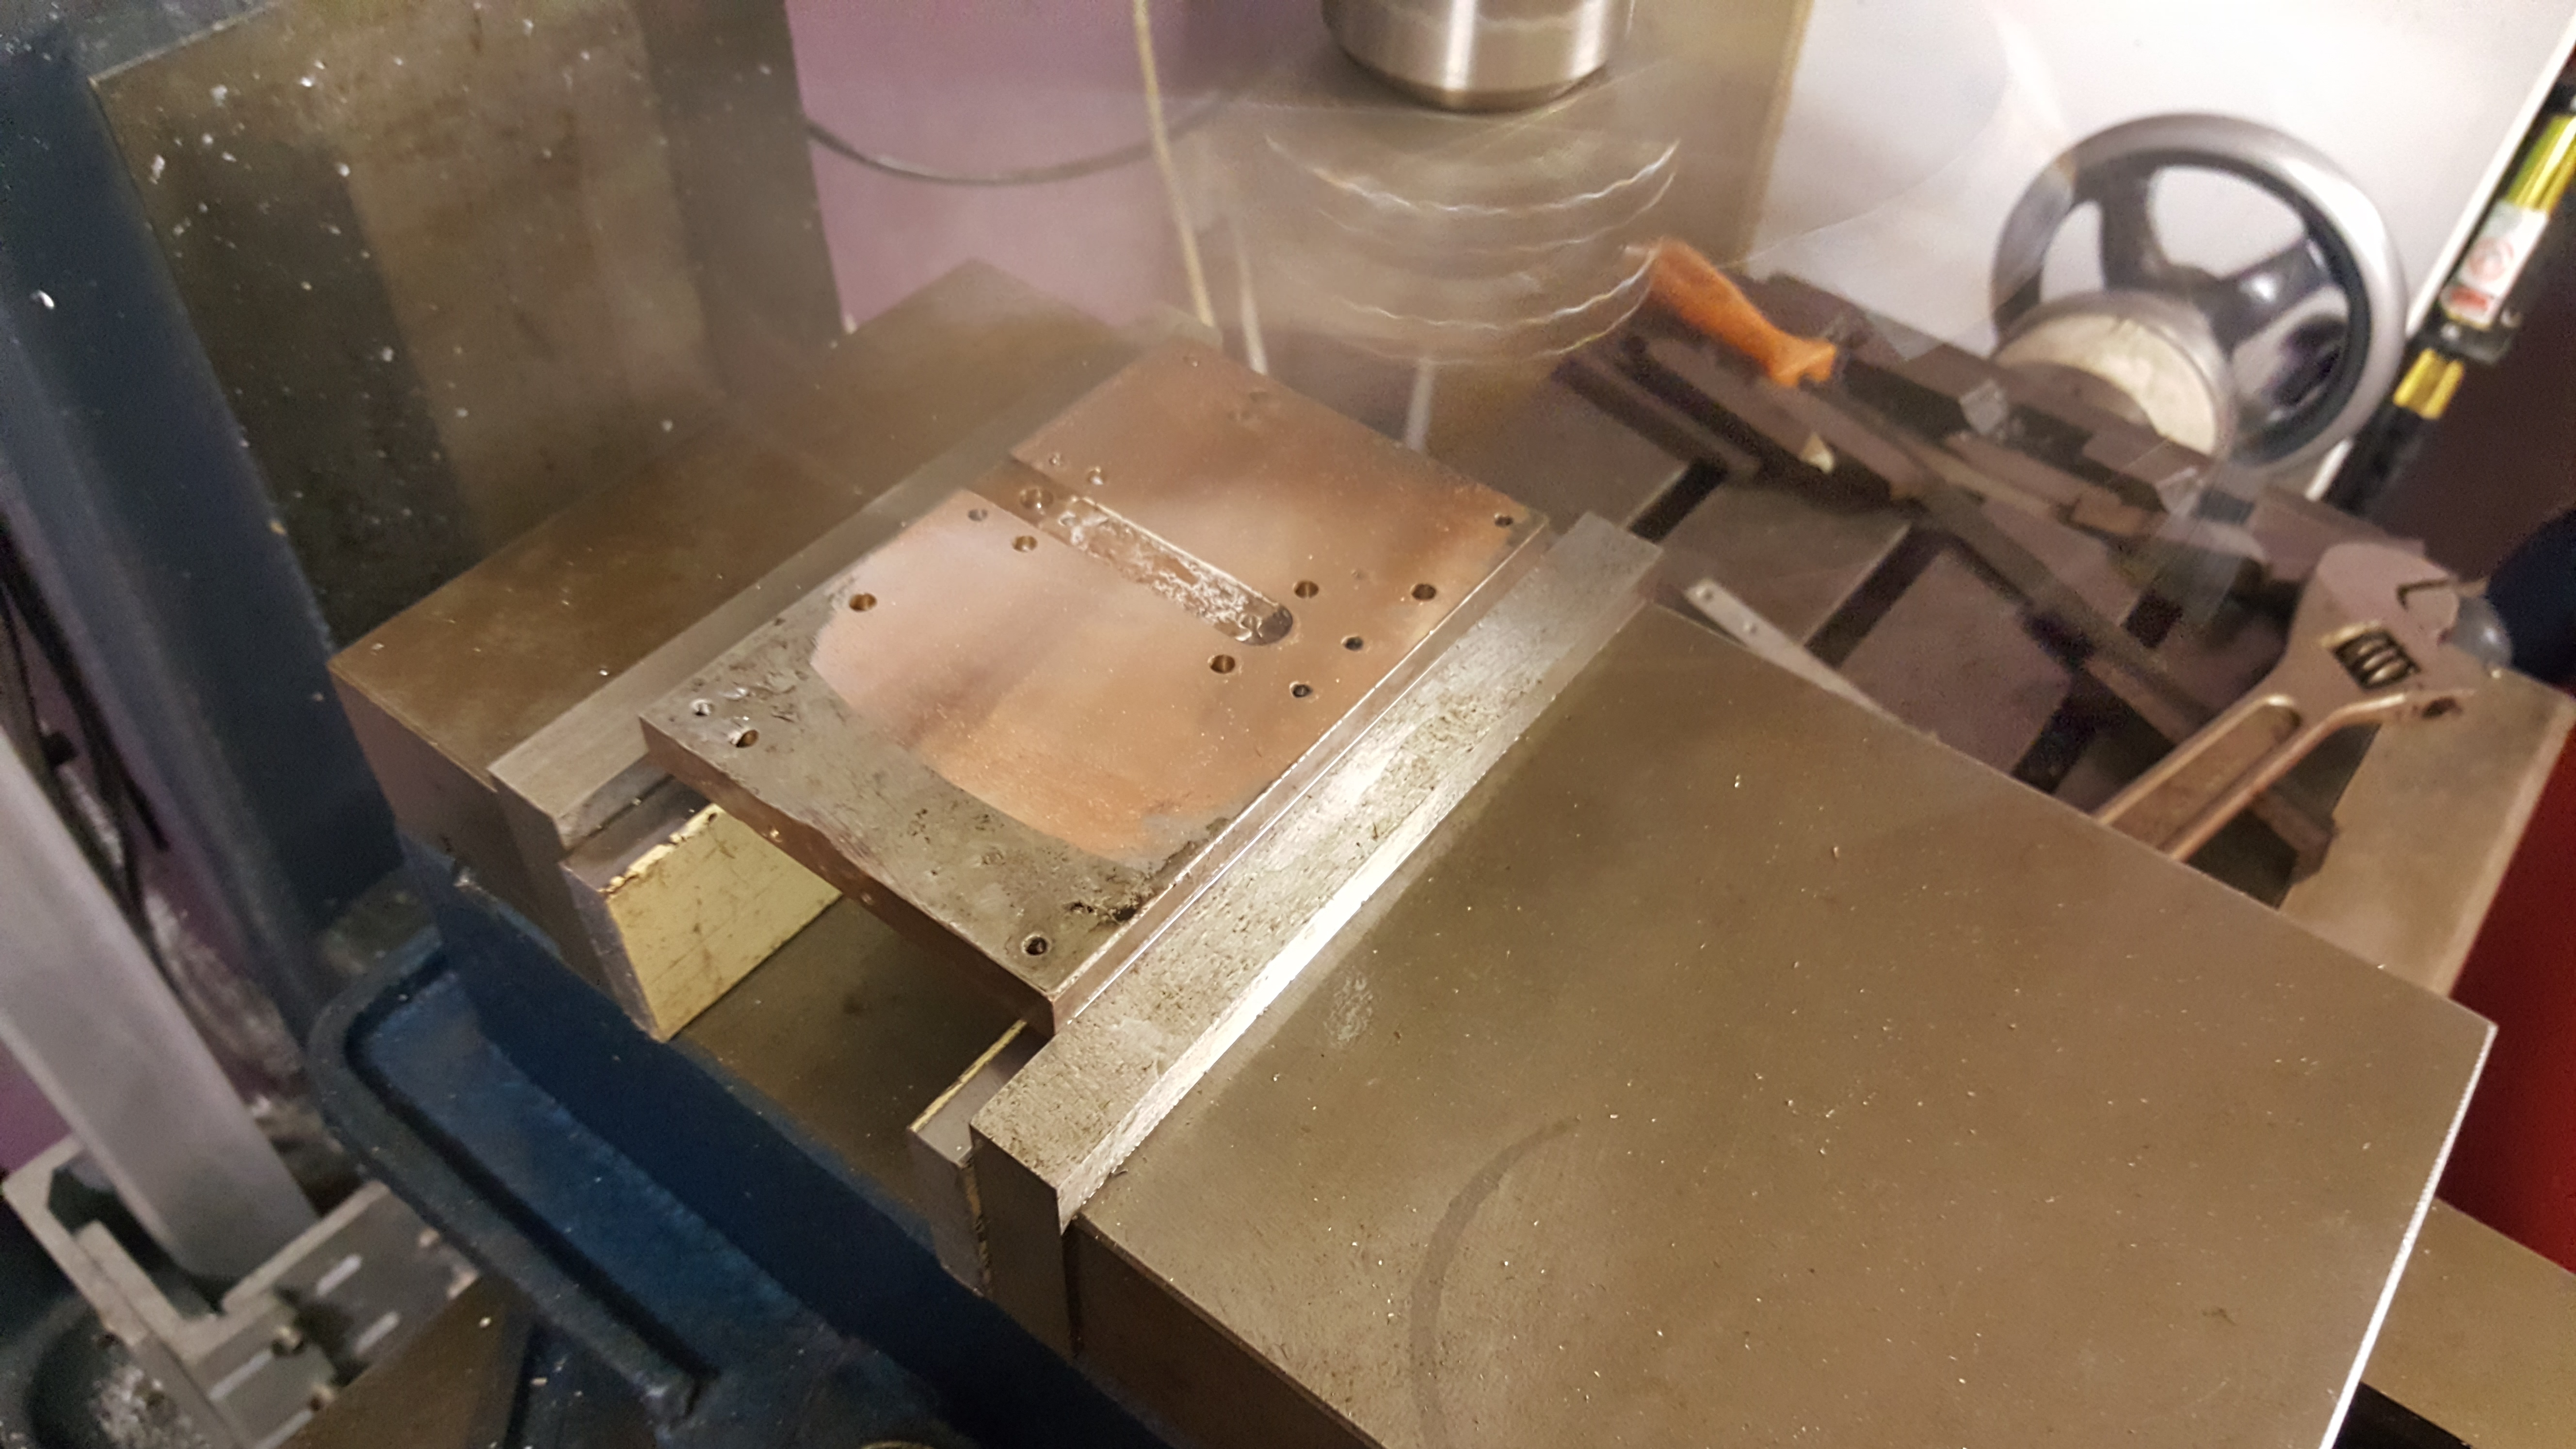
  2. To finish the 144 MHz amplifier off. I have the basic functionality, but it’s lacking a user interface and other nice features. The hardware is there, but there’s no translation onto the nice graphics LCD.

1kW 144MHz Amp Lives!

Those of you who have been following my 144 MHz 1kW amplifier project (previous posts machining heatsinks, soldering transistor down and building the pallet) will, I’m sure, be delighted to hear that I have had life out of the amplifier. In excess of 1 kW, I hasten to add!

The amplifier was able to maintain in excess of 1000W for over 2 minutes.  At this point, the Bird dummy-load started to get a bit warm, so a longer test was abandoned. The amplifier pallet, however, remained cool enough to touch. As the F1JRD original design notes, the 10-Ohm coax balun does become hot (Lionel suggests around 120C at 1kW with no cooling). I, however, used a small fan running slowly to provide a gentle draft which greatly reduced the balun heat.

The next step is to add the Dallas-Maxim DS18B20 temperature sensor – the idea is to have the sensor buried into the pallet next to the transistor, to measure the copper heat spreader temperature.

1kW 144MHz Amp Pallet

Those of you who have been following this project evolve will have seen how I soldered the transistor to the heat-spreader and before that how I machined the heat-spreader & heat-sink after their initial use. Most recently, I have been building the new W6PQL pallet, based on the revision 4d schematic, found here.

This pallet offered several design changes compared to the original F1JRD design. The first is temperature tracked biasing for the FET. The F1JRD pallet didn’t have temperature tracking, but the W6PQL design uses a combination of 10kOhm and 22 kOhm NTC thermistors to track the temperature change of the pallet. A 6V Zener diode is used to clamp the bias supply and to also limit the maximum gate voltage the FET can see. A small 200 Ohm pot allows the bias to be adjusted to get the correct quiescent current. This is the next task.

The story continues with the initial power-up testing! First I need to commission my new General-Electric 50V/40A PSU I brought at the Rosmalen Hamfest back in early March.

BNOS LPM144-10-100 Repair

I have had a B.N.O.S LPM144-10-100 solid state linear amplifier for some time. It brought it at a ham fest and it worked fine. However, when I tried to use it recently, I noticed that sometimes the amplifier would work, but other times there was no output. Due to the intermittent nature of the fault, I knew it couldn’t be the main power transistor (MRF247). The most likely cause was one of the 3 relays. There were also 5 electrolytic capacitors. I decided to change all 8 parts.

The first thing I did was cross correlate what I had with the circuit diagram (click for full size image/download).

The PCB 

Using a desoldering station to melt and vacuum extract the solder, the 3 relays are easily removed from the PCB with no board damage.

Closeup of the 3 removed relays:

Comparing the original PCB photo with the one below, you can see the 3 replacement relays and 5 capacitors.

I used a Finder 12V miniature DPDT 8A relay as my replacements sourced from Rapid Electronics in the UK, but these relays are universally available from different manufacturers. You will need a DPDT relay with 12V coil (not SPDT as this article previously stated [thanks to Keith GM4YXI for spotting this issue]). My current suggestion would be the TE Connectivity / Schrack RT424012 (datasheet).

Below is the amplifier working! Yay!

Soldering Expensive Transistors

This morning, Royal Mail delivered me a parcel from Jim W6PQL all the way from California, USA. It took a couple of days to clear customs, but it arrived within about 5 days of being ordered. If you followed my previous post on this subject, about machining heatsinks, you’ll know that the last transistor I had failed on the testbench. You’ll also know that the copper heat-spreader was re-machined to suit the new PCB. This is why the heat-spreader has a few extra holes. Seeking advice from veteran microwave DXers & constructor (G4BAO, G4DDK, G8KBV, et al.) I was instructed to solder the device down. I watched a few of Jim W6PQL’s videos on soldering LDMOS parts to the copper heat-spreaders and replicated his instruction as closely as possible. You can see Jim’s instruction video here.

A small length of thin leaded 60/40 solder was made into a wiggle for the length of the transistor and placed in the groove previously machined in the head-spreader. I liberally applied flux to the bottom of the groove and the underside of the transistor and then sandwiched  the solder in between.

The copper heat-spreader was placed on the electric infrared hotplate and heat applied. The black dot is used to allow a laser thermometer to monitor the copper temperature. NB: this method didn’t work well.

The next two images show the solder has melted and the excess squidged out the sides. It’s clear to see when the solder has melted, since the the transistor drops. It is advised to move/slide the transistor in the molten solder to remove any voids and any excess solder. I immediately killed the heat and removed the spreader from the hotplate and placed it on a heatsink. It only took a couple of minutes to cool to a temperature I could handle, and I checked the location of the transistor against the PCB mounting holes.

The PCBs were finally mounted as a test fit. I will populate the boards before mounting them. Unlike the original jrd1 boards, these PCBs do not need to be soldered down. This means the boards can be soldered up and then mounted.

Stay tuned for more updates…

Machining Heatsinks for QRO Amplifiers

Back at the 2012 Friedrichshafen Hamfest I brought a 1.25 kiloWatt VHF amplifier kit for 144 MHz from F1JRD and F5CYS. These devices were fairly new at the time. It took me a year to pluck up the courage to build the pallet, but I went about it all wrong. With the help of Dad and the kitchen hob, we soldered the jrd1 Teflon PCB to the C110 copper heat-spreader as suggested in the Dubus article (see here). I had the pallet working at the time, giving around 600W of RF, which was about the maximum my 1000W 50V PSU was capable of sustaining. When I came to boxing the device up into an amplifier to use with EME and Meteor Scatter in late 2016, the part failed under test.

After much deliberation, I have ordered parts to repair the amplifier project. I found Jim W6PQL‘s website (see here) a wealth of information, and Jim also offers to supply parts and designs to help others. I ordered a set of PCBs to replace the original jrd1 board, a NXP/Ampleon BLF188XR 1400W part to replace the failed the Freescale/NXP MRFE6VP61K25H 1250W part, and some other accessories that Jim sells. The parts were posted by Jim today, so I decided it was time to recover parts from the old PCB and recondition the heatsink and heat-spreader.

The first step was to remove the jrd1 board from the copper heat-spreader. I used the kitchen hob to heat the copper heat-spreader, since the old board was soldered to the copper block. The board damage was sustained to enable the removal of the more expensive components.

Below, the heat-spreader with the jrd1 board removed. I used a solder sucker and scraper to remove as much of the molten solder.

Once the heat-spreader had cooled down, I mounted the copper spreader up in the milling machine read to re-machine the top and bottom surfaces. Great care was taken to level the block using parallels. Below you can see the fly-cutting process on the first cut, removing just 0.05mm from the surface.

With the top and bottom of the head-spreader machined flat, a small end-mill cutter was used to machine the transistor slot to the correct depth following the skimming of the top surface. Then the heatsink mating surface was machined. Below you see the first cut on the heatsink.

The finished parts. A few machining marks, but the surfaces are perfectly good enough. Some dents on the copper block, but it’s not worth removing all of the material to eliminate these.  Using a few drips of water as a substitute for thermal compound, the two mating surfaces stick together very well (with a good vacuum forming). That’s more than good enough for my needs!

Now I just need to wait for the parts to arrive before I can finalise the PCB and transistor mounting! This story continues here: Soldering Expensive Transistors.

Portable HF Day & First Meteor Scatter Reception

After drying out from the RSGB IOTA contest last weekend, we took the gear out again 1-2 August, where I worked a few new contacts: 7Q7BP on CW was a firm favourite, as well as KH6/AA1LC in Hawaii, CY0/VA1AXC on Sable Is., 8P6FX in Barbados and CP6XE in Bolivia.

During the weekend we turned our hand towards the RSGB low-power backpackers contest working a few on 2m. After the contest, HA6KVC/P was coming through nicely via Meteor Scatter on FSK441.

This was the first time I have ever heard any meteor scatter… Ever…

Amateur Satellites & Dual-band Beams

Having attended a short talk by Steve M0SHQ at Essex Ham about operating Amateur Satellites, and seeing Steve work the ISS via APRS, I decided to have a go myself. I built the dual-band beam he recommended several times, but the design always measured up poorly. In the end I tweaked the design somewhat, and come up with something myself – it’s all credit to the original designer, I just optimised it with some antenna modelling software. Details on the antenna can be found here: Dual Band Satellite Yagi.

144 MHz 1.25 kW Amplifier

Over the weekend I worked on my 1.25 kW solid state PA based on F1JRD’s design from Dubus using a MRFE6VP61K25H. I bought a complete kit at the Friedrichshafen Hamfest 2012 from F1JRD and F5CYS and built it up late 2013 but due to problems, I never had more than around 40W output. This weekend, with a new set of capacitors from ATC I rebuilt the output matching and fired it up once again. With my 1kW/50V power-supply I can get around 600W output, which his more than enough. This is still a work in progress, but things are moving forward with the project.