
This project started when I wanted to control some LED lighting using my mobile phone. I ended up writing some Arduino code to use an Ethernet Shield, and tinkering with an Android App to talk with the Arduino via a HTTP connection and web page.
The Schematic
The schematic is very simple. I used an IRF640 N-channel power MOSFET to switch the LEDs, but almost any power FET will do. The gate is driven from the Arduino directly, and a pull-down resistor stops the input from floating high when the Arduino pin is in high-impedance tri-state.
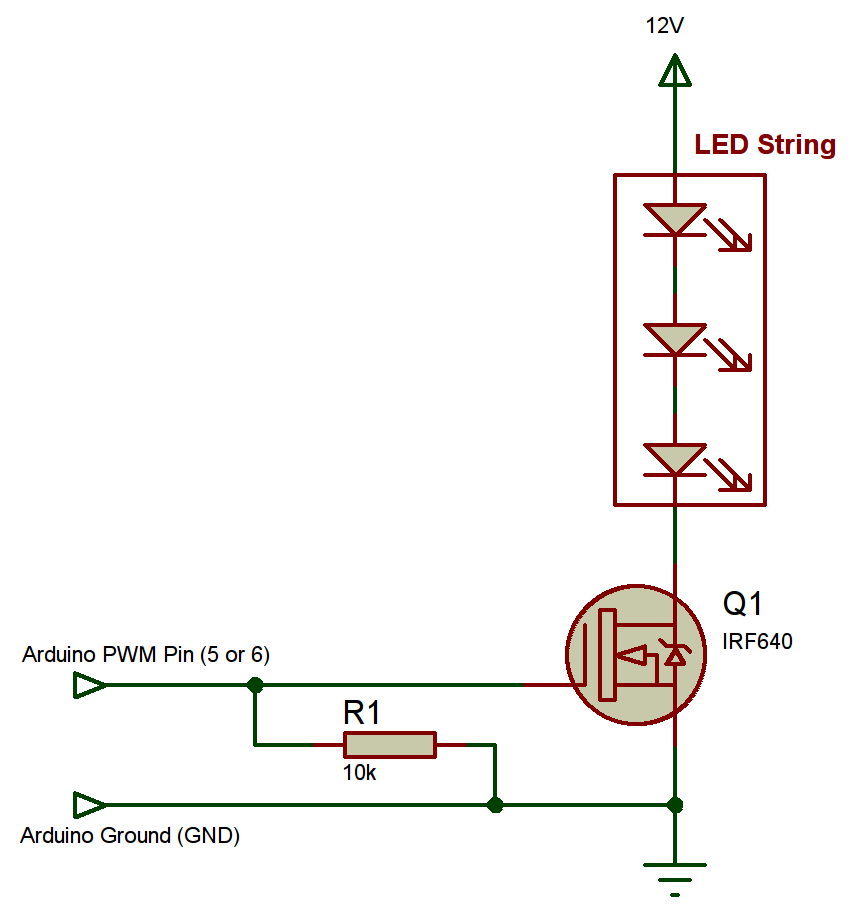
The power supply used is 12V from a wall-wart, fed by the DC socket on the Arduino. The LED string positive is connected to Vin on the Arduino, the negative to the drain on the FET. The FET source is connected to the common ground (common to Arduino and wall-wart). The FET gate is connected to your preferred PWM pin on the Arduino (I use Pin 5).
Arduino Code
I am no elite programmer, but the code does work just fine. It uses an Arduino Uno with Wiznet Ethernet Shield. The Arduino presents a webpage over a very crude HTTP server running on port 80 (adjustable). The code is below, and is available under my website’s standard licence.
Download: ArduinoEthernetLightPWMCode.zip
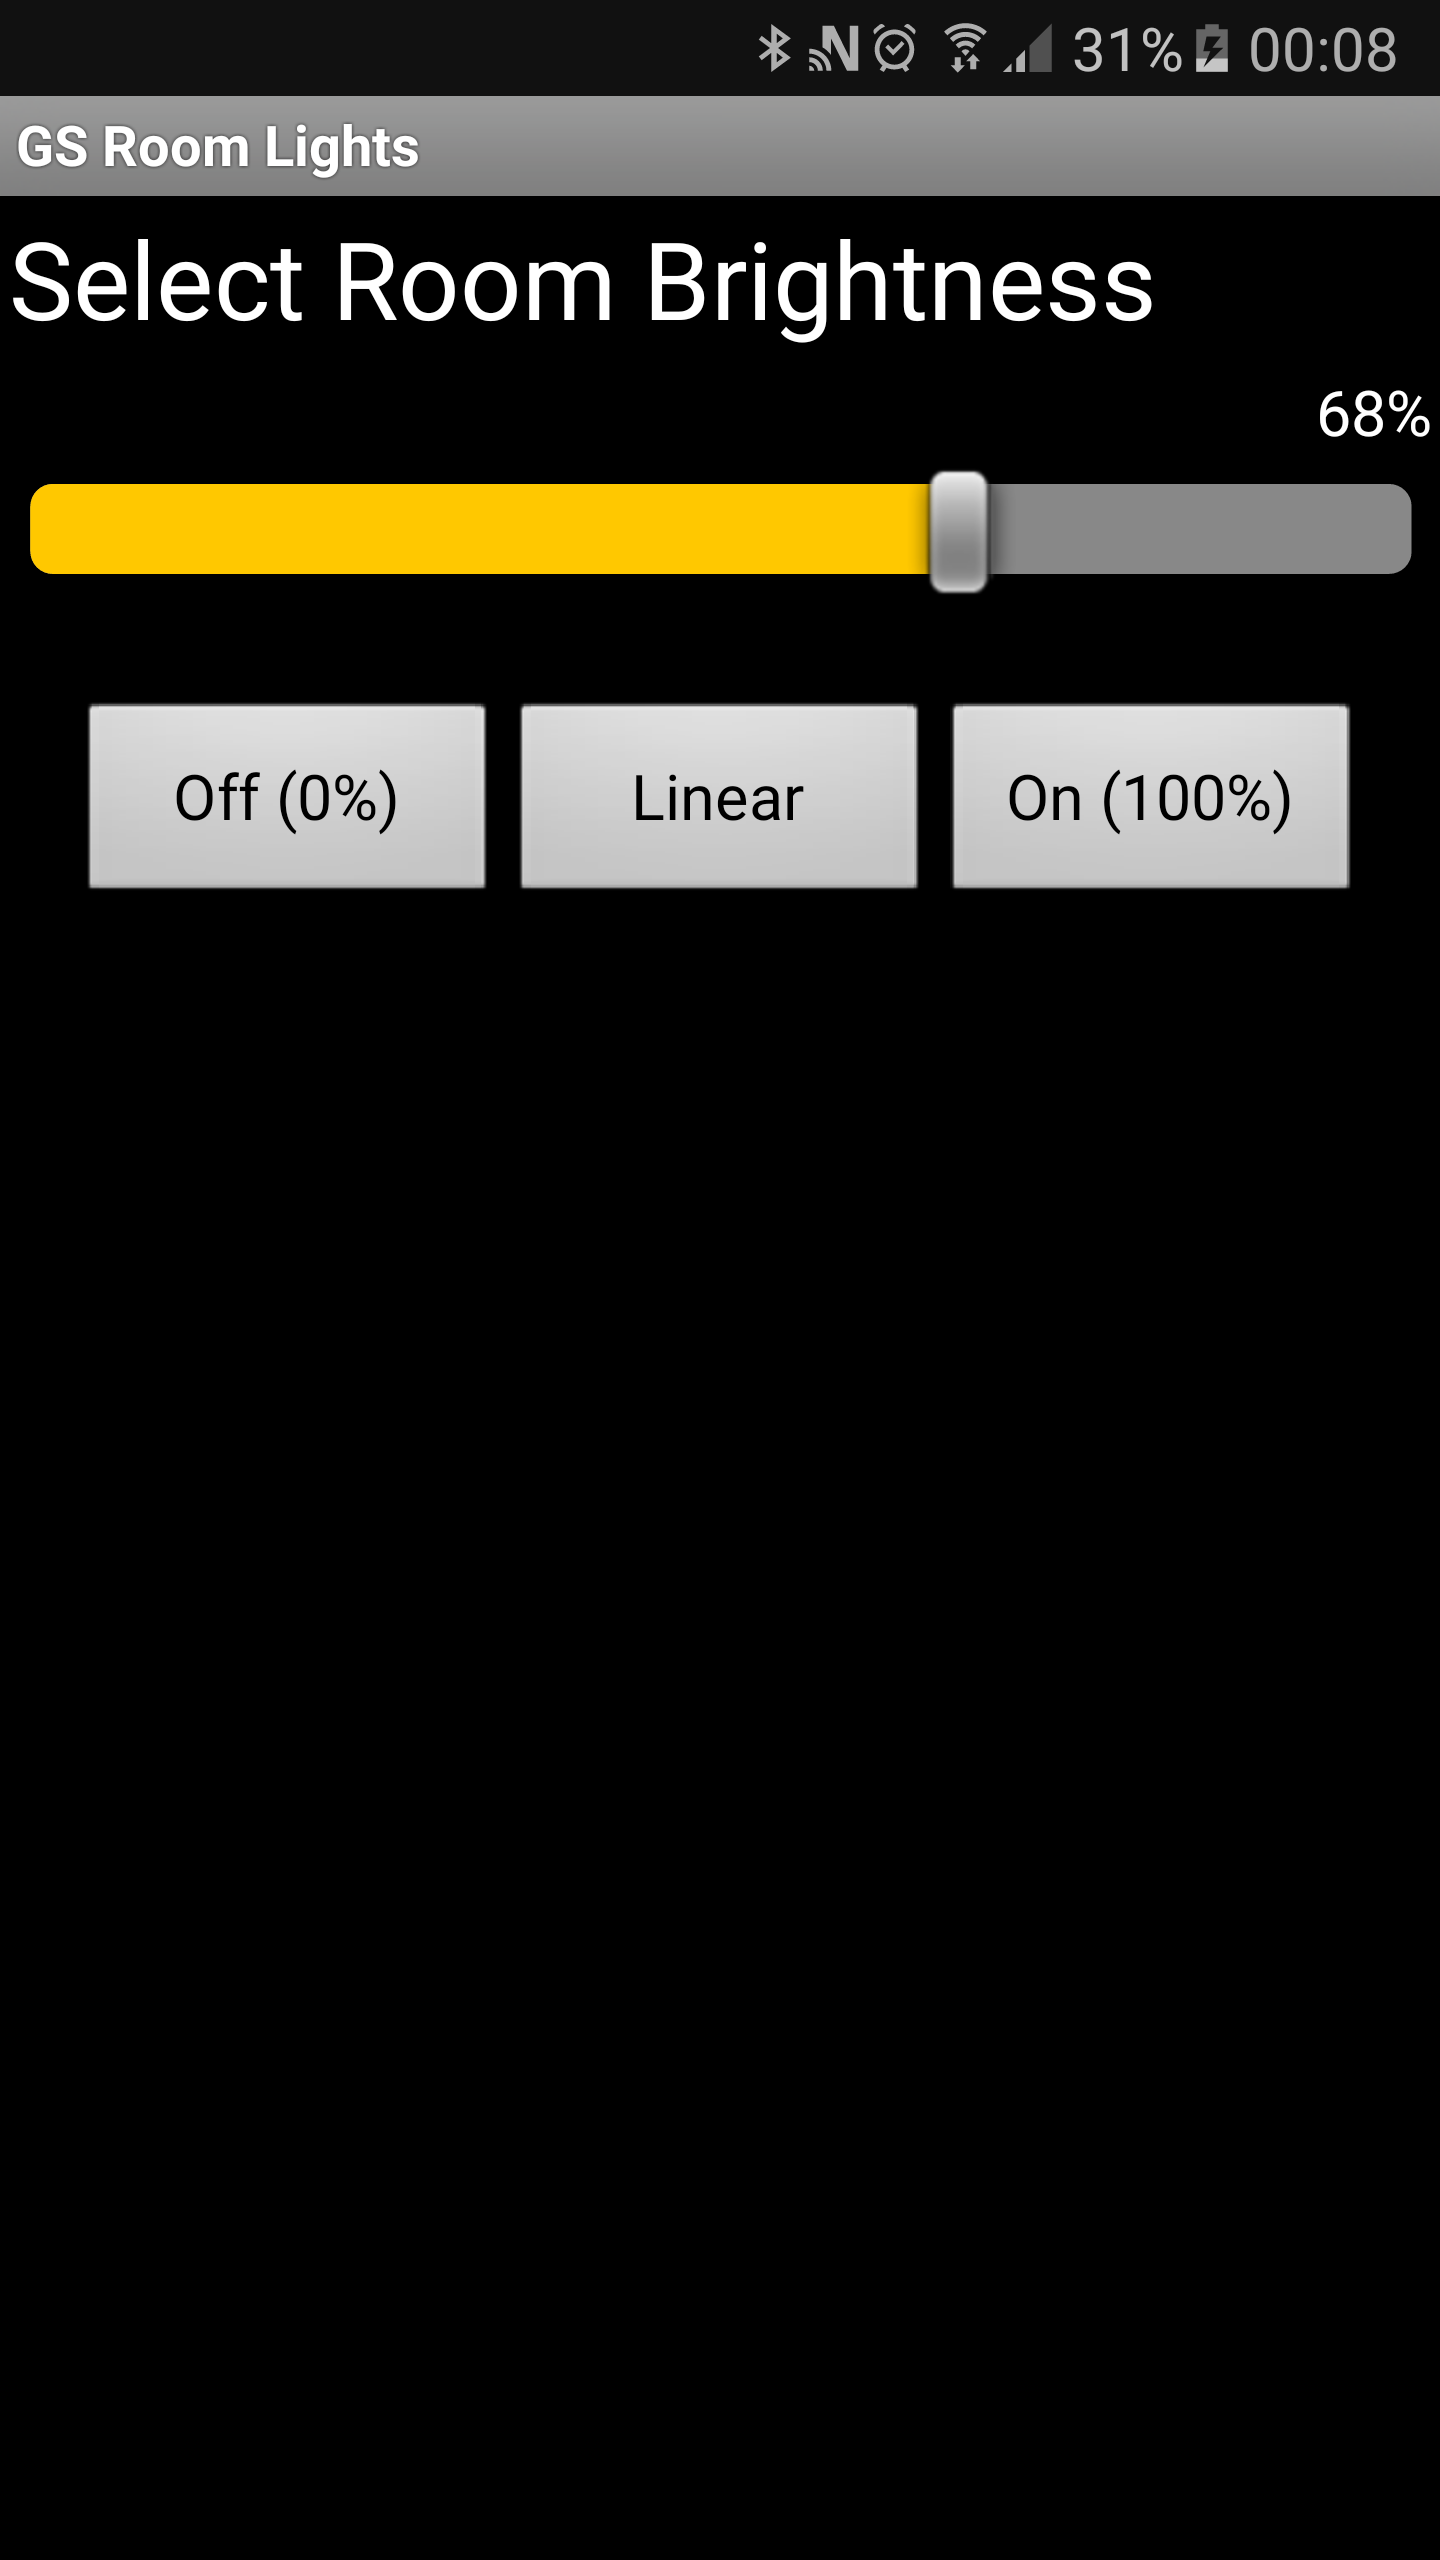
The Web Interface
You can have the Arduino send any HTML you desire, as long as it fits in the program space. I have kept it very simple (and ugly), but it is functional. If you visit the IP address of your Arduino, on the port you specified (I have used port 80), then you will be served a webpage like below:
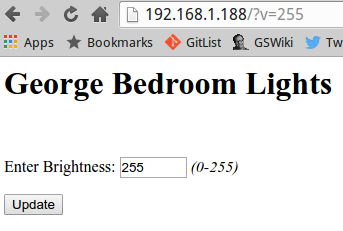
Entering a value and pressing Submit, will update the PWM outputs with this value.
The Android App
What I really wanted was a nice app I could press on my phone, either turning the lights fully on, fully off, or somewhere in between. The last time I made Android Apps I was with the masterful Aaron Brown, but this time I was alone. A quick Google flagged up the MIT App Inventor 2. I watched 1 tutorial, and I was away!
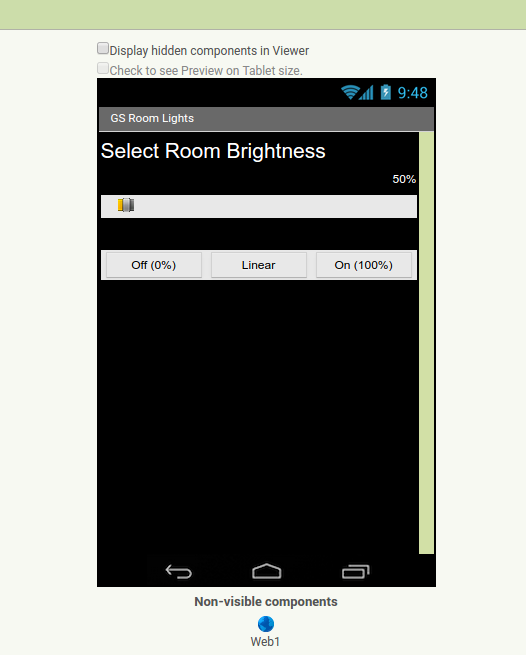
Again, you’ll notice I’m not an arty person, but that doesn’t stop me! I designed a basic looking Android screen, and I was away, blobbing code together in the App Inventor!
The app screen inside the inventor can be seen below. I drag and dropped labels, buttons, sliders and the other elements you can see in a way that looked reasonably sensible. The process is very simple, and the results are quick and easy to see.
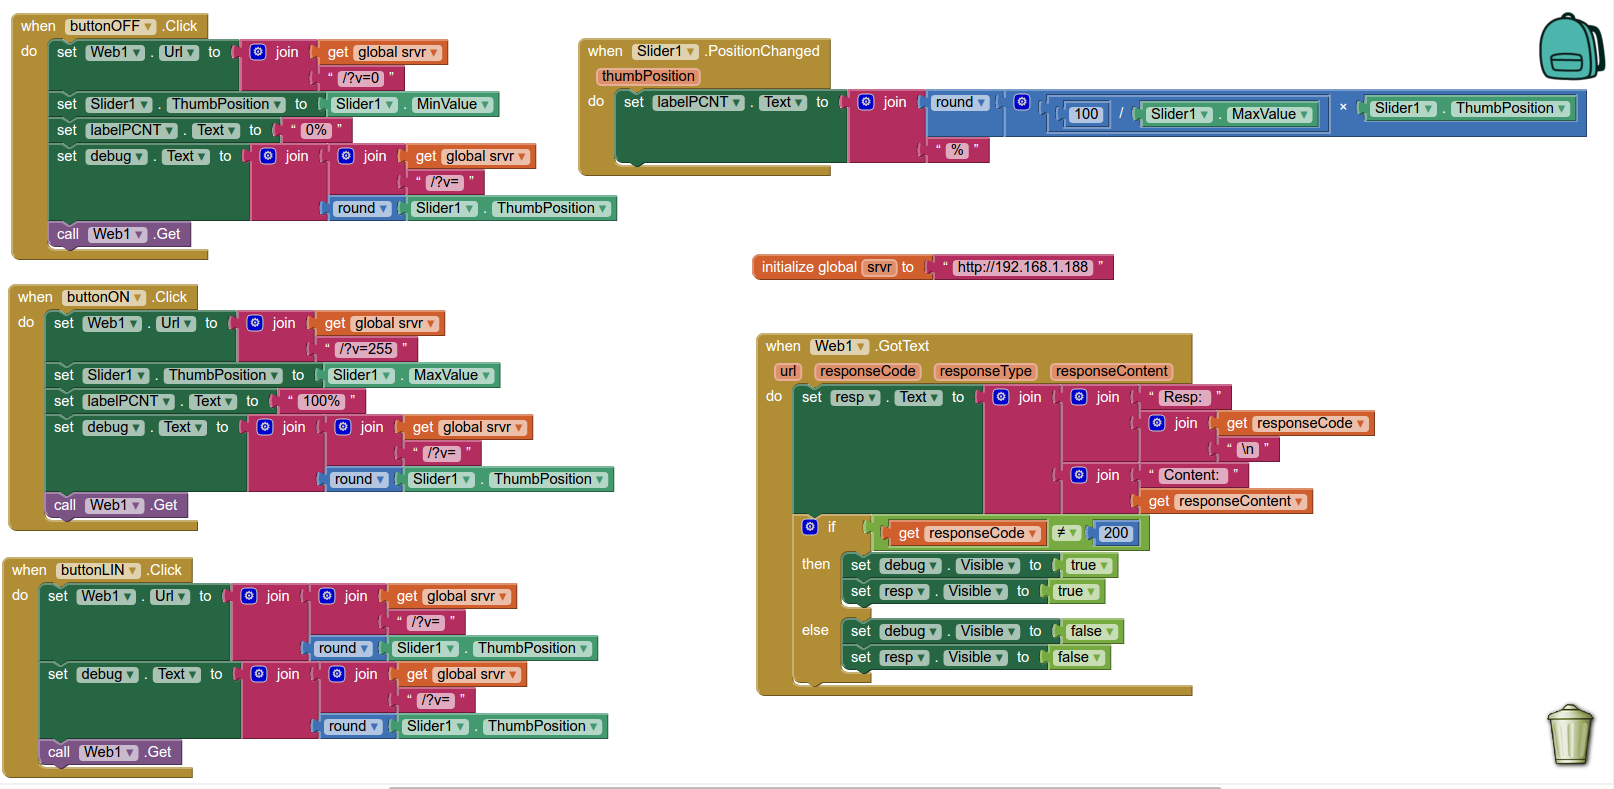
Once the screen design was done, I needed to make some code up. This was done graphically, almost, using “blocks” of code as shown below. These are again very simple to use, and you’re abstracted away from the details, which I liked in this case. The 3 left blocks deal with the button presses. The top right block deals with movement of the slider, and calculating the percentage label value. The bottom right deals with the return from the HTTP web call. If there are errors, they are displayed below the buttons, otherwise, they’re hidden. A global variable in the right middle allows for a single place to set the server address.
Once the app is tested via the Live Android Linking (AI Companion), the app can be bundled into an APK for Android! Ideal!
That’s about it for now, but hopefully it will give a few people some ideas!