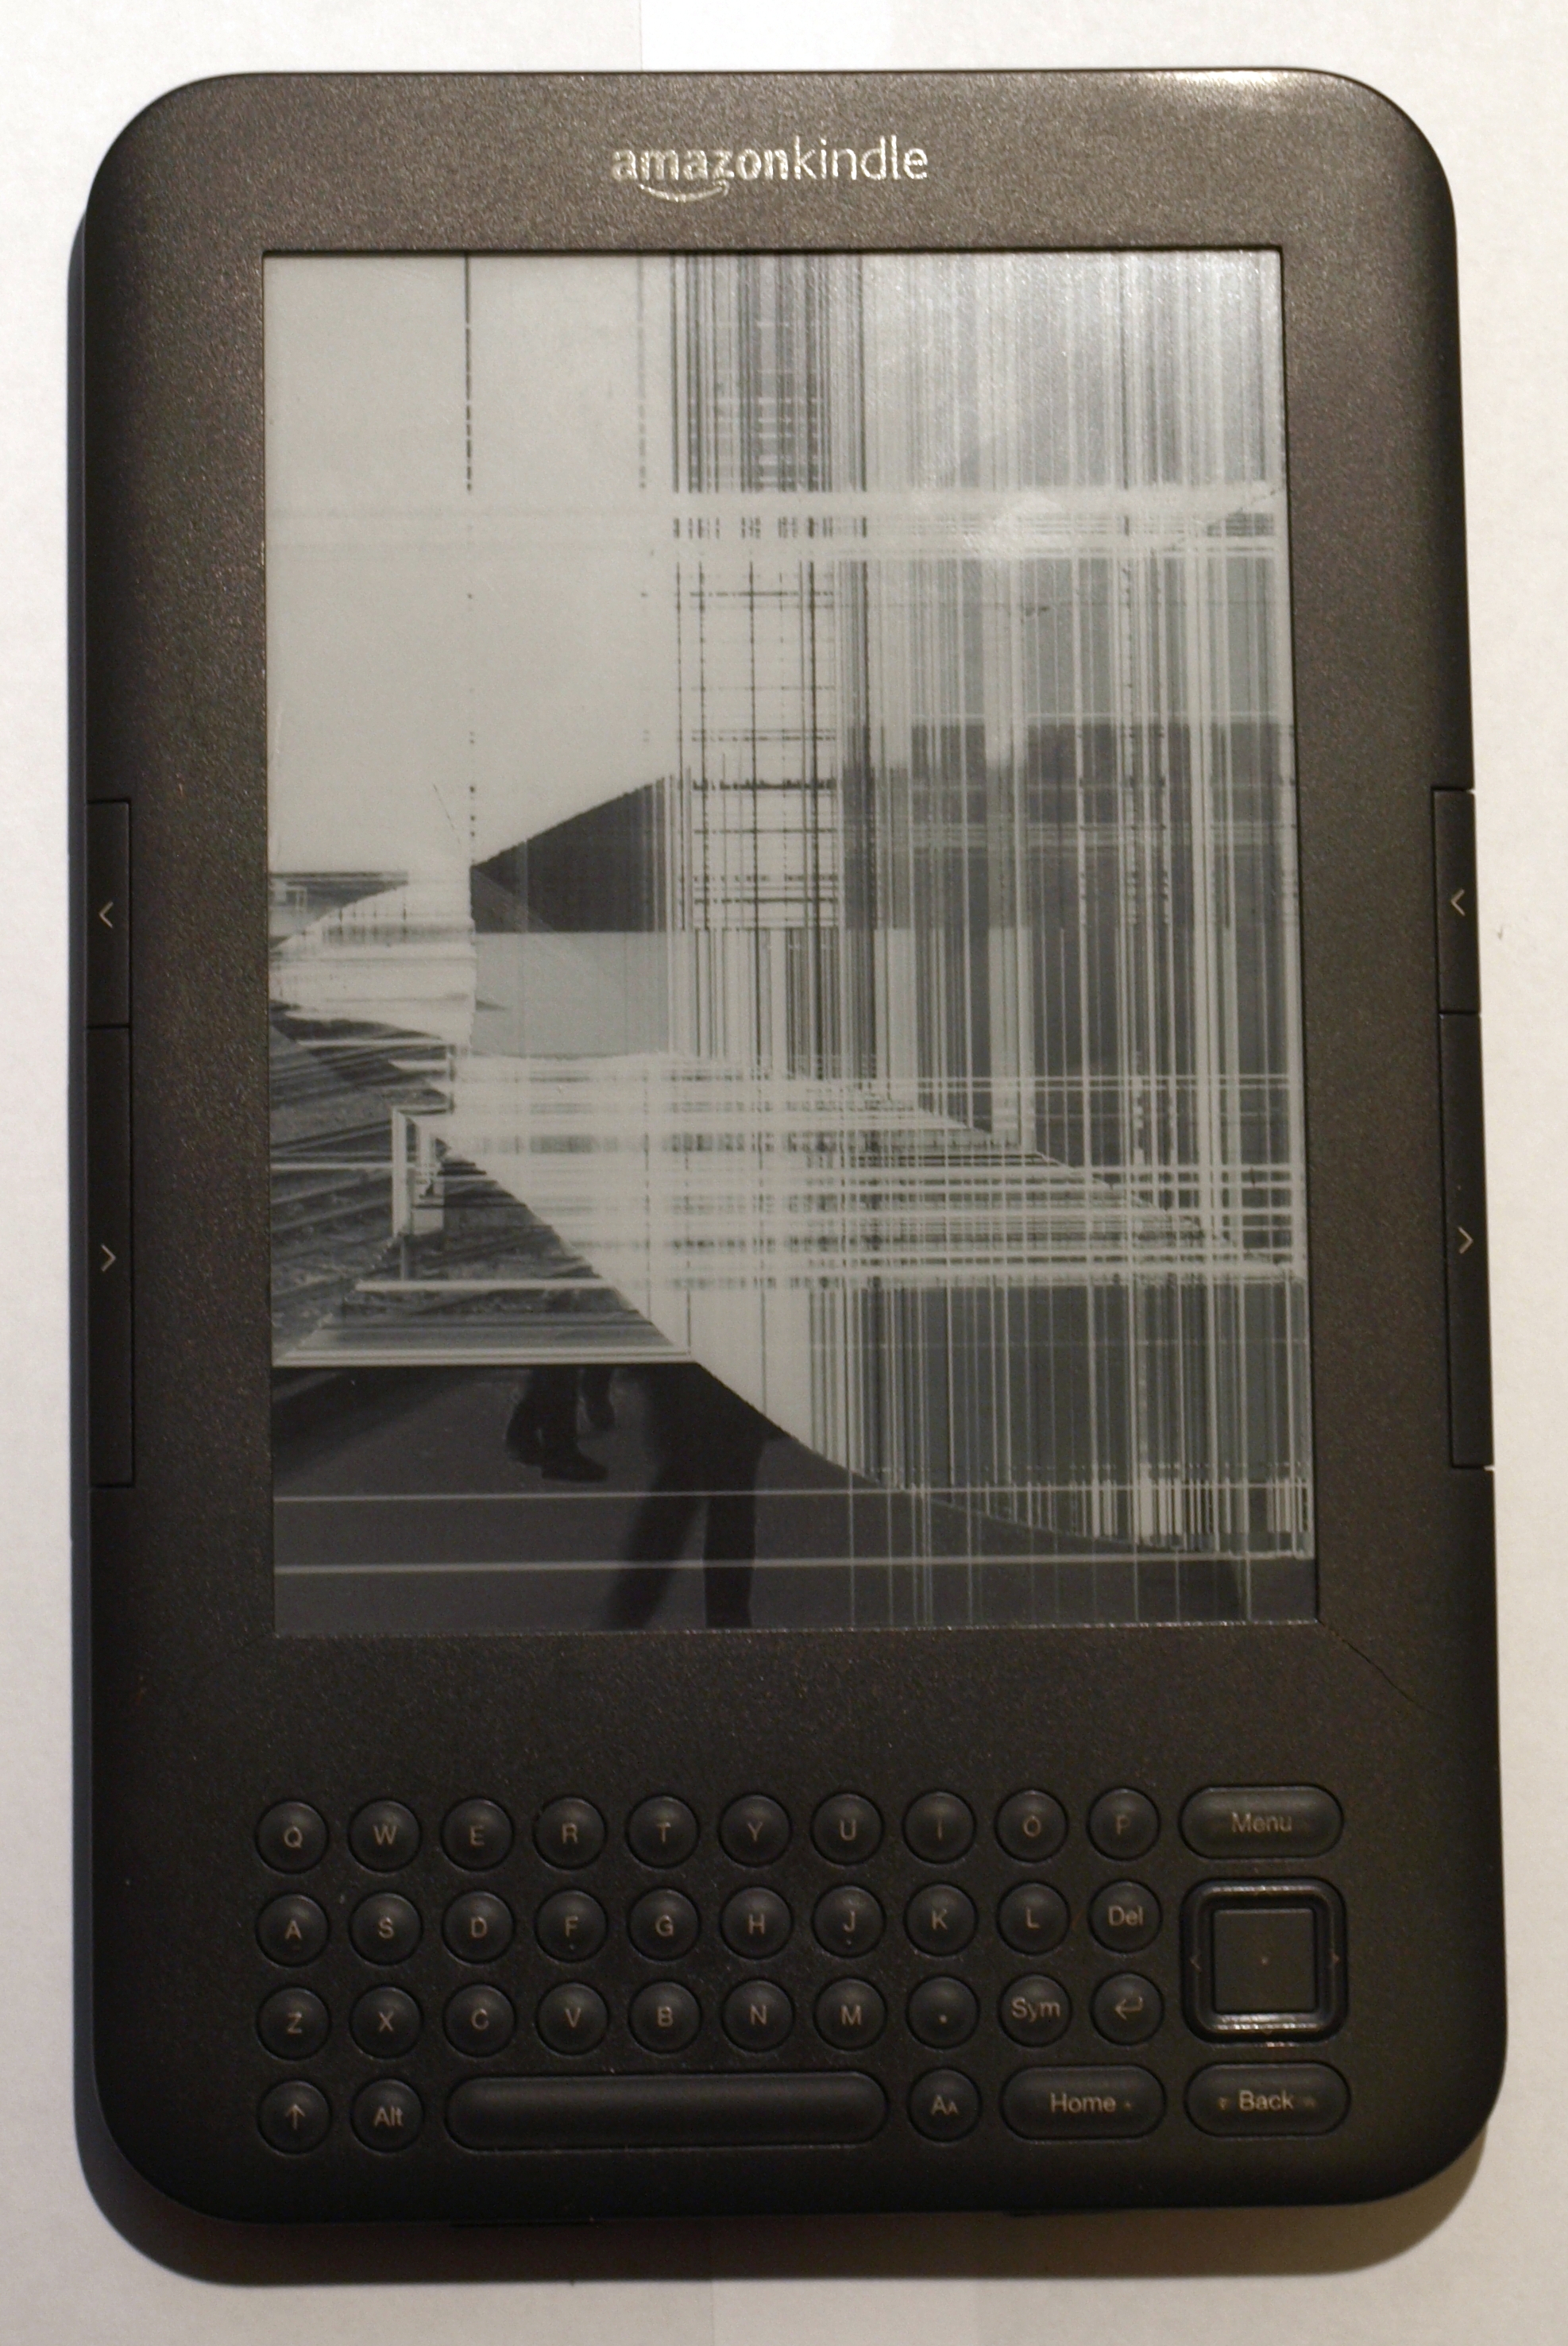
So my Kindle 3 (keyboard) that I got for Christmas 2010 finally died when I smashed the screen in January 2013. I weighed up the options of a new Kindle (around £70) before deciding that I could probably fix the Kindle 3 screen myself. I went on eBay and picked up a replacement screen for £45 delivered from Wales (best speed/£ radio) and set about replacing the screen. This page documents the process.
The first thing I did was to watch YouTube: How to Repair an Amazon Kindle 3. This video is a great video and shows the basic steps involved. I followed this guide exactly. Below are some high resolution stills taken of the repair of my Kindle 3 (keyboard).
Remove the Back Cover
The first step is to remove the back cover from the Kindle. This is done by using a plastic prying tool and following the edges of the case around. There are no clips around the page buttons but at at either side of the button strips there are.
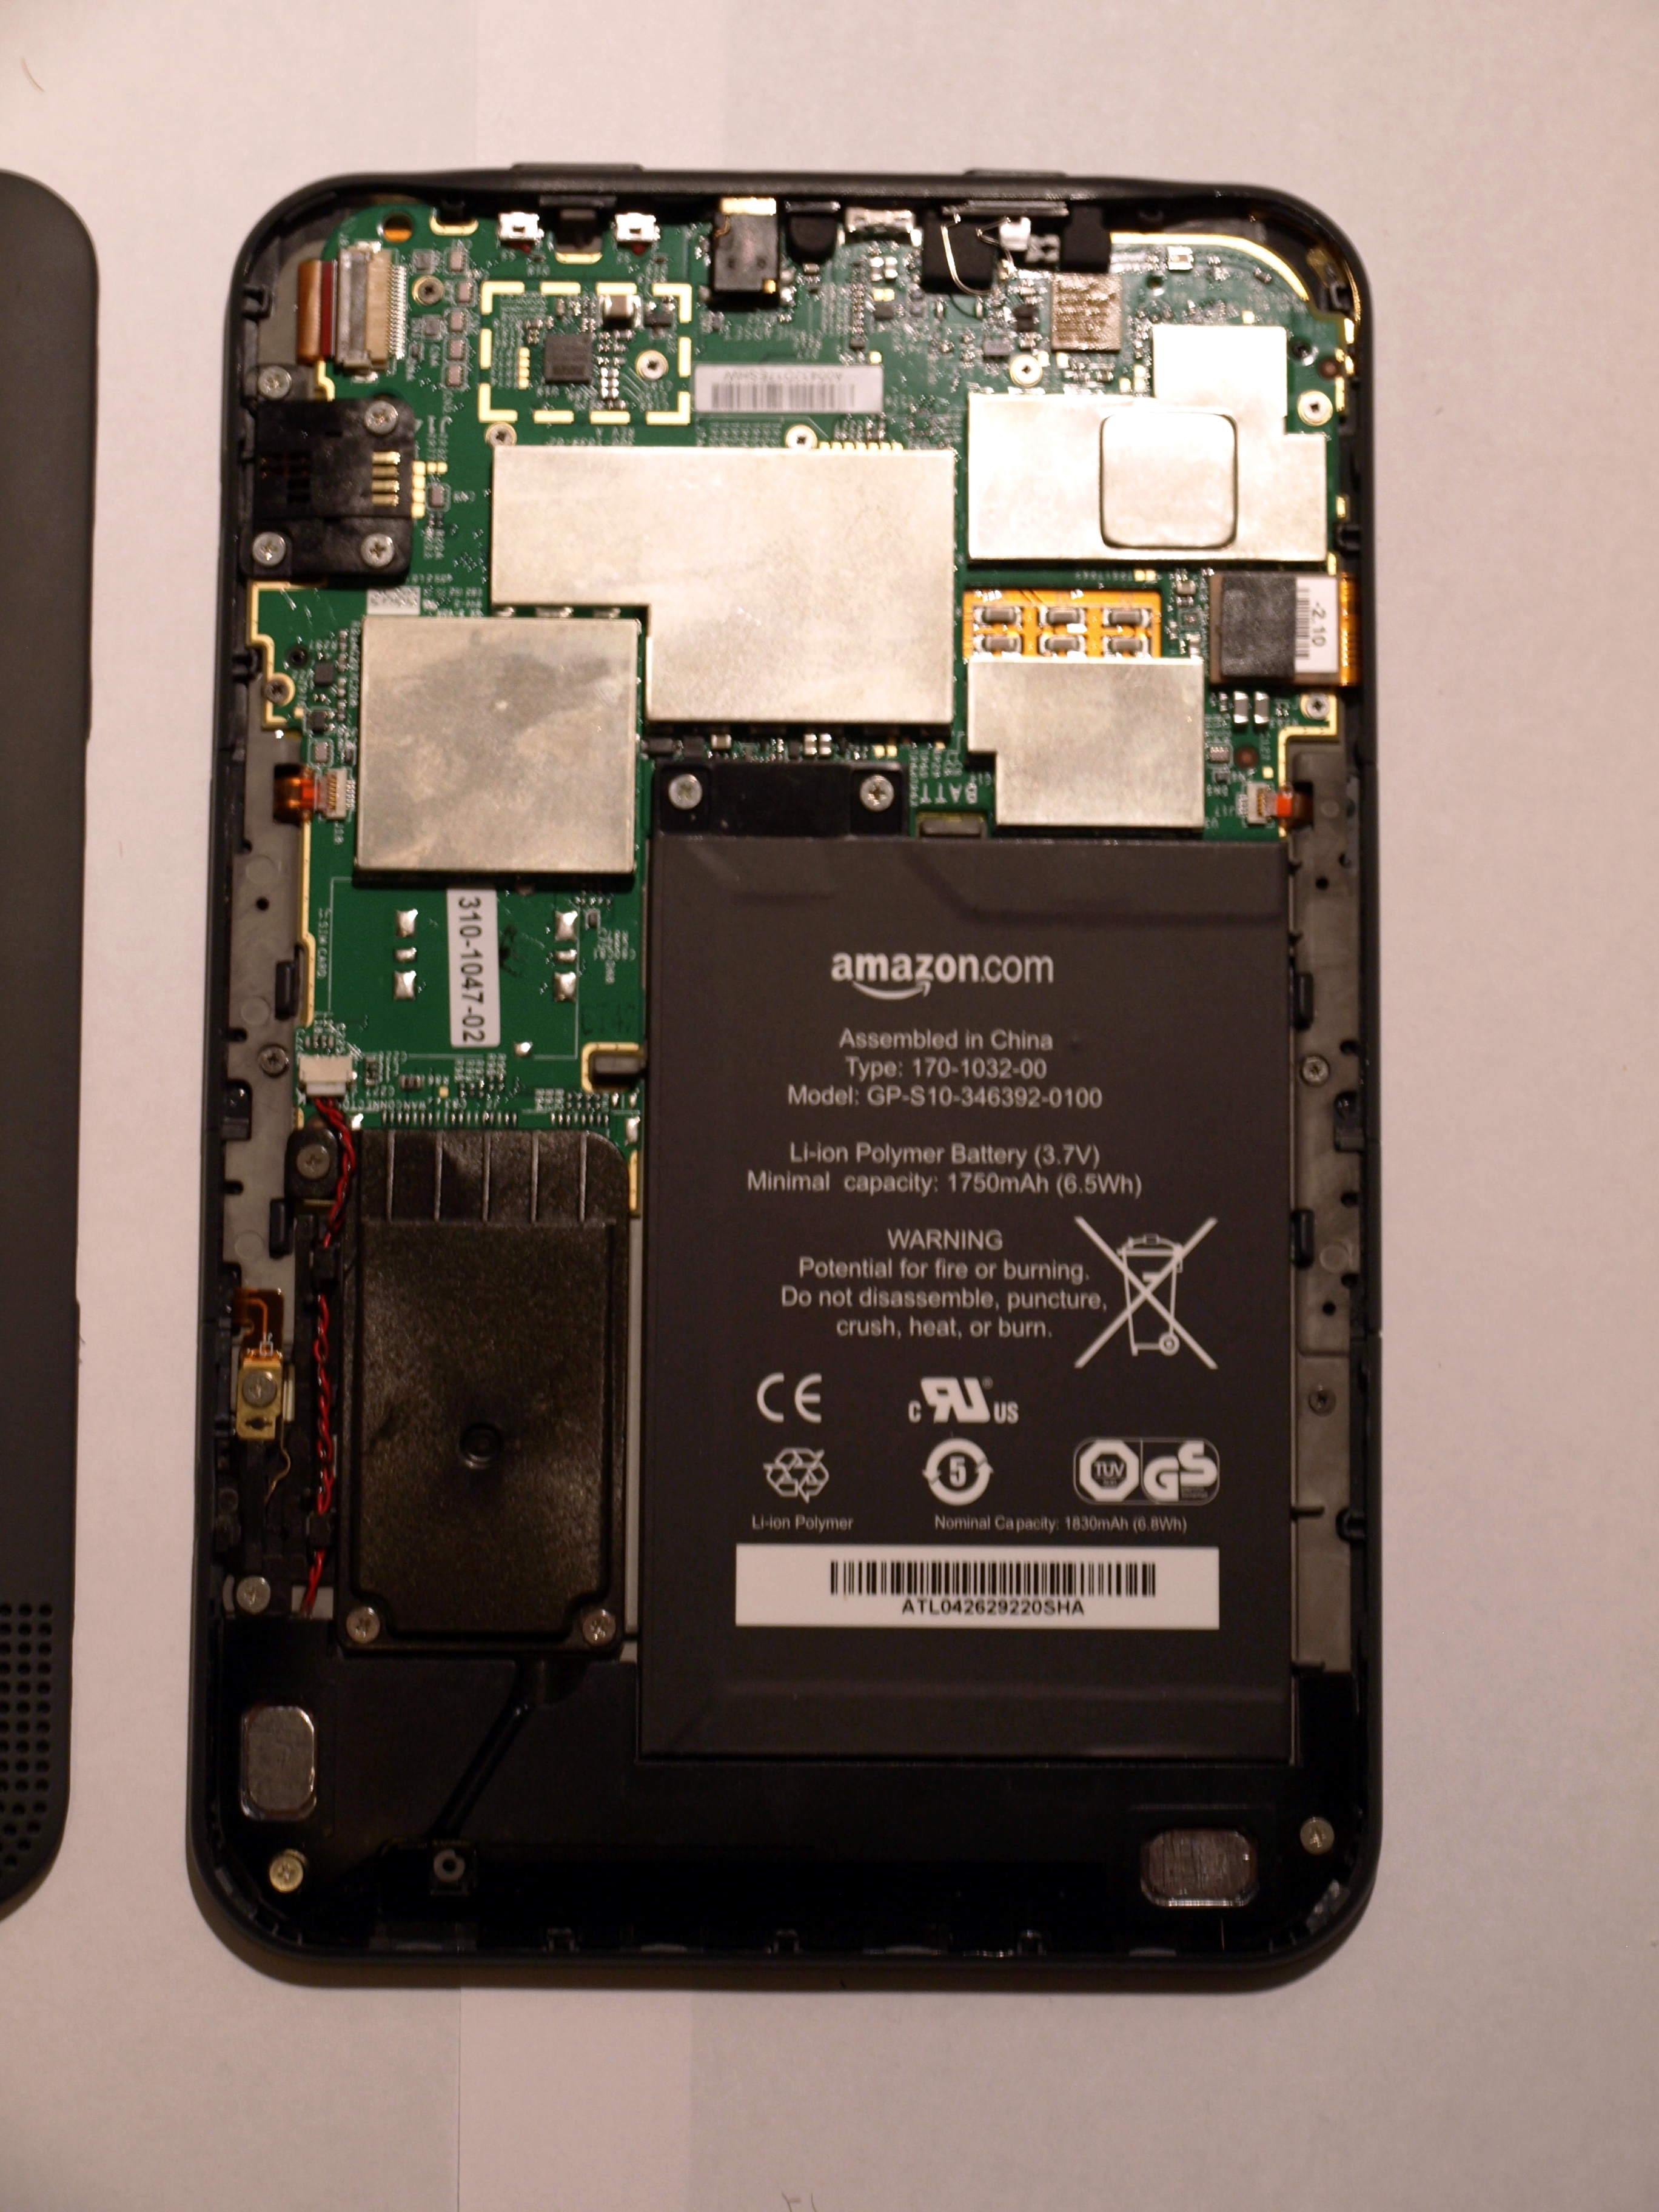
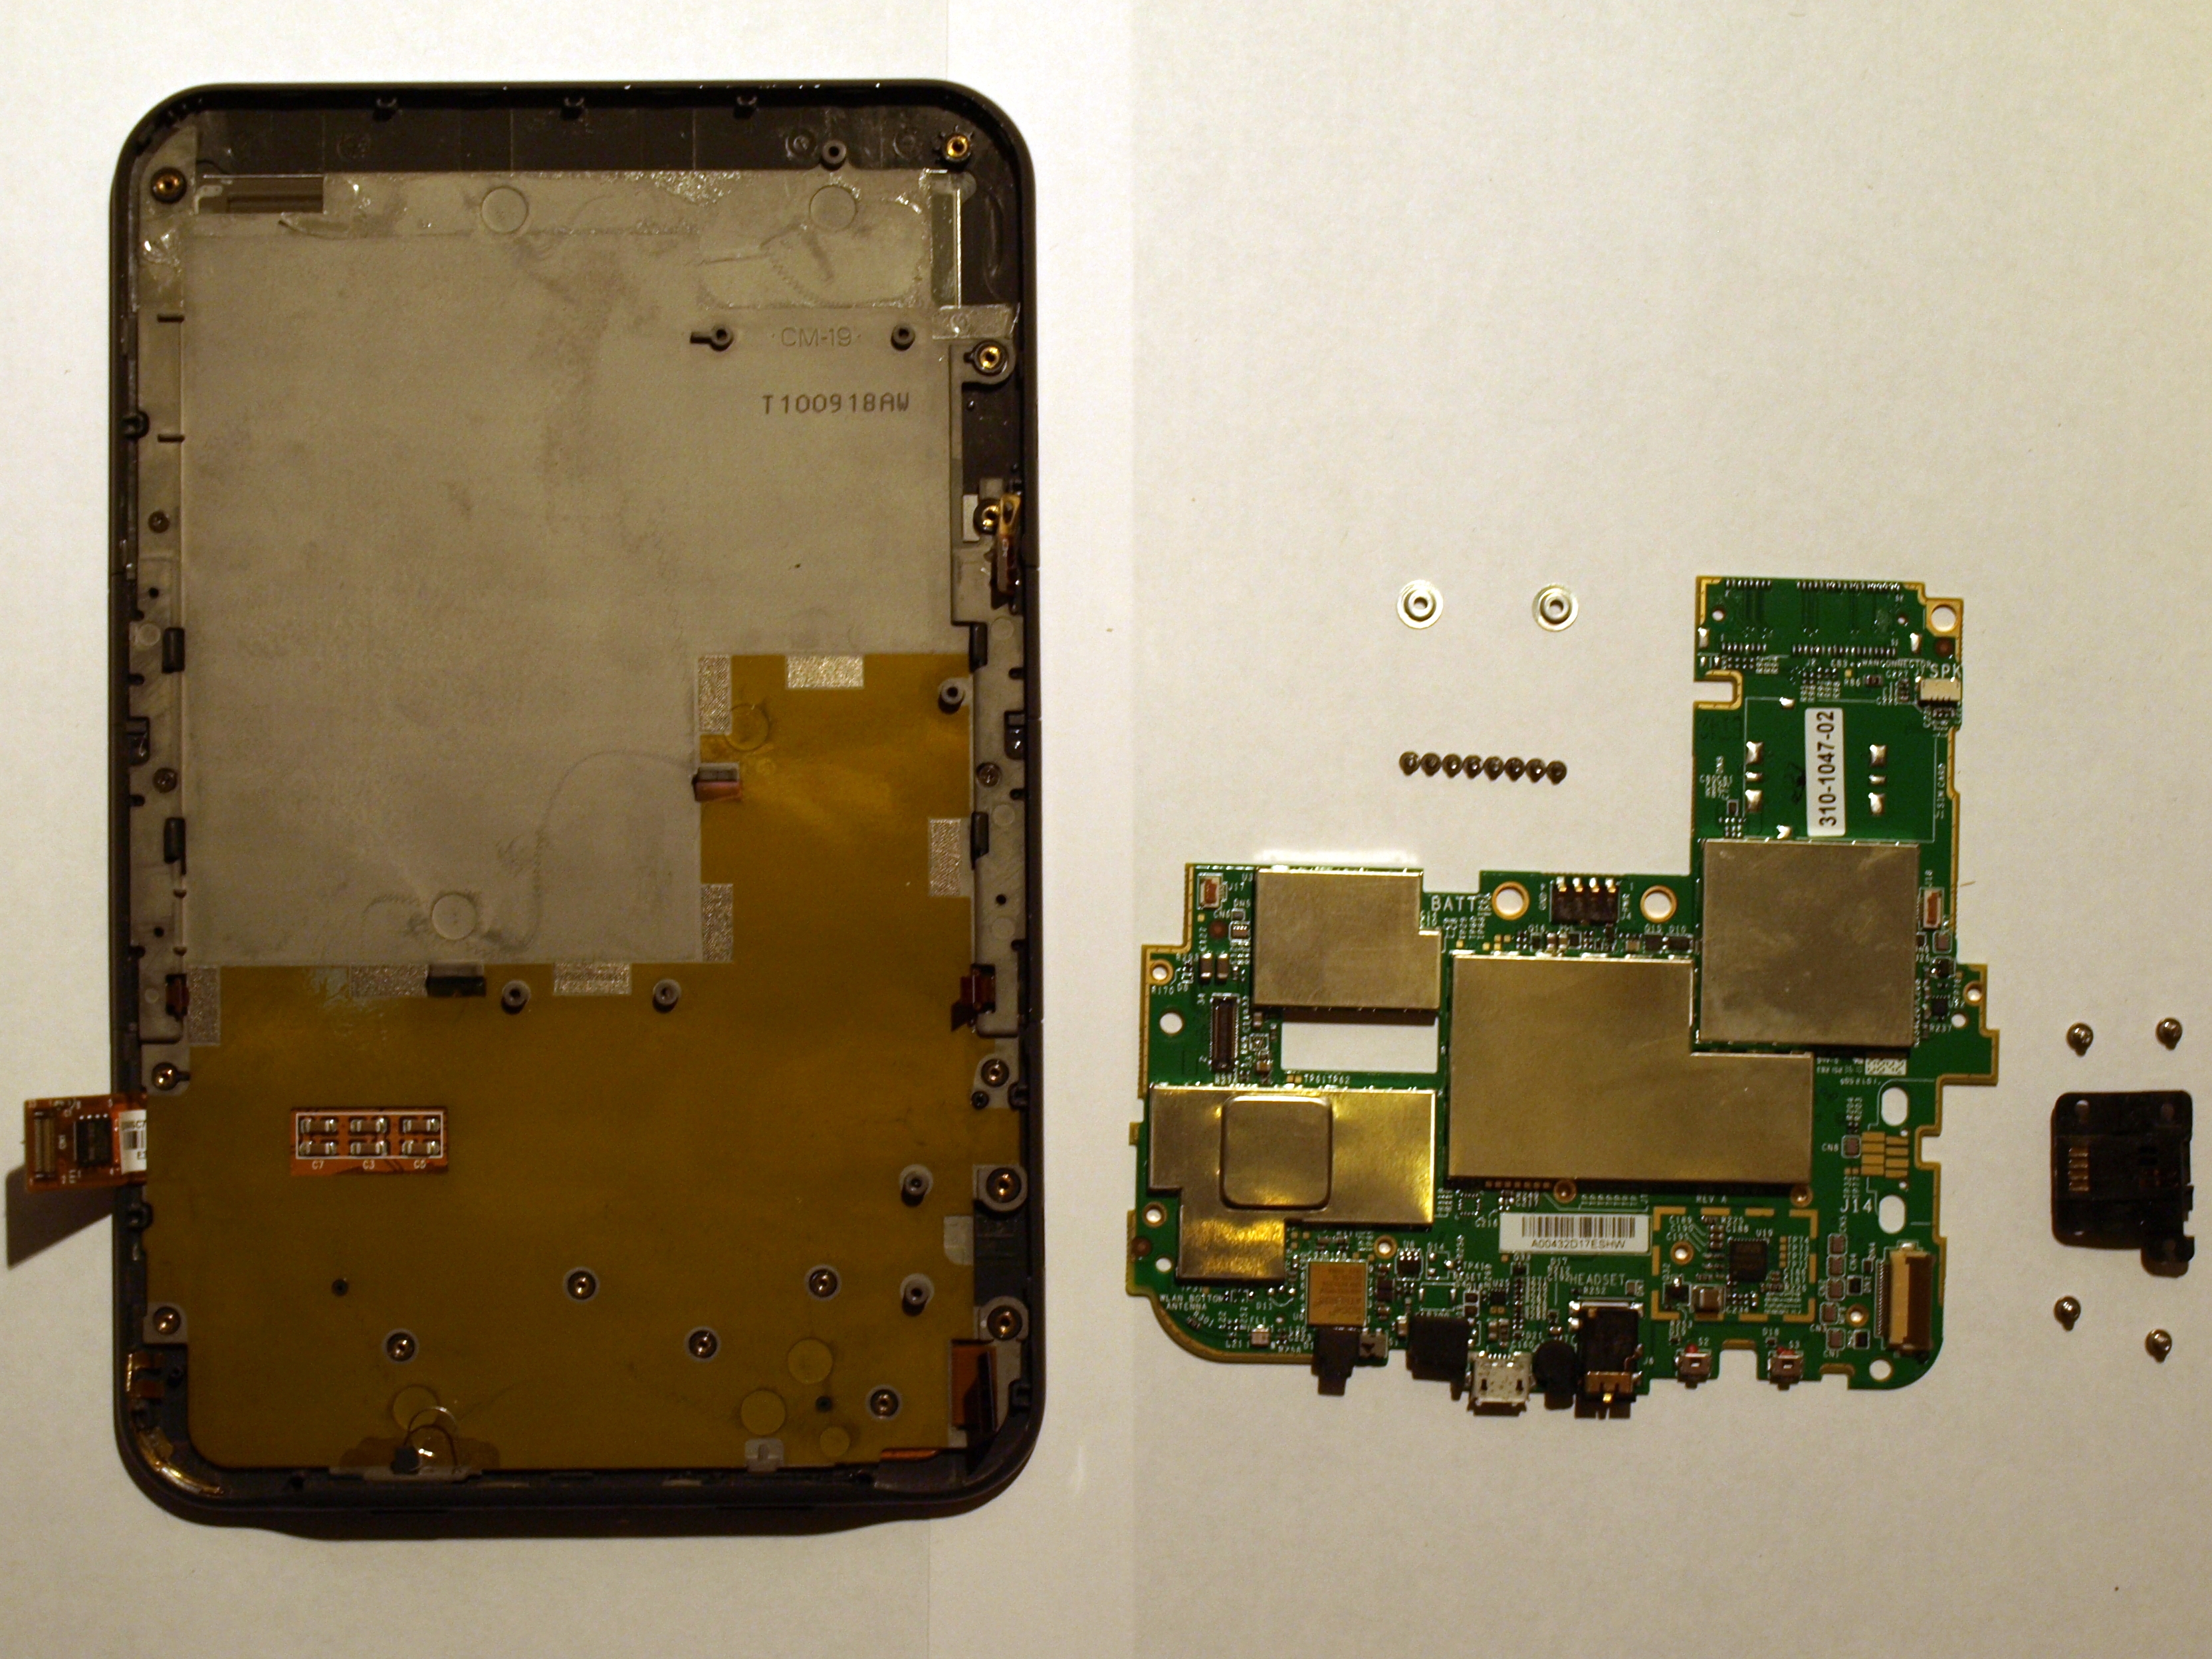
Once you’ve got in, you should see something like this… You may have a real 3G module instead of the smaller dummy 3G module (smaller black box to the left of the battery).
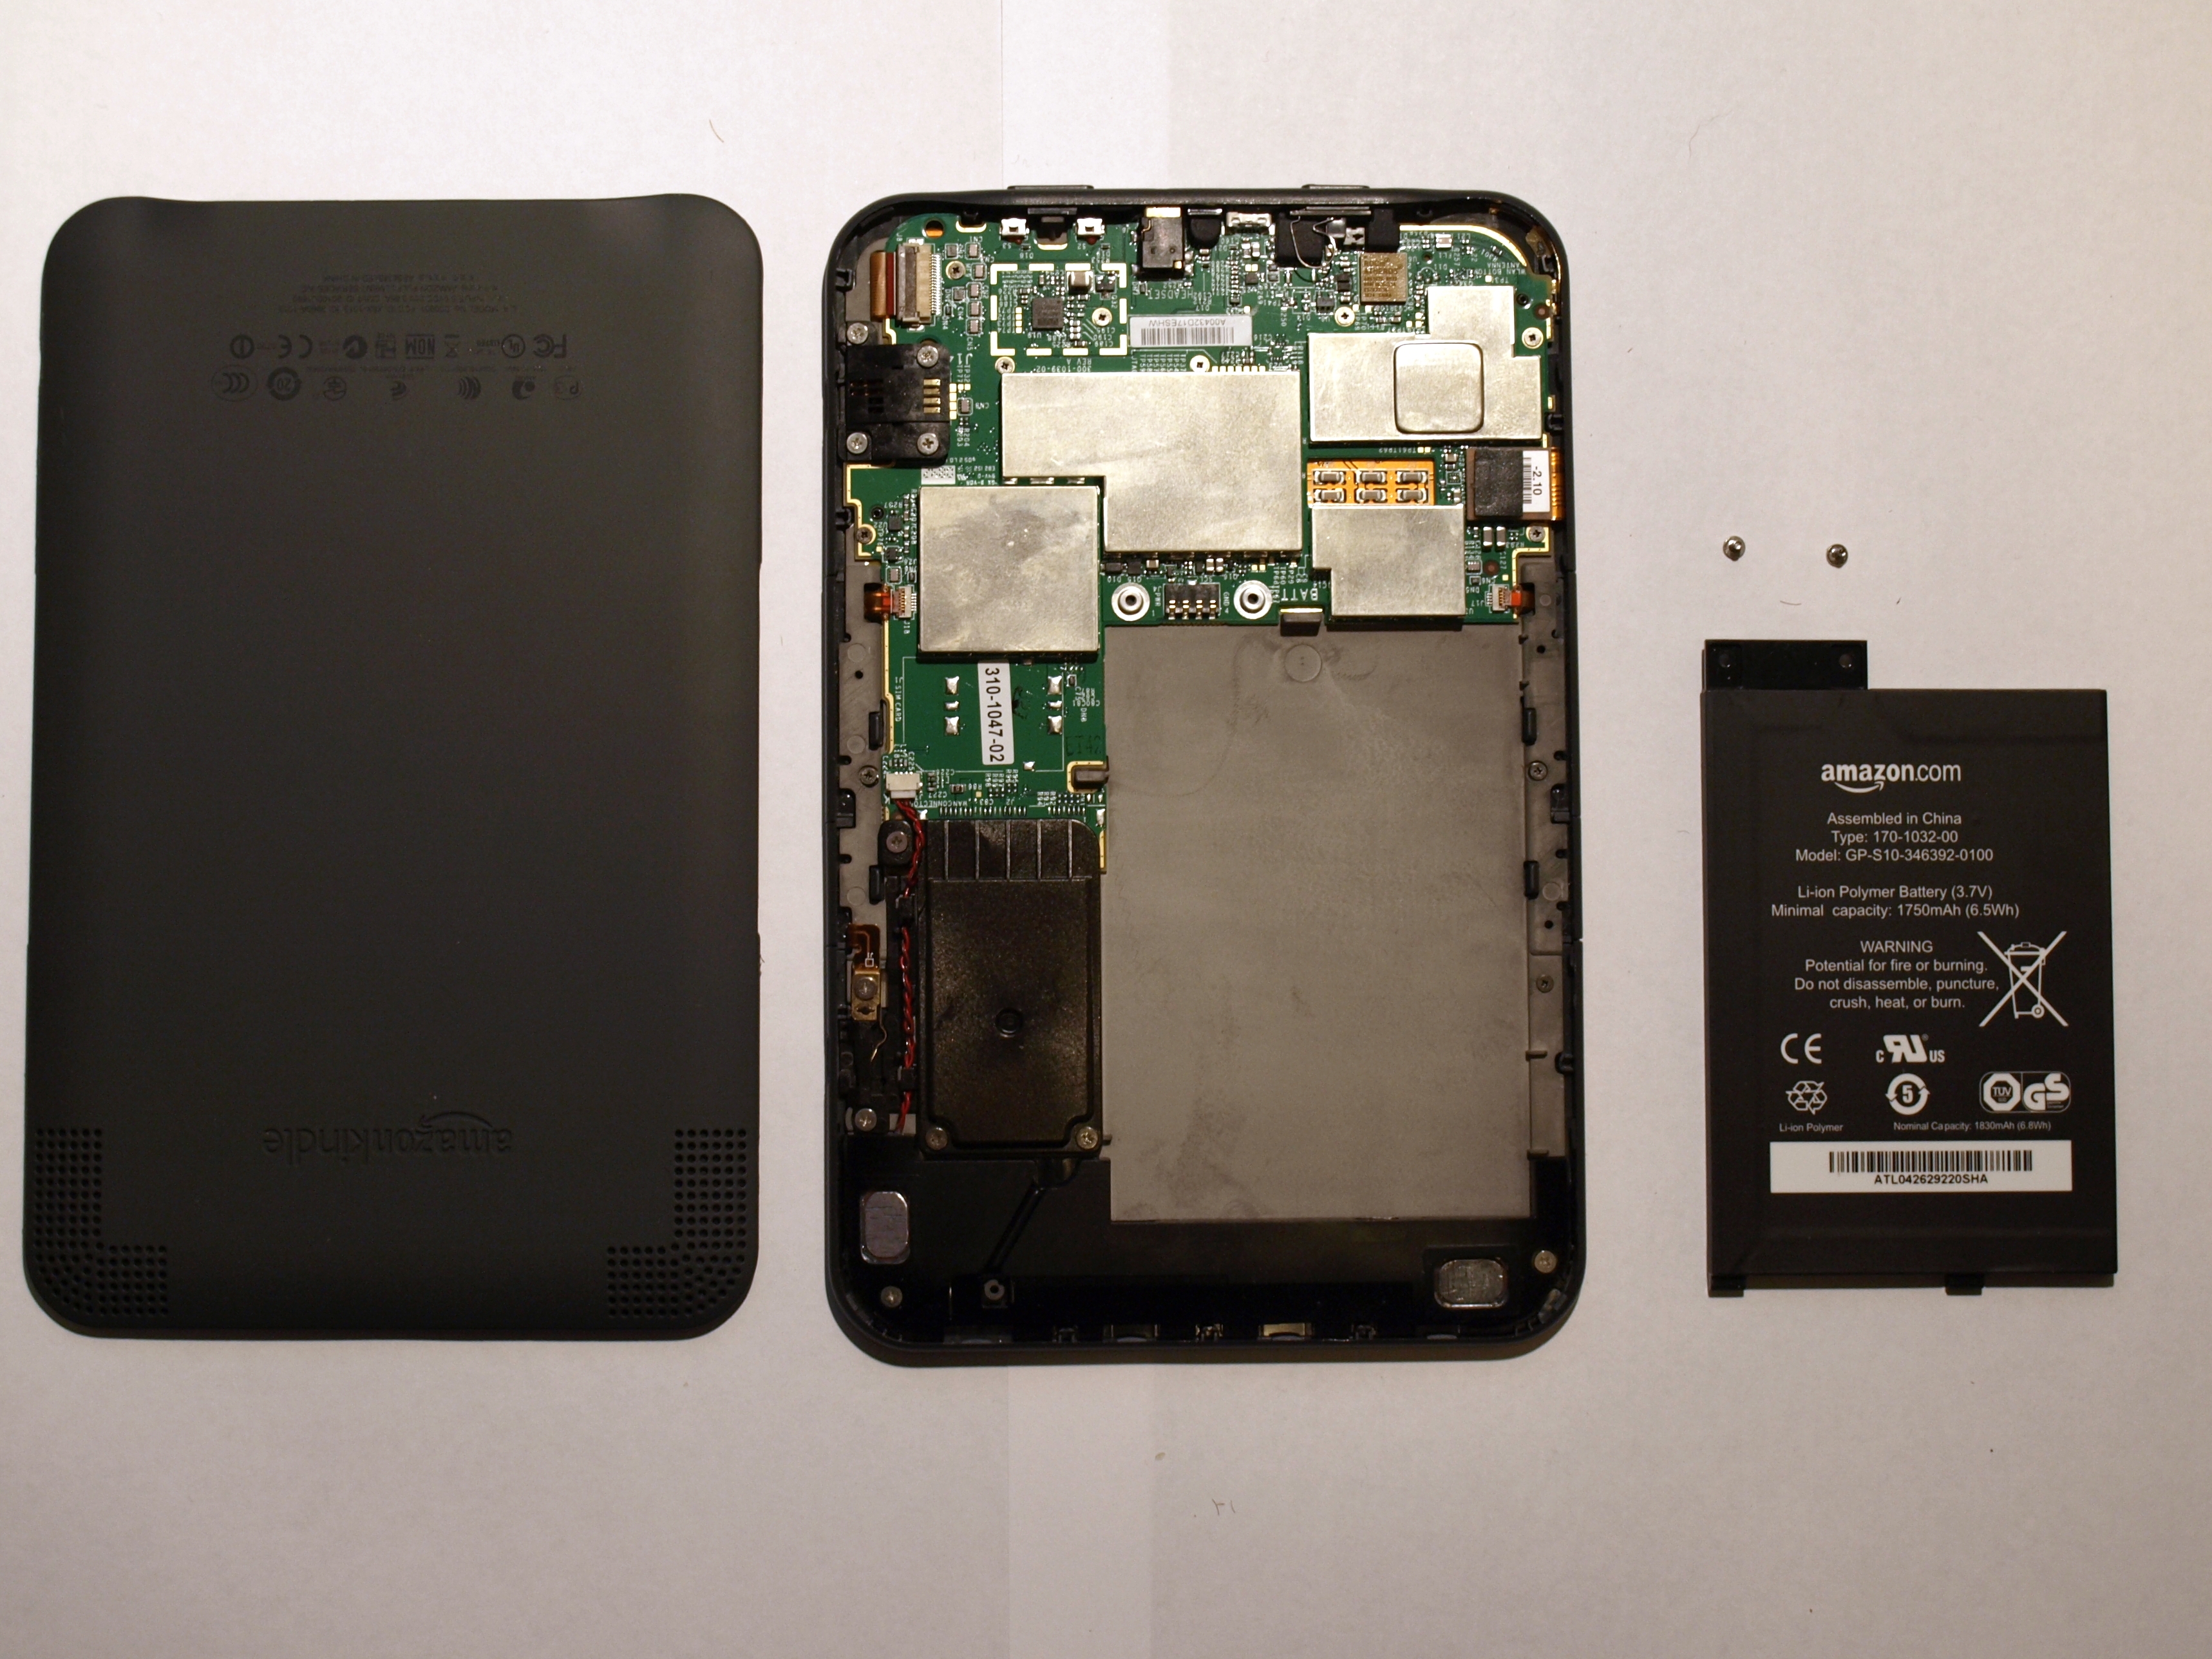
Remove the Battery
Remove the two screws from the battery, at the top and lift the tab. The other end of the battery is clipped into the speaker assembly, but it should angle out easily. Remove the two metal caps over the screw posts from the main PCB as they’ll only fall on the floor and get lost later! 🙂
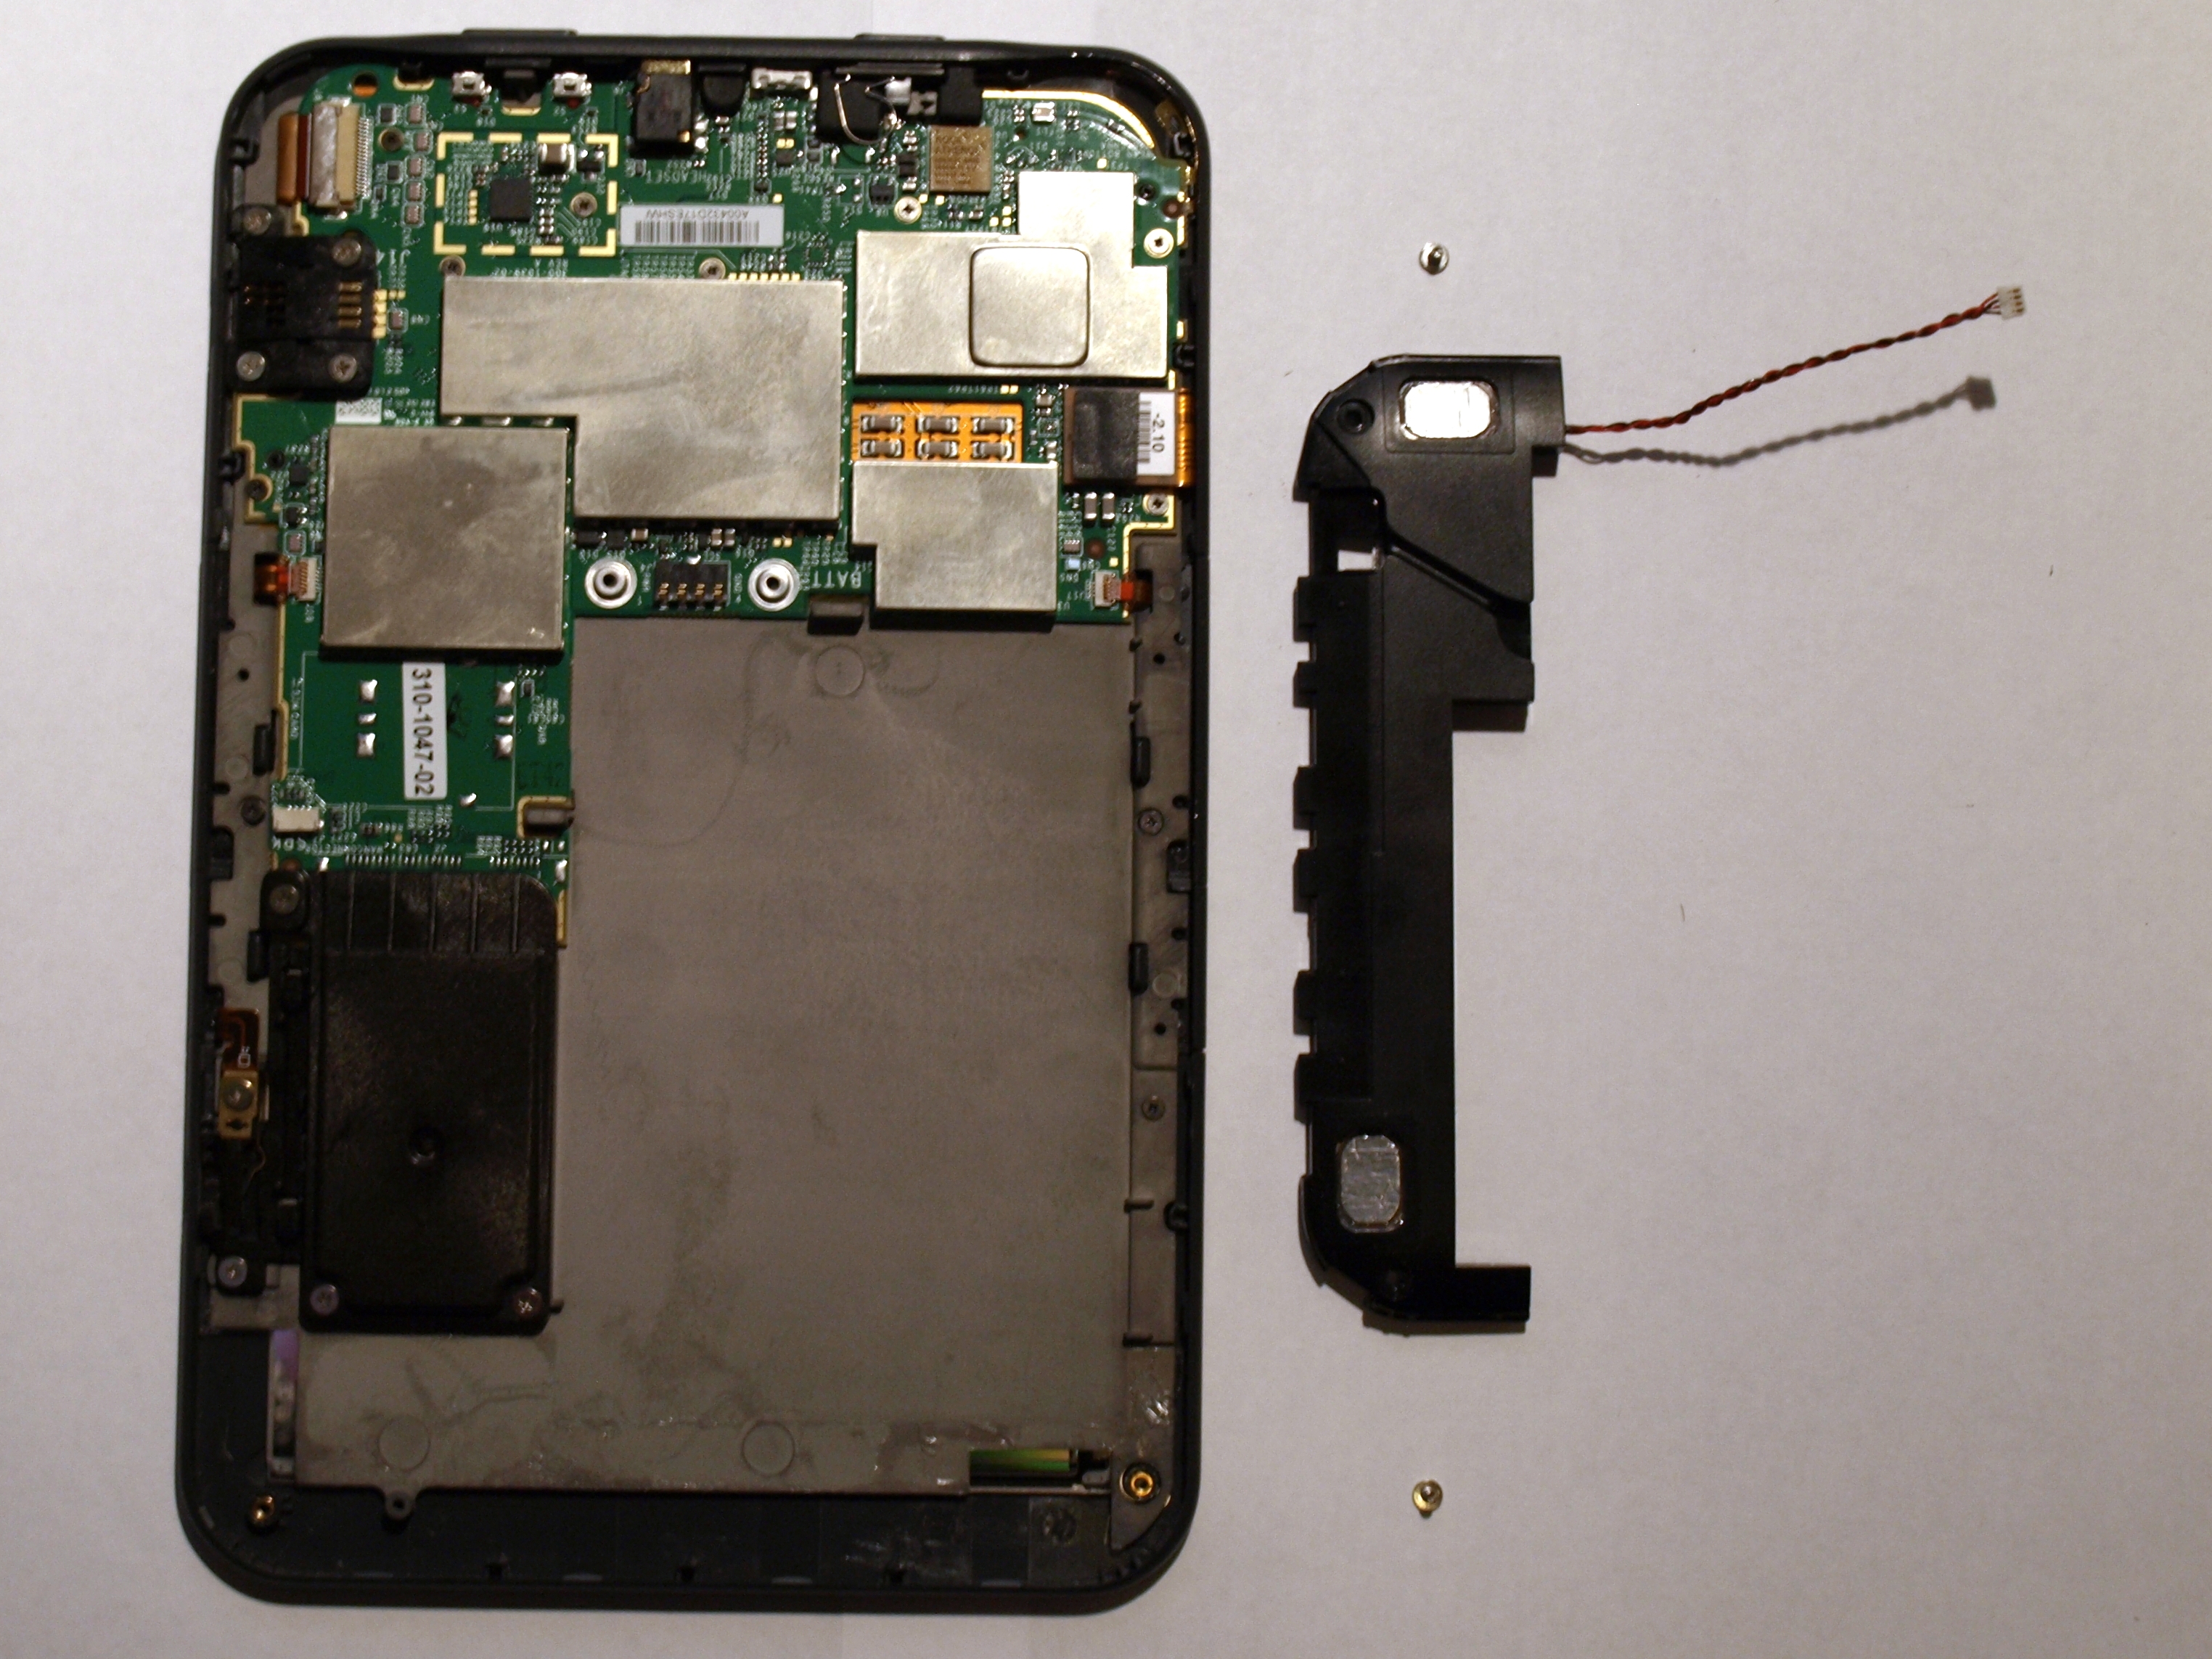
Remove Speakers
The speakers are held by two screws at each end as well as double-sided tape. Word on the internet is that this step isn’t mandatory, but I removed them for what it’s worth. Firstly disconnect the speaker wire running to the mainboard. Remove the two screws and then slide your prying tool/butter knife under the speaker assembly to separate the double-sided tape. Work slowly, giving the tape time to release from the keyboard plate.
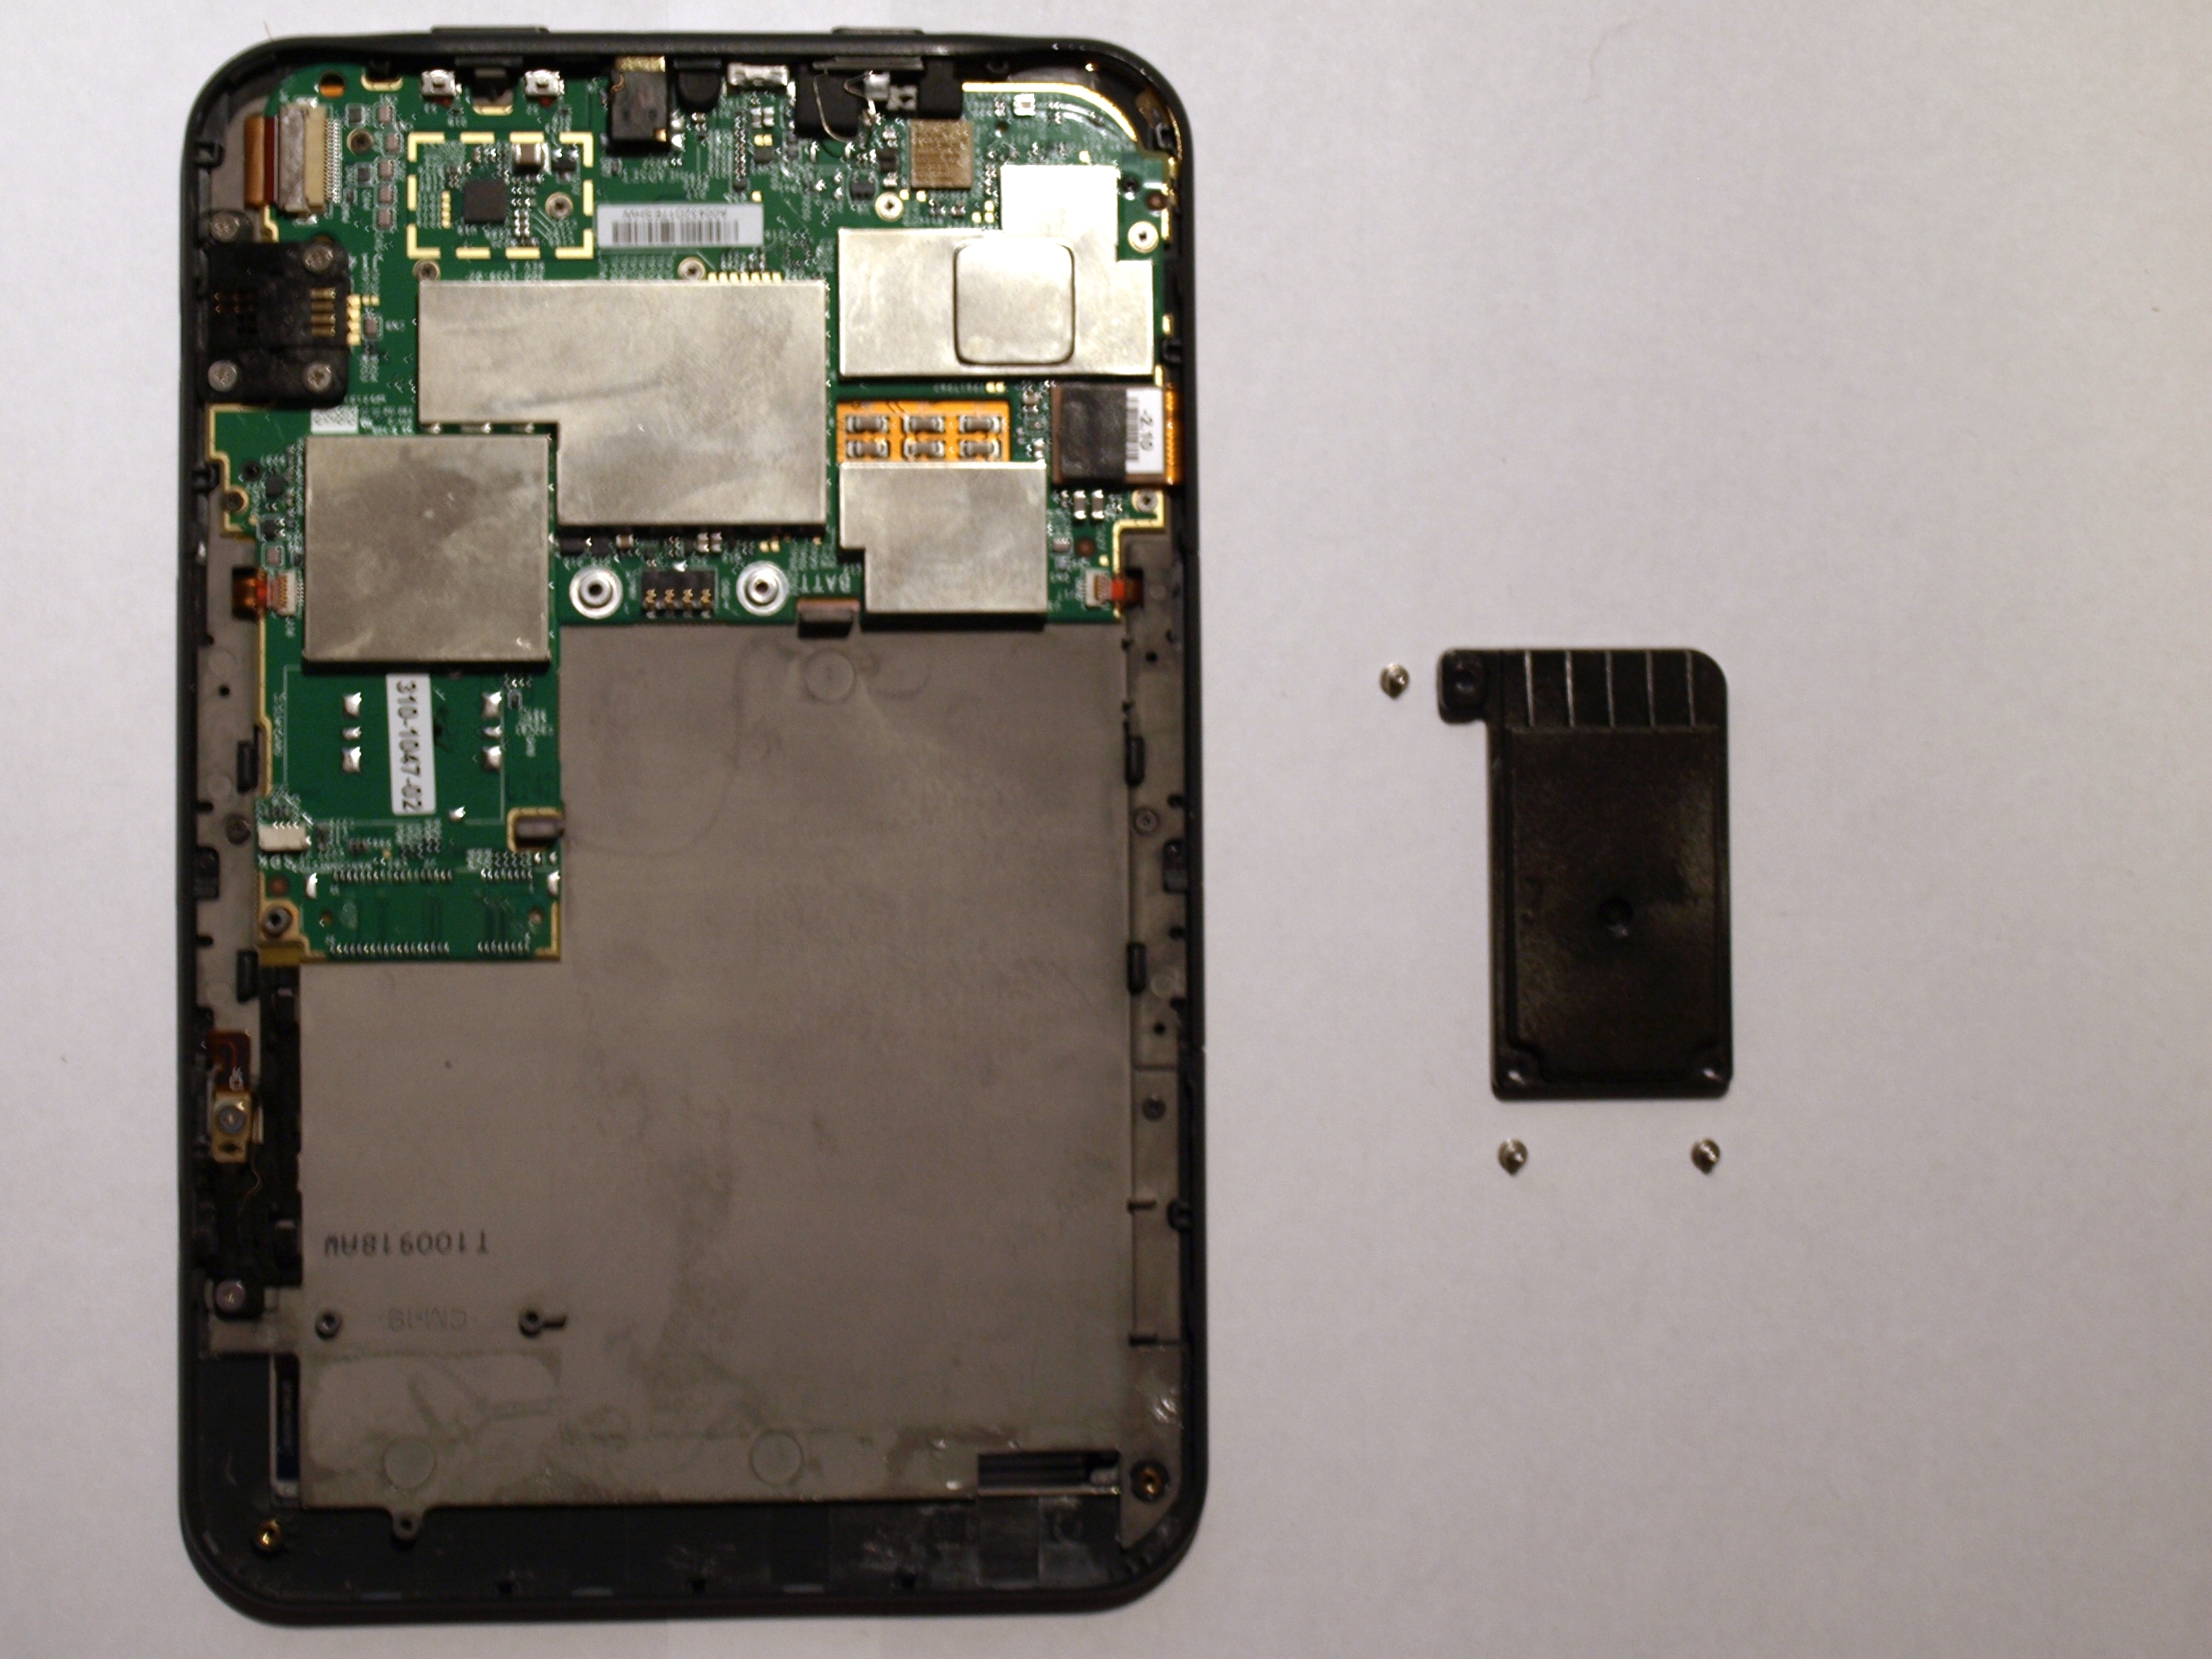
Remove dummy 3G Module
Again, word is that you don’t have to remove the 3G dummy module if you have one. You MUST remove the 3G module if you have one, else you’ll destroy the solder joints! Either way, for safety’s sake, do it. It takes less than 20 seconds to remove the three screws holding it in.
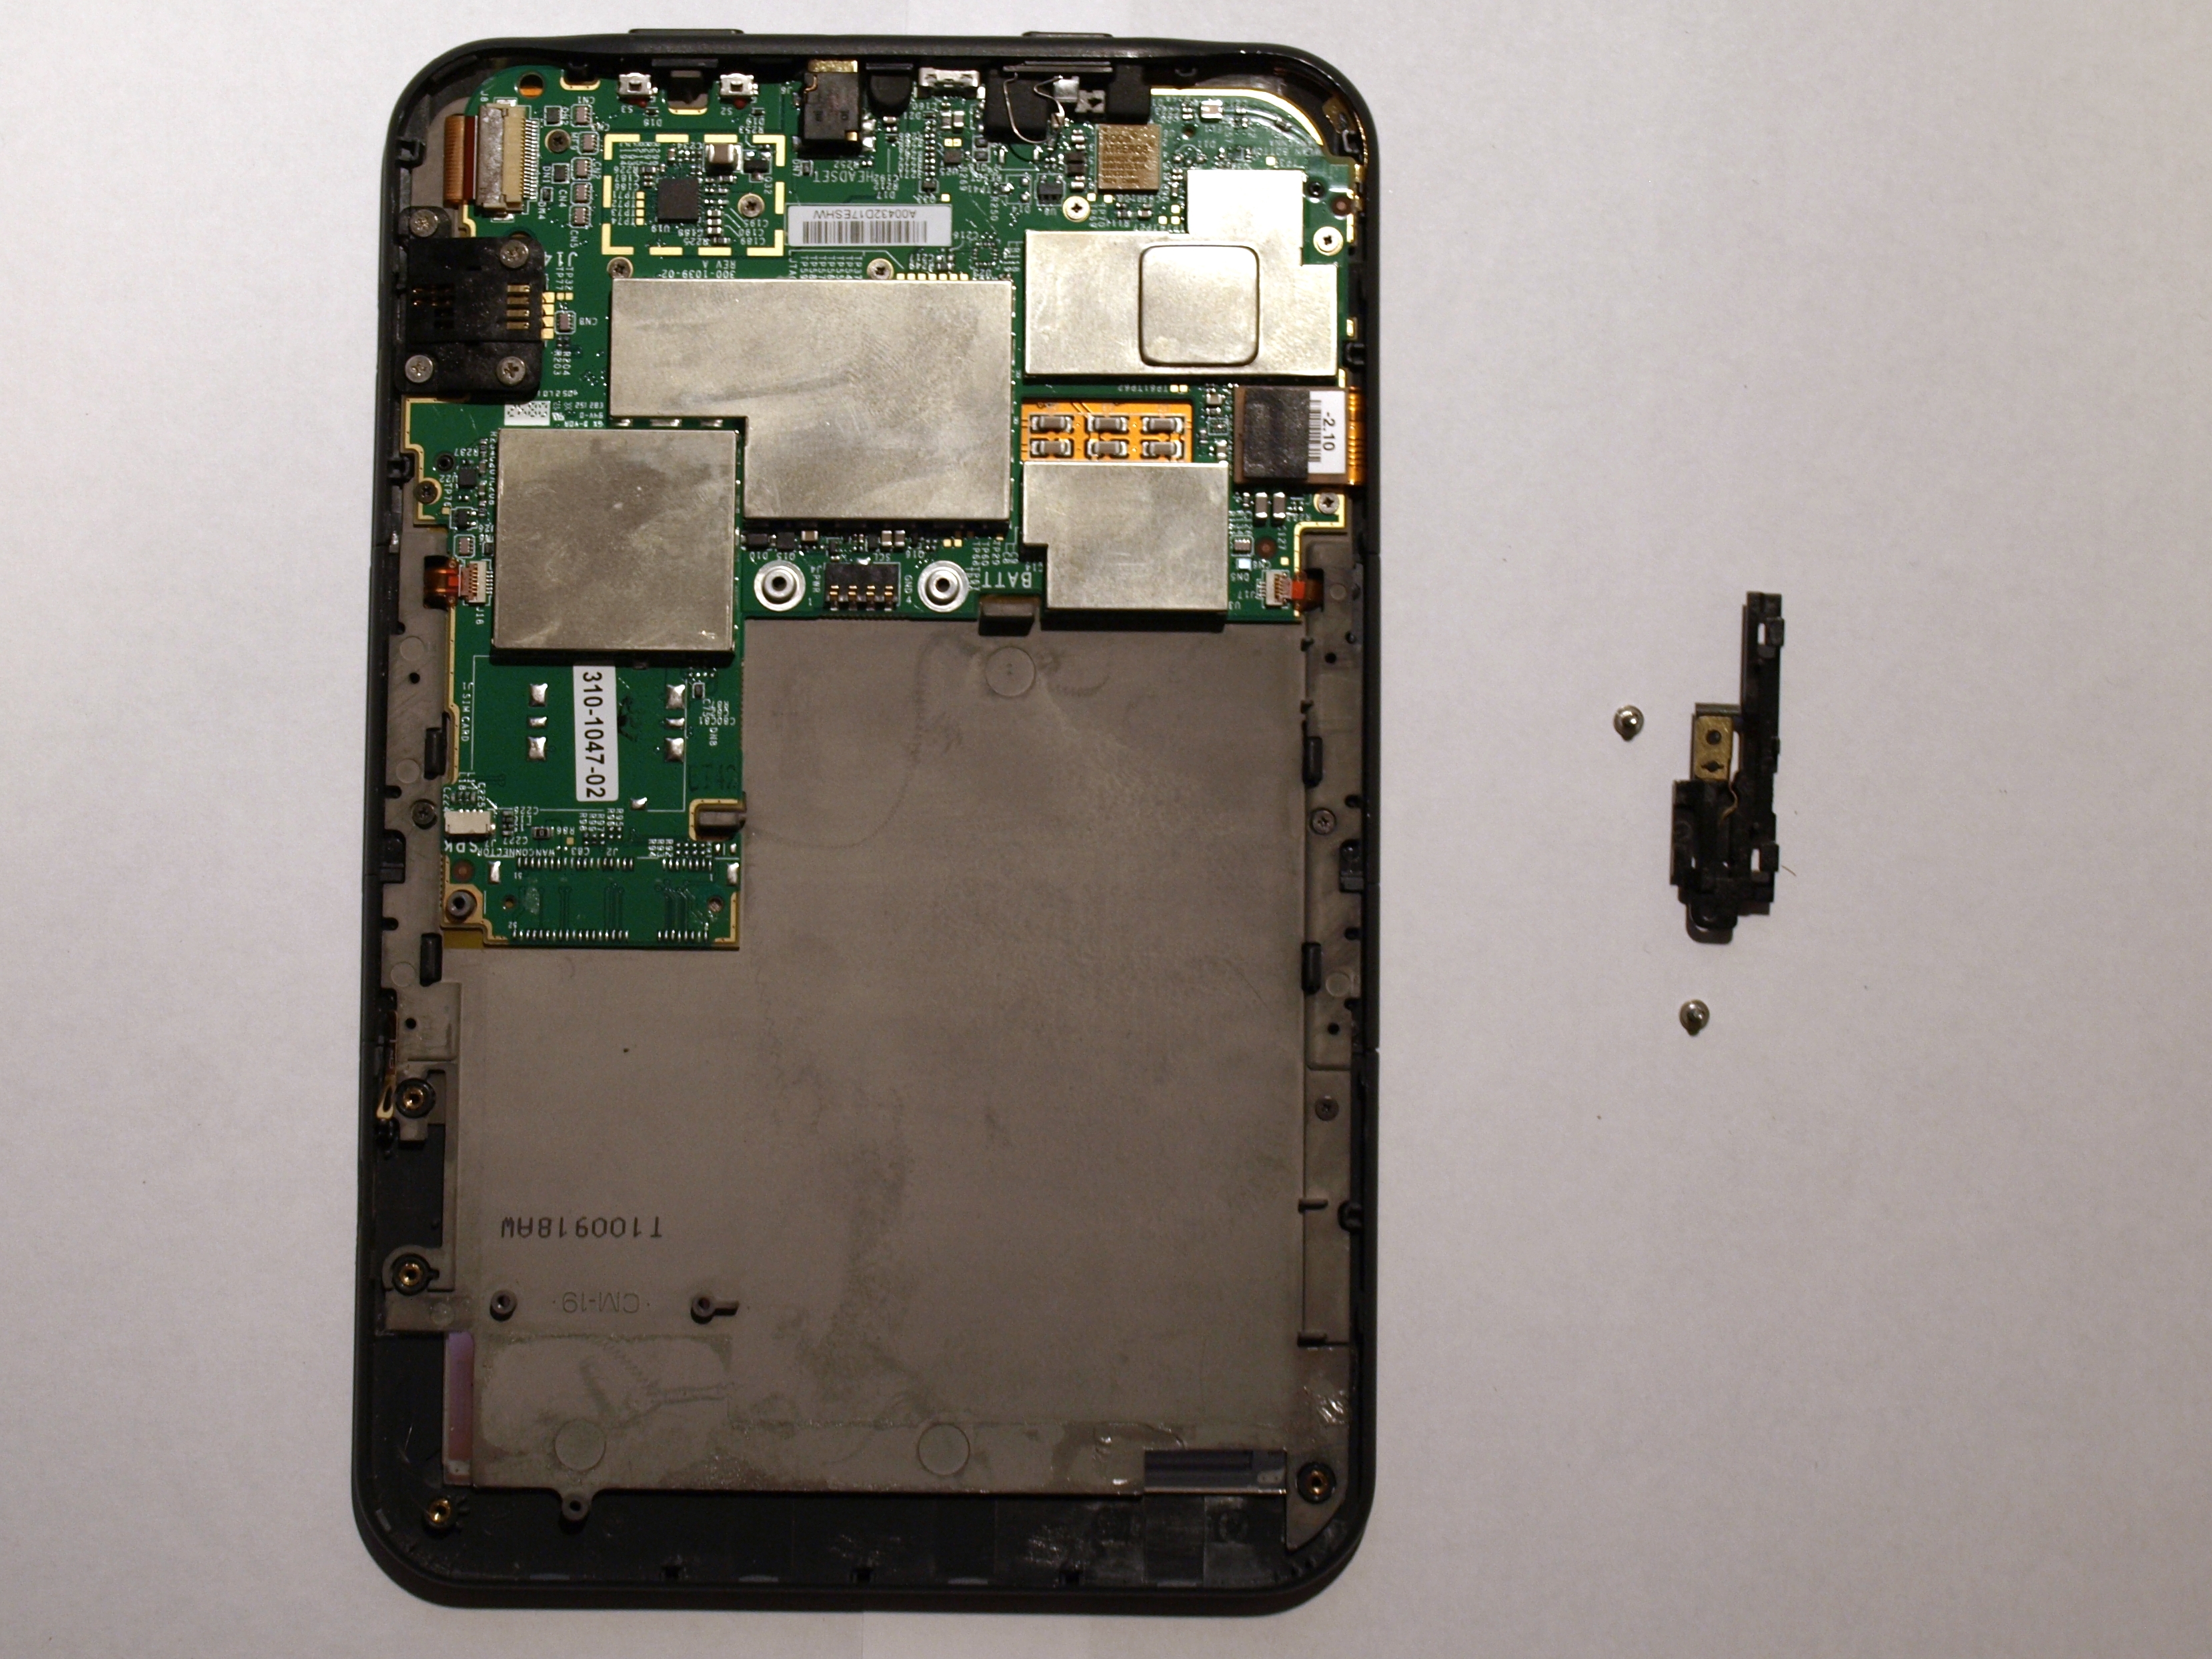
Remove Grounding
Next is to remove the grounding clip. Do this by removing the two screws firstly. Then using your prying tool, separate the metal grounding wire from the brass spring clip so that the parts are all free.
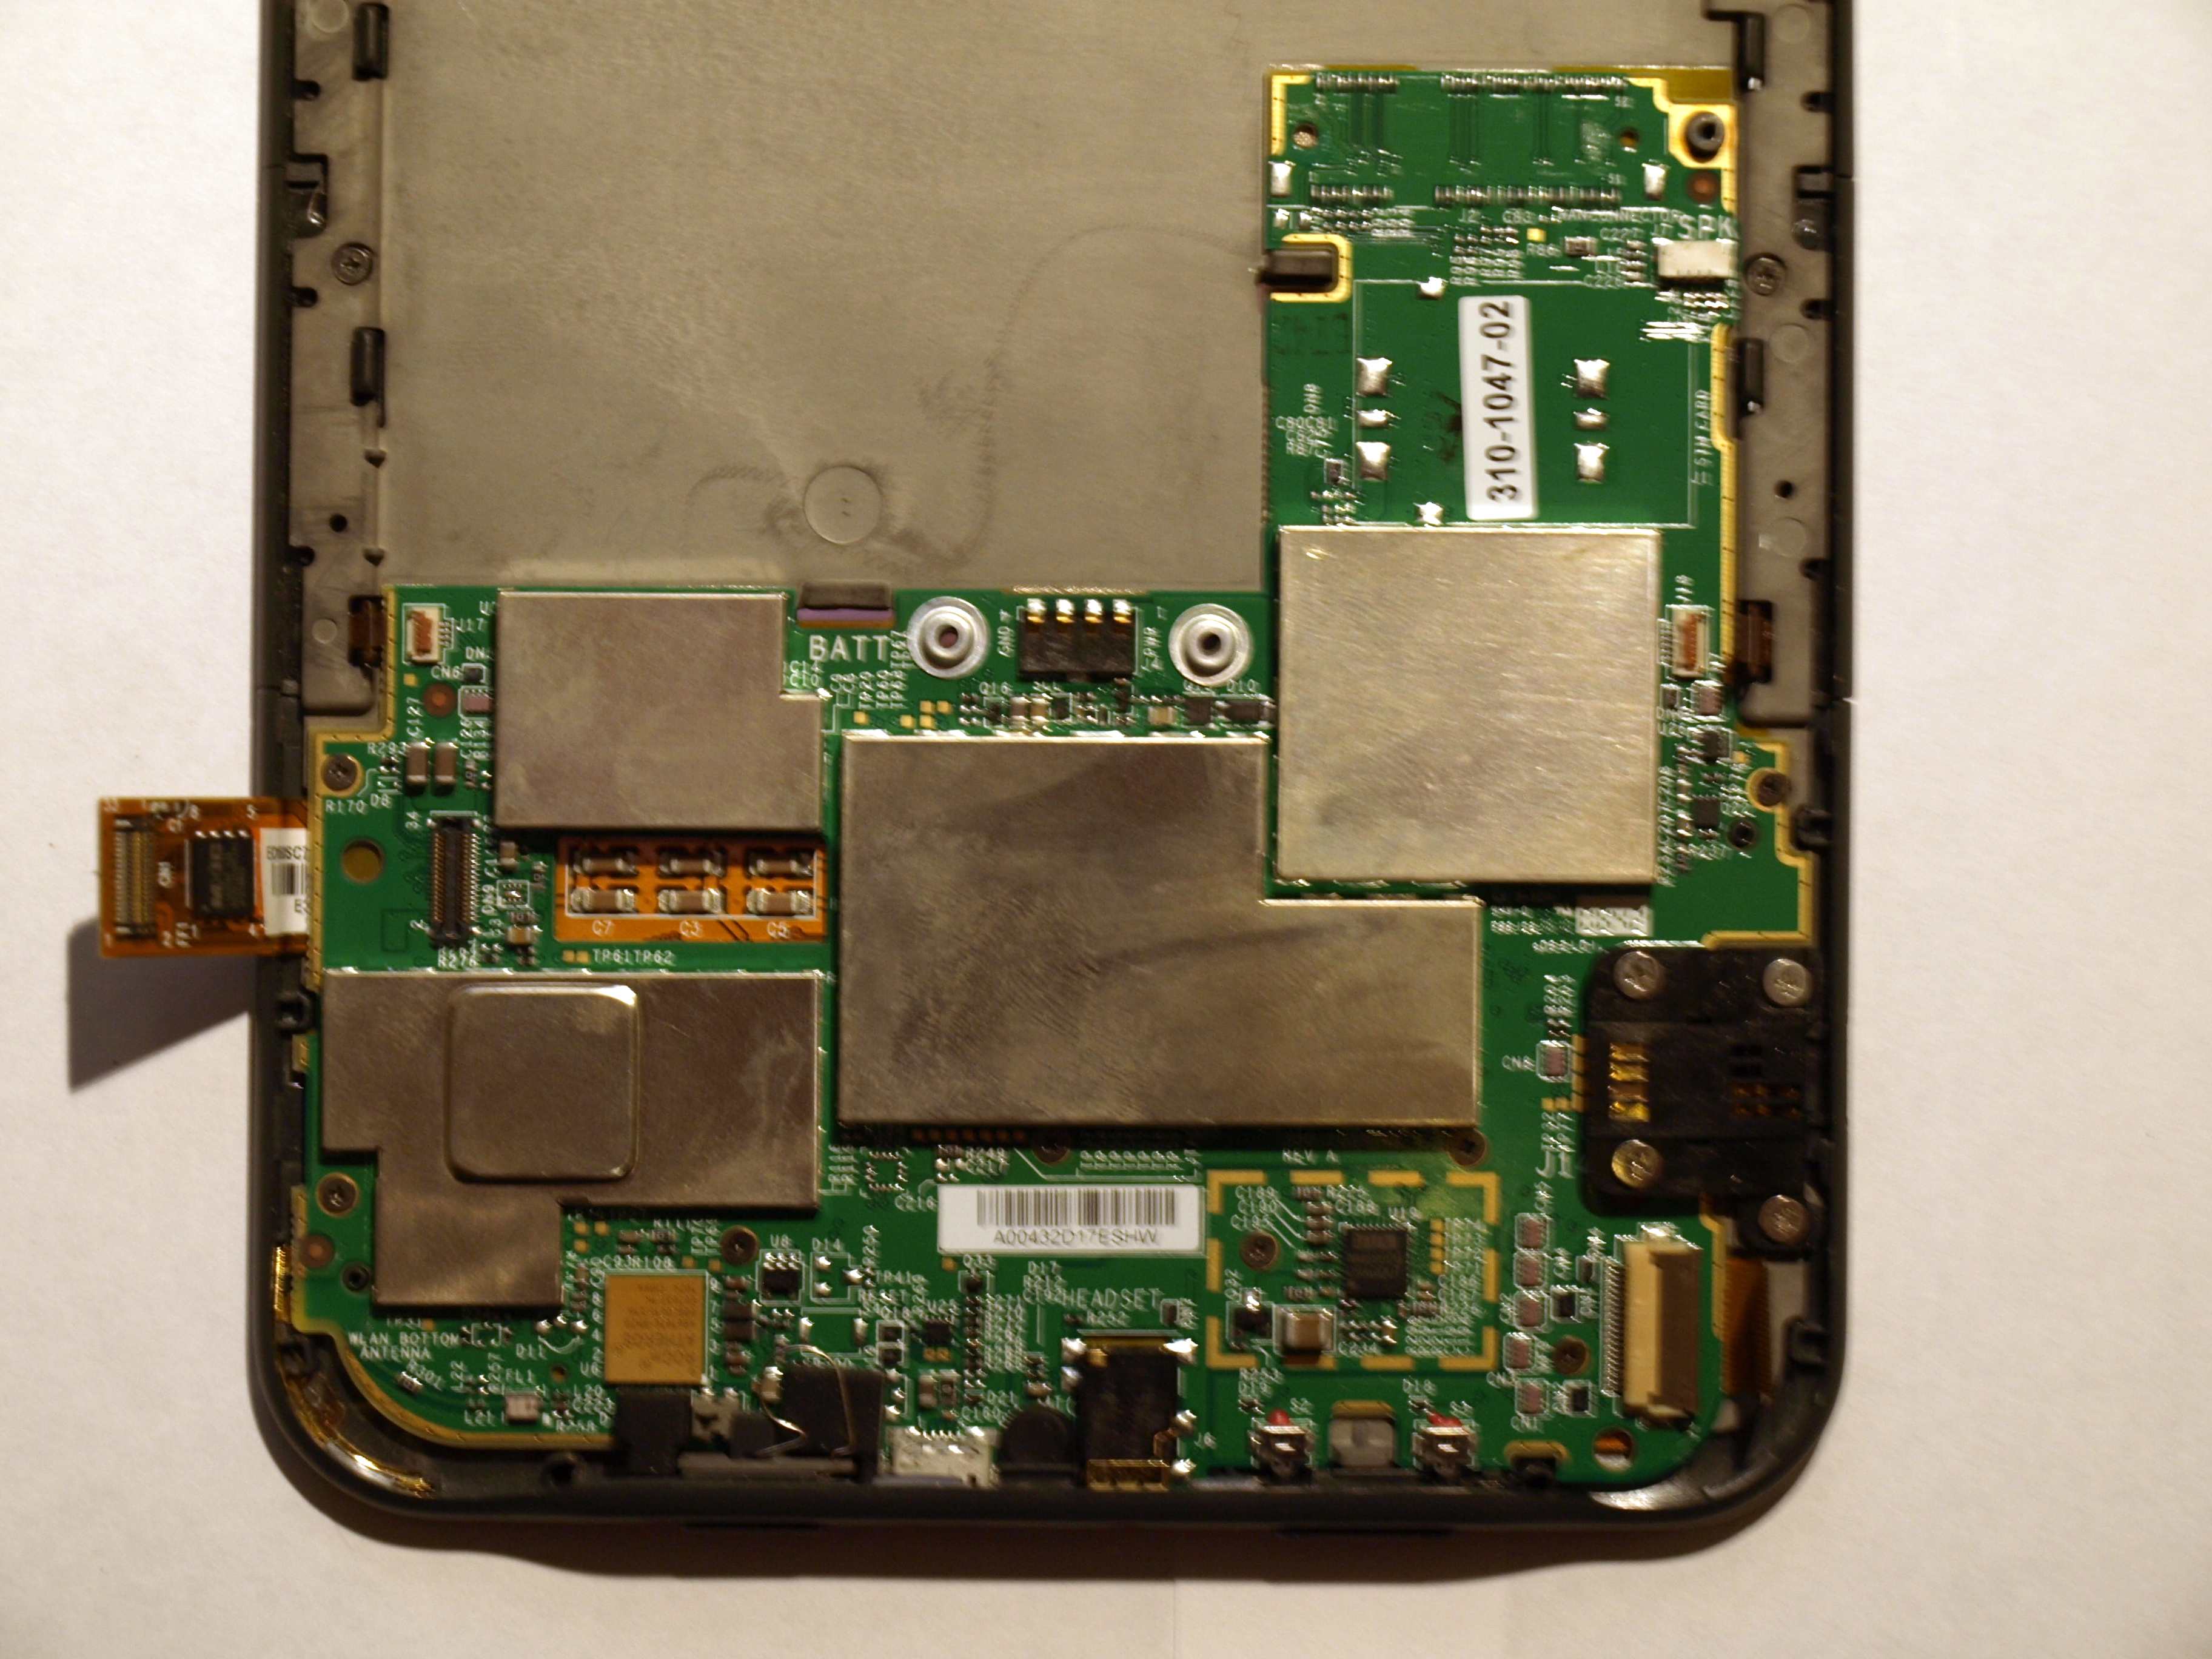
Disconnect Wiring
Next disconnect the wiring. There are 4 ribbon cables to remove. Looking at the picture, the top left of the board (where the battery fits) has a small connector. There is one on the exact other side of the board at the same height. These two are the page buttons. They have locks on them; Lift the front of the connector up, and then once unlocked, remove the wire carefully.
The larger two are for the E-Ink screen (left middle, hanging out) and the keyboard (bottom right). The screen connector pops off, and the keyboard has another lock.
Remove PCB
Remove the screws holding the PCB in. Do not bend the board or pull at it. It comes away easily once all the screws are removed. If it doesn’t then bending it can crack the solder joints and paralyse your Kindle. Lift the top end up, and the board will come, then gently pull the board from the bottom.
Remove Keyboard
Next you need to remove the keyboard assembly. This is held in by another 3 screws. One in the middle of each side’s page buttons, and one further up on the screen cable side – see the picture for screw locations. The volume button comes out with the keyboard plate; don’t loose it!

Remove Screen
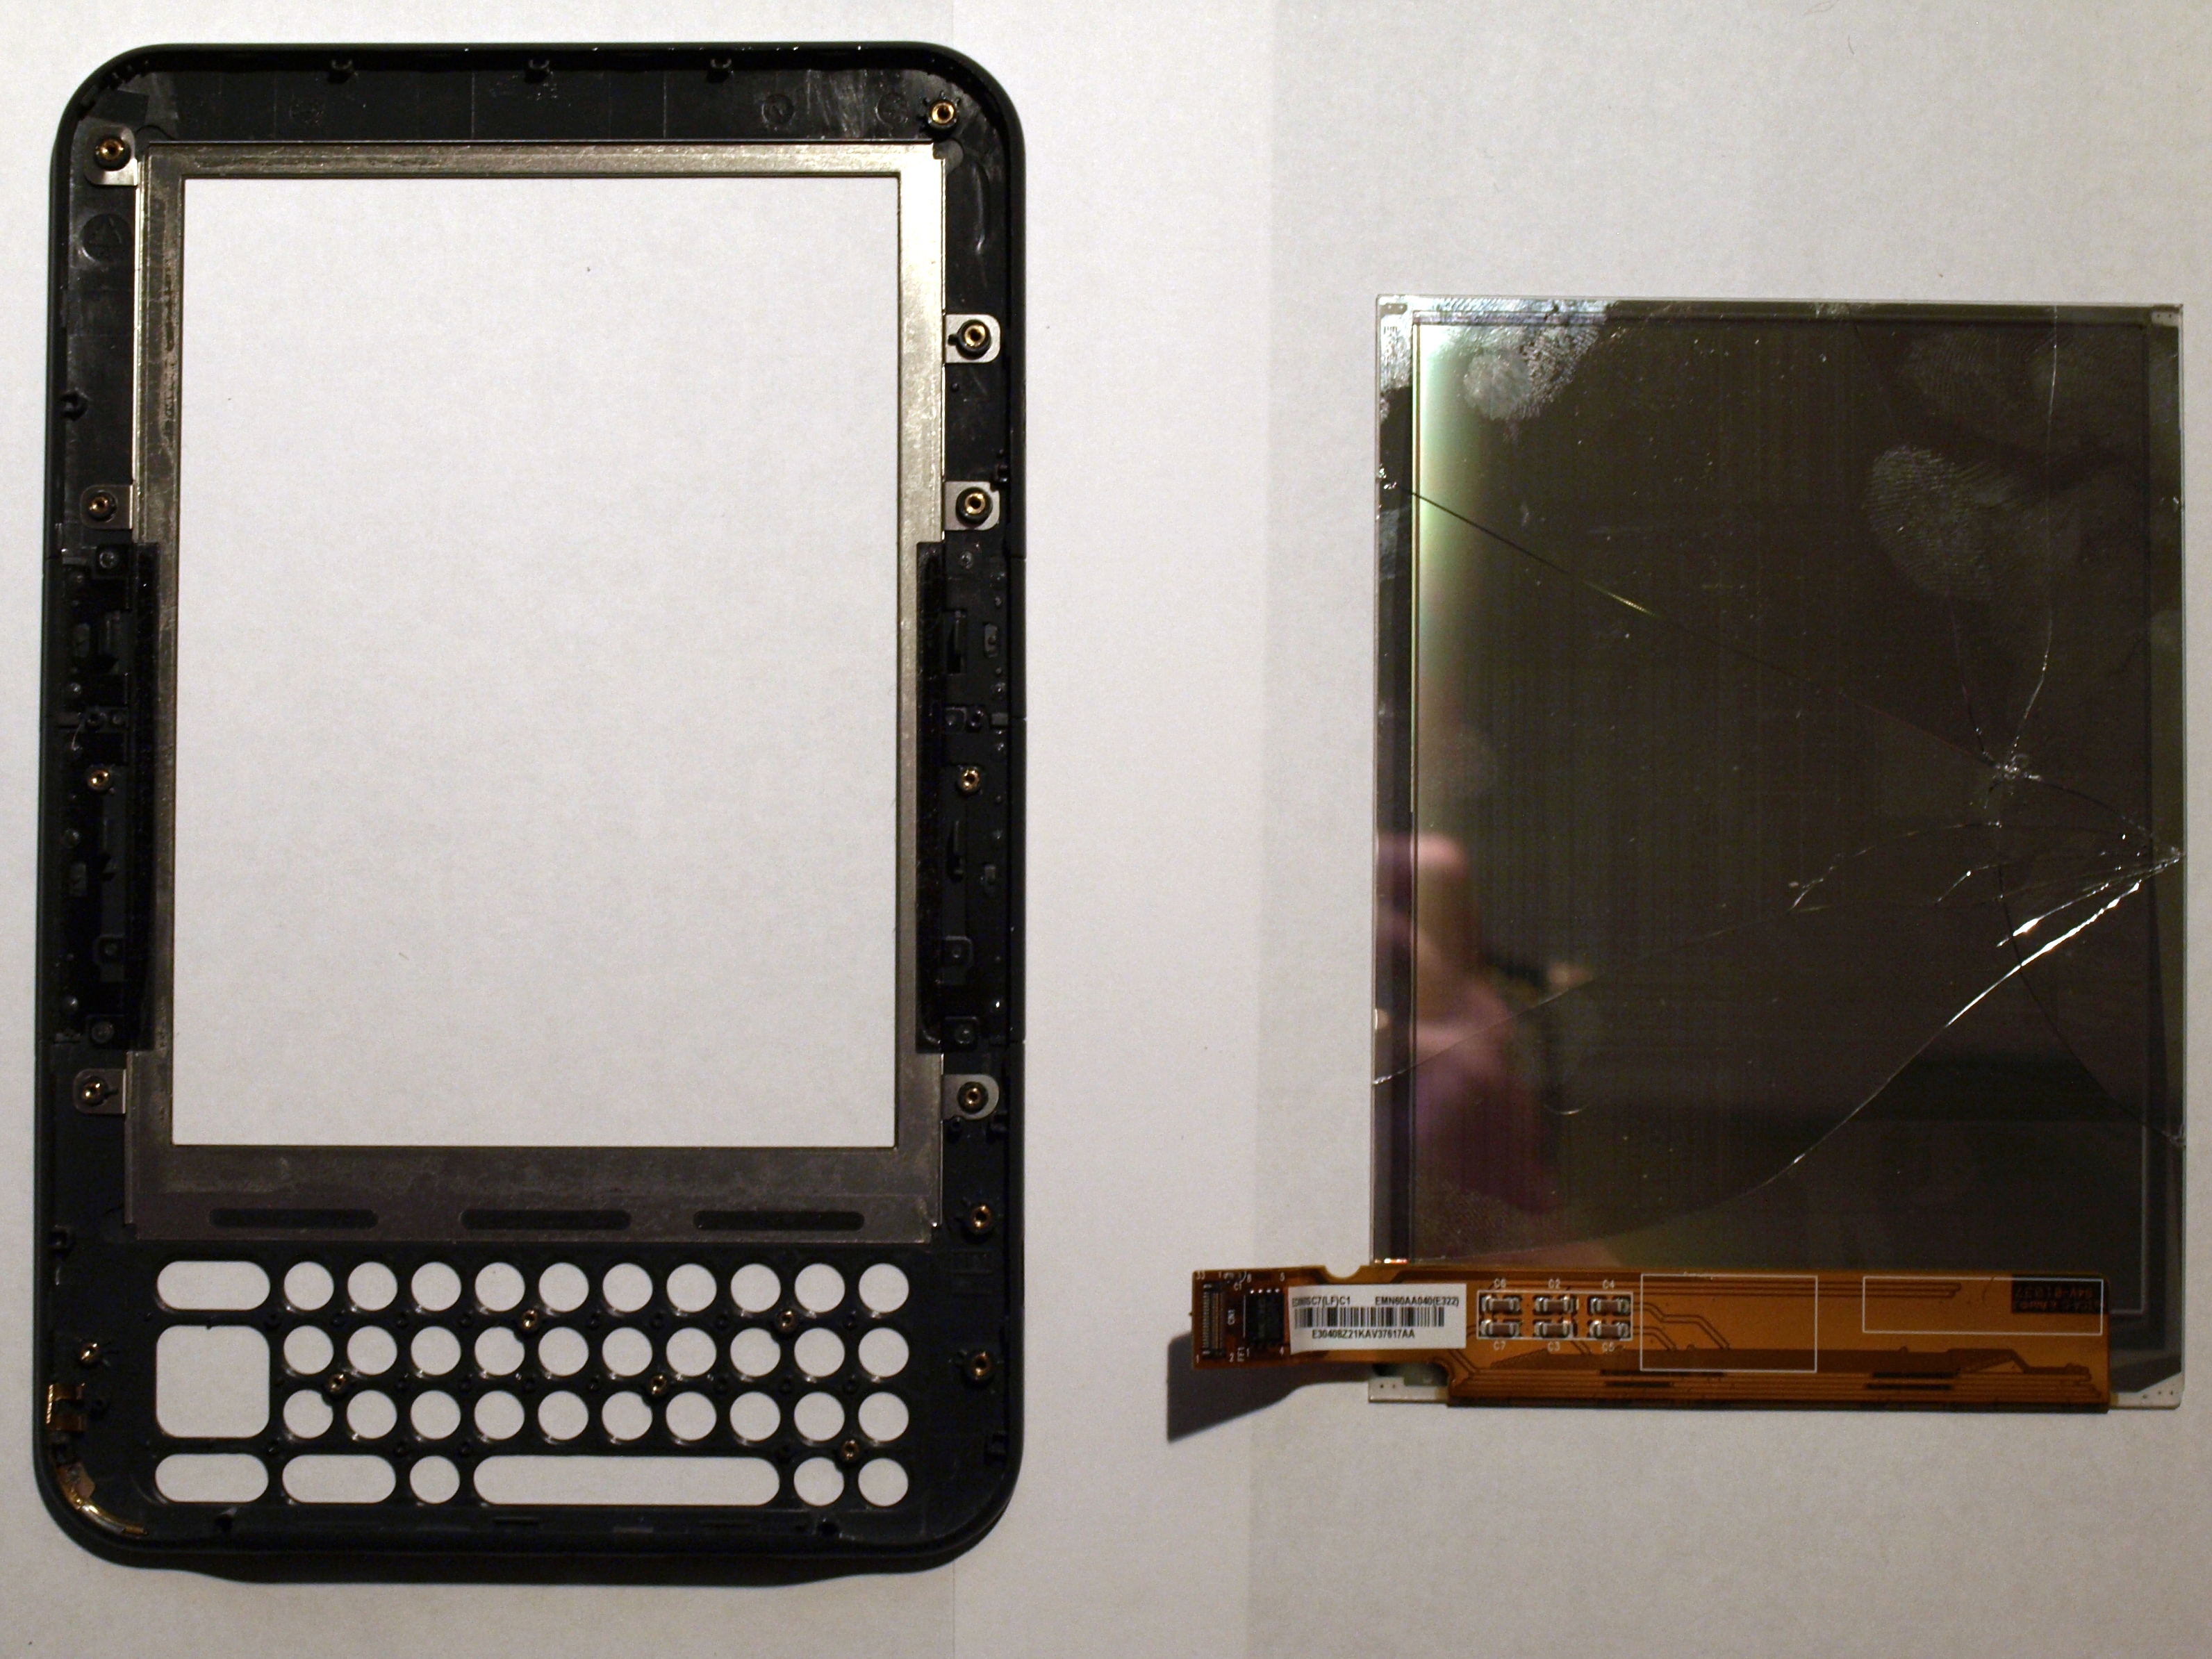
Finally comes the removal of the screen. The damage is clearly visible on the back of the E-Ink display; a crack and shatter pattern all the way from the impact point out. If your screen is not damaged here, or you’re taking a screen from another Kindle be very careful as they’re very fragile and have no rigid frame – the front’s strength comes from the screen, not the plastic!
As you can see, the metal grounding frame stays in the Kindle, and the screen is double-sided taped into the metal frame. I was a little rough on my screen to get it out, and damaged the screen further. There is no screen front on the display. Touching the Kindle screen is to touch the front of the E-Ink module. There is no plastic screen front, as such.
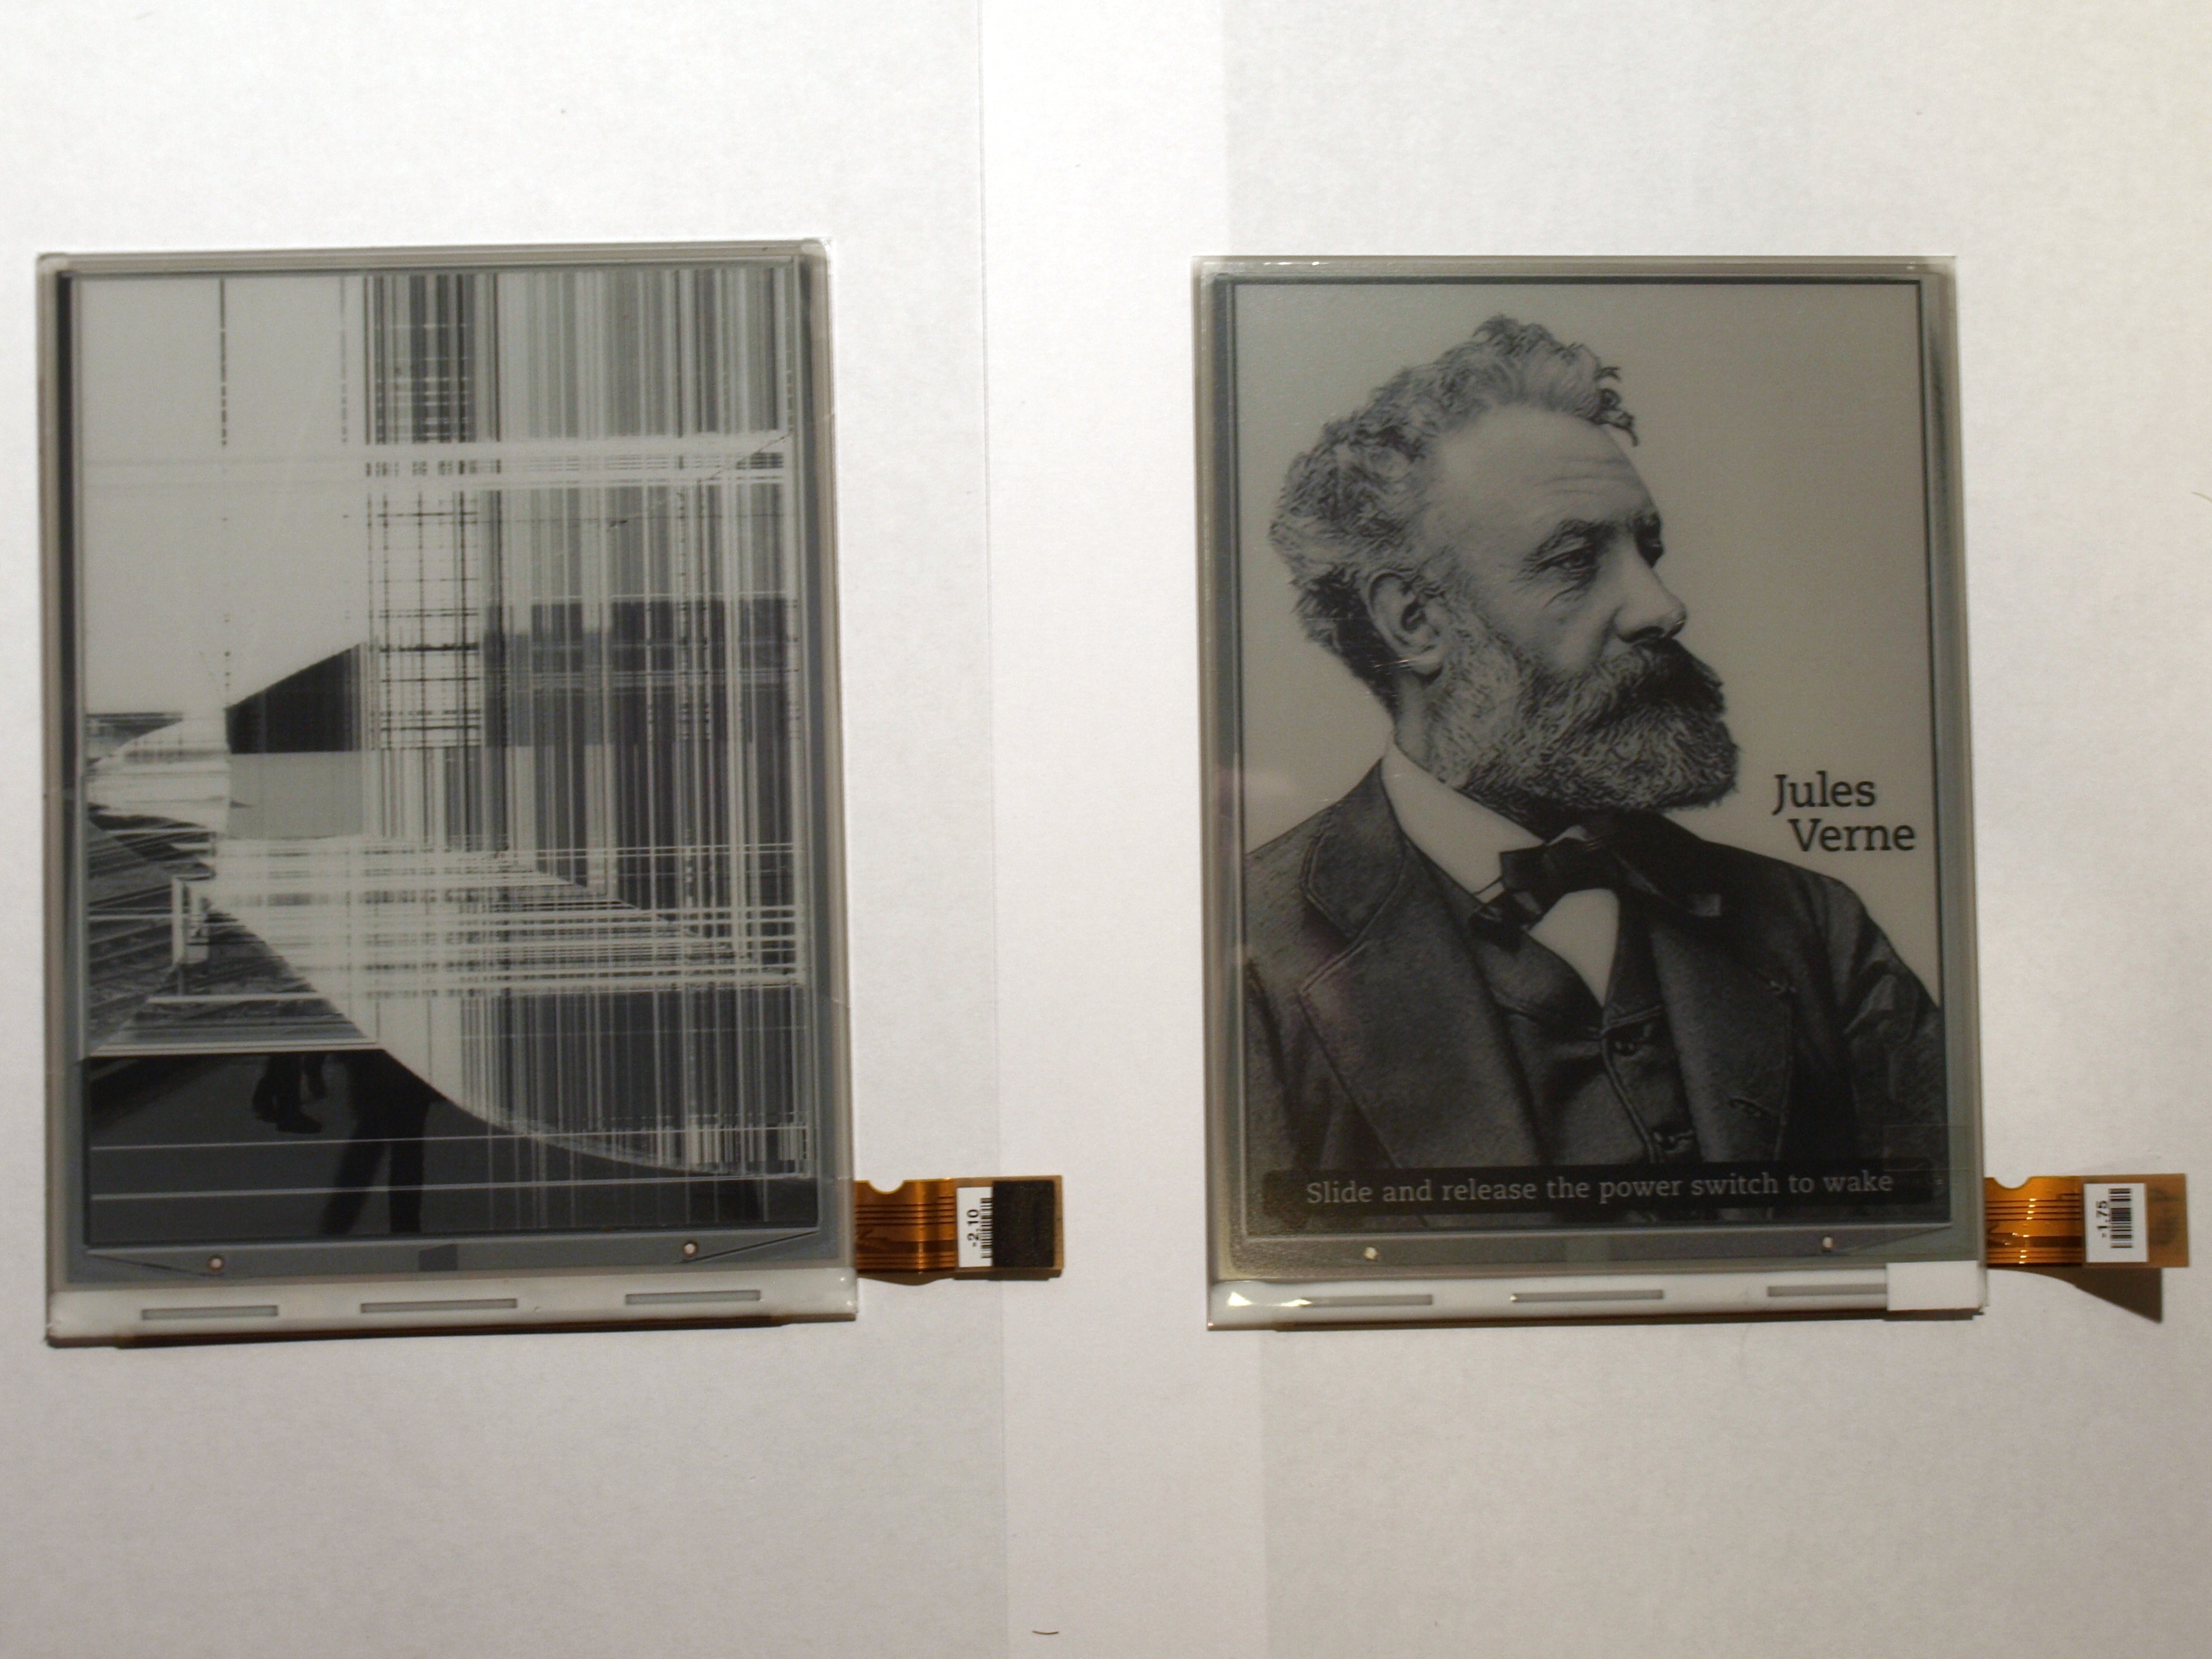
Here you can see the two screens, old and new. The new screens come with the image on them which lasts during delivery – a true testament to the technology!
Reassemble
Once you’re all done, put the Kindle back together in the exact reverse order. Starting with the display, get it nicely positioned in the top of the screen holder frame, and push gently and evenly on the edges of the screen to stick the screen into the frame. Don’t press the centre as you’ll destroy it. Be careful!
Once your screen is in, and looking correct from the front, then install the keyboard plate and screw in the 3 screws, carefully checking the display is okay and fitting nicely. The volume rocker comes out with the keyboard plate, so put it back in. If it’s become dislocated, the + goes closest the headphone socket. Put that back and check it rocks freely and moves back to the centre point at rest.
Once that’s in, refit the main PCB. Watch out not to get the cable connectors trapped under the board! A common mistake! The board has locating holes so make sure it fits nicely. Screw the board down.
Now to reconnect the wiring. Make sure all of the locks are open, and then feed the wires in square to the socket and flat. You don’t want to break these sockets or it’s game over. Once the cable is in, and the lines on the cable match those around the socket, then you’re set. Click the lock down again. Repeat for the 3 locking tables. The display connector is a push-down connector. Carefully locate the socket under the plug, and once they’re aligned, apply a gentle pressure. You’ll feel the connectors pop together, but hopefully not snap/break!
Reconnect the grounding clip, locating the plastic first. Then put the wire in place followed by the brass sprung clip. Finally add the two screws.
The Dummy 3G module is easily refitted. Locate the plastic and screw the 3 screws in.
The speakers are located and pressed firmly to re-adhere the tape. Then put in the two screws and connect the speaker cables.
Last but certainly not least, put the battery in, not forgetting the two metal collars for the posts. Make sure that everything else is ready when you do this, as my kindle booted at this point. If you need to redo anything remove the battery first to remove the power.
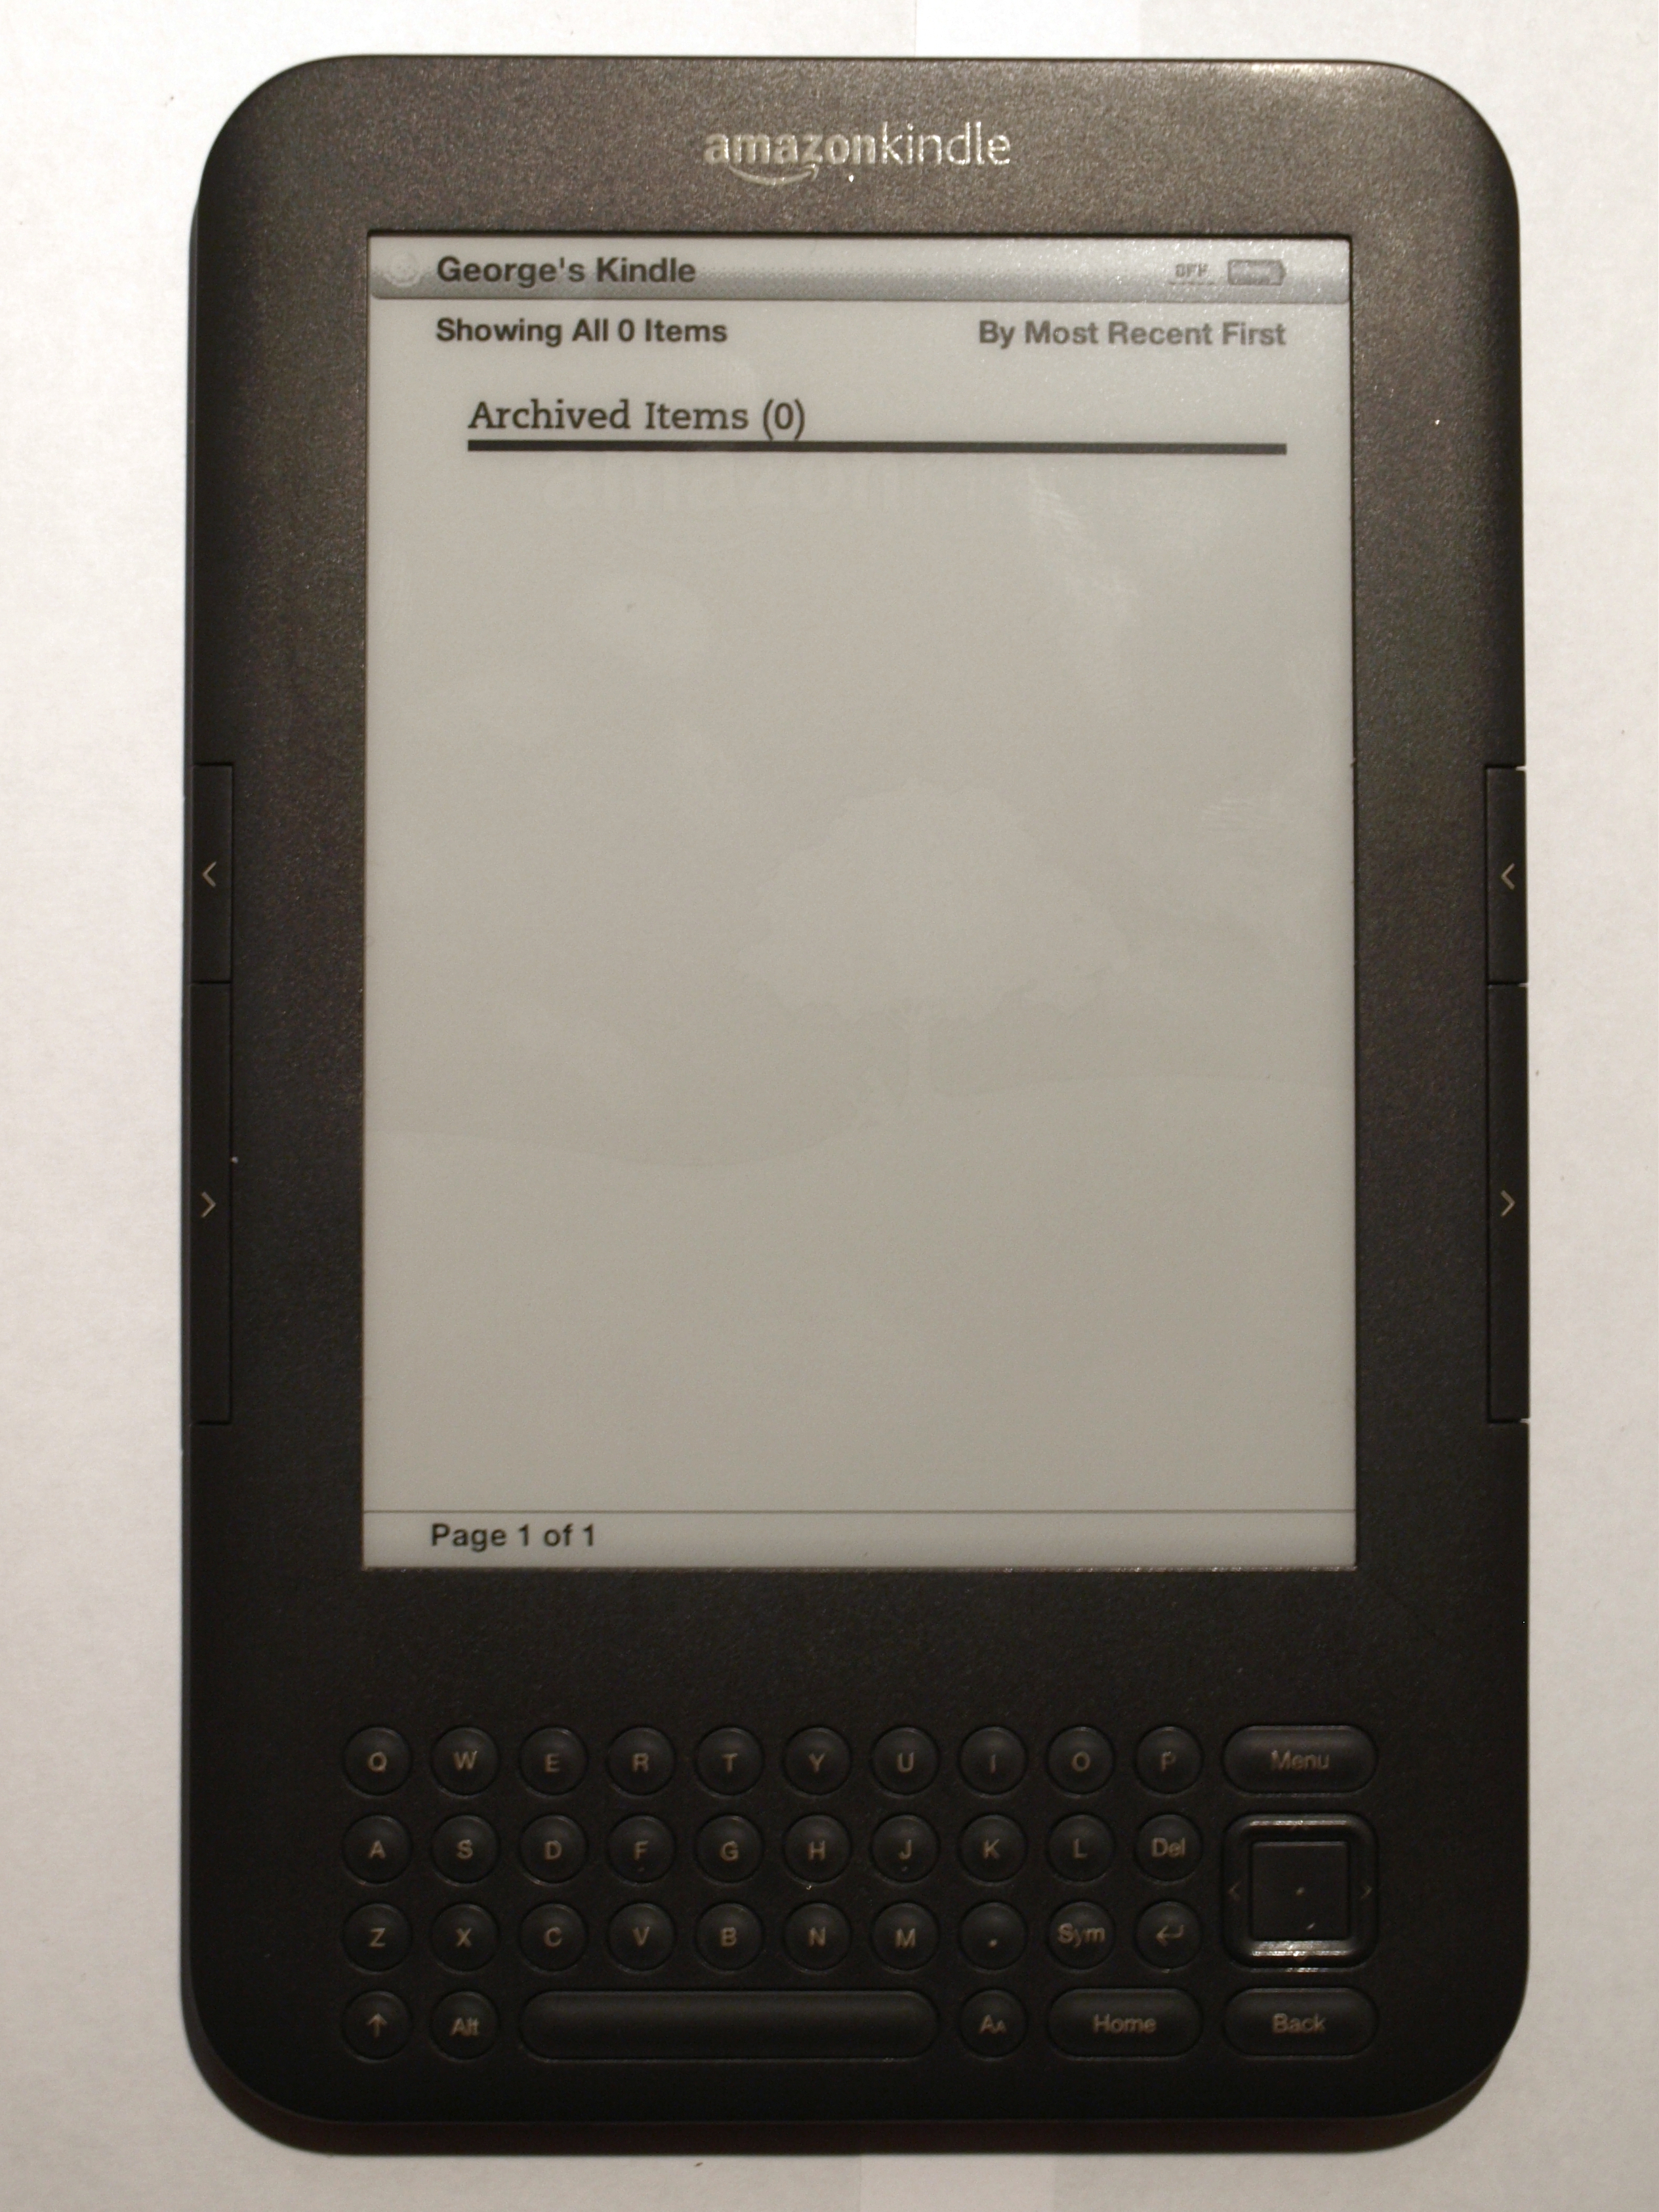
At this point, if the kindle isn’t booting, slide the power switch and prey! You should get the green light of glory, and then some moments later and nice working display with the Amazon booting progress bar. Below, you see the screen working. All your books will have been restored. This picture was taken while the device was still booting. The screen flickered and my booklist returned.