
This page aims to show the very basics of using the Contiki Cooja simulator. It assumes that you have already got a program written to simulate. This example will use “Convergence.c” as the source program file. We will simulate this program working on a Crossbow TelosB (Tmote Sky). This document was originally to help MSc students with their projects at University.
Check Your Program
You first need to check that the program compiled correctly. This is done by checking the output of the make command:

We see that there are no errors displayed, so we can assume that the compilation went correctly. A quick check reveals that the file “Convergence.sky” was created:
$ ls -larth *.sky
-rwxrwxr-x 1 george george 393K May 15 17:37 Convergence.sky
We can also check that some details about the file, that it is a binary executable:
$ file Convergence.sky
Convergence.sky: ELF 32-bit LSB executable, version 1, statically linked, not stripped
It all looks as if the compilation has succeeded!
Starting Cooja
Next we start the Cooja simulator. If you’re using Contiki Instant, you may have an icon on the Desktop to launch Cooja. If not, you can do it from the command line:
$ cd /home/user/contiki/tools/cooja/
$ ant run
You will see lots of text go past as the Cooja environment is compiled, built and started. Eventually you will see the Cooja program start. This takes a few moments to start.
If you don’t see this, then there is something wrong with your system. This is outside the scope of this text which assumes you have set up Contiki correctly. Check that you’ve successfully changed into the Cooja directory. I assume contiki is installed in the home directory inside the subfolder contiki. Older versions used a contiki-2.x format, so it’s worth checking. You may need to check your Java set up.
Creating A Simulation
Simulation Environment
Firstly you will need to create a new simulation. To do this, click “File > New Simulation”.
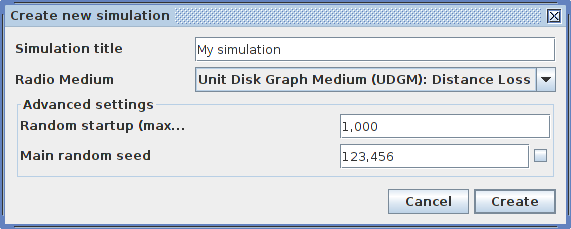
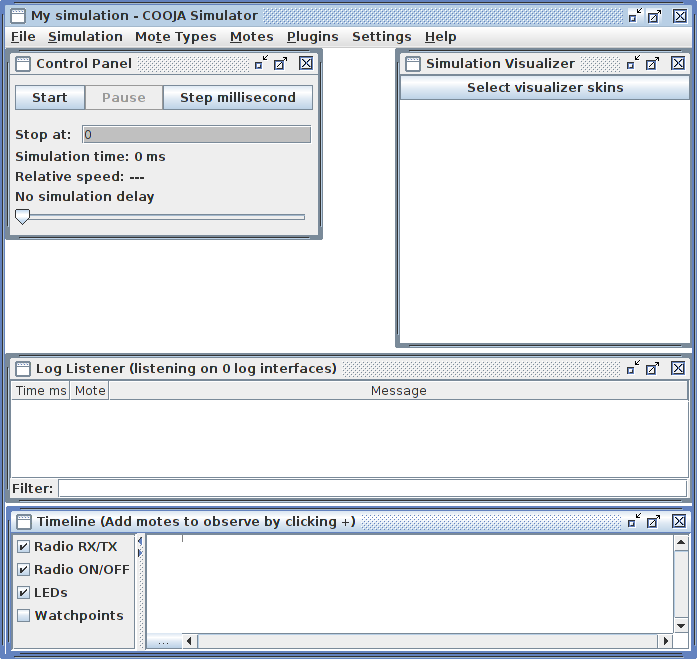
Give your simulation a more suitable title, and then select the radio medium that best suits your simulation type. I usually stick to either Unit Disk Graph Medium or No radio traffic, depending on if you need radio simulated or not. Turning radio simulation off when not needed saves CPU time and makes the simulation run quicker. Random start-up delays the booting of each mote simulated randomly so they don’t all start exactly at the same time. The main random seed is a seed for the random number generator. You can tick the box at the end to get a random seed. When you’re ready click “Create”. You’ll see something like below â the main environment window.
Setting The Mote Types
The next stage is to set the mote types. In Cooja, you create a list of mote types, define their parameters and assign their program code/binary. You then, as a seperate task, create instances of them to simulate. Here we address the first part: creating the mote types.
You have 3 stages of simulation in Cooja: Application level, OS level, and Emulation level. We concern ourselves with emulation level in emulating a Tmote Sky mote. If you’re interested in the others, read the Cooja documentation.
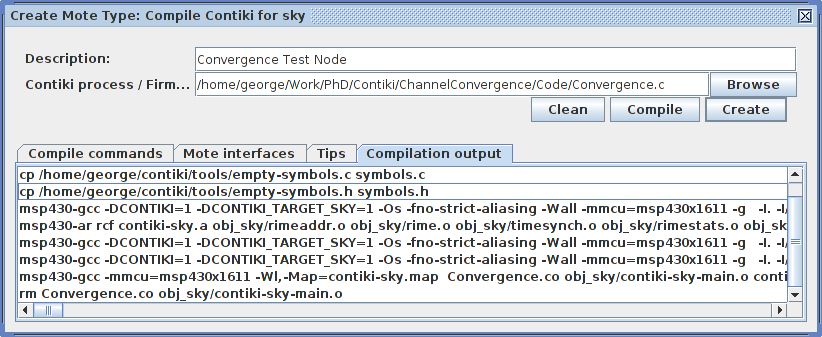
Click “Mote Types > Create Mote Type > Sky Mote Type”. Give the mote type a useful description. In the “Contiki Process / Firmware” field, you should specify your source file (the .c file) or the binary file (the .sky file). If you specify the binary file, you won’t see any compile instructions (binary files are the result of compilation â there is no need to compile). If you specify the source code, then the compile commands field becomes active, and you can specify specific instructions for compilation. You may care to look under mote interfaces and tips tabs, for extra parameters â you will not need to adjust these for most jobs.
If you have specified source code, you need to press Compile before you can create the mote type. You can see the compilation output/results in the compilation output tab. If successful, the Create button becomes available.
Adding Motes
As soon as you’ve created a mote type, you’re given the opportunity to add modes to the simulation environment. The “Add motes” dialogue allows you to set the number and configuration of these new motes.
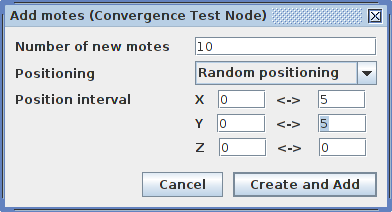
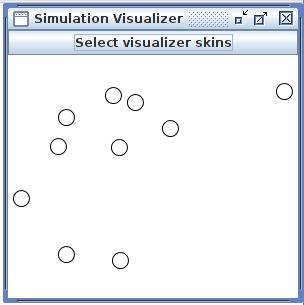
Click “Create and Add” when you’re ready. You can get back to this dialogue to add more notes at any point by clicking “Motes > Add motes of type” and selecting your mote type (here, “Convergence Test Node”). You should then see your nodes randomly placed in the “Simulation Visualiser”. There is more on the Simulation Visualiser overleaf.
The Simulation Environment
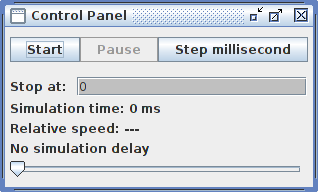
You also have various dialogues within the simulation environment. The Control Panel allows you to set various time parameters. The main one being the simulation delay. You can run the simulation at any speed, with key speeds being “No simulation delay” and “Real time”. Other options are self explanatory.
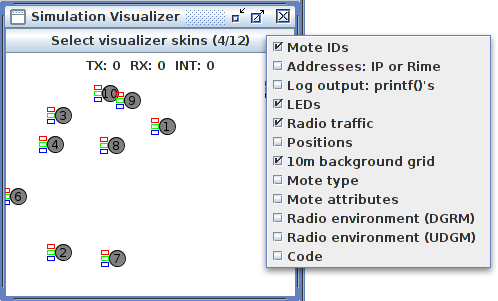
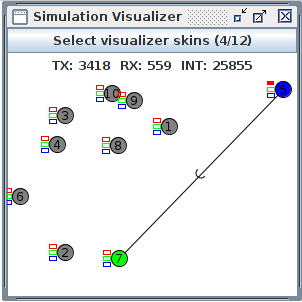
From the Simulation Visualiser window, you can select the skins you see using the “Select visualizer skins” button. This will show a list of options which are selectable (see below). This is your key to seeing what’s going in within the simulation. It is a scale model of the mote locations. Left shows the visual options. Right shows two nodes communicating data, at this point the simulator is computing the results of node 5 talking to node 7.
 |
 |
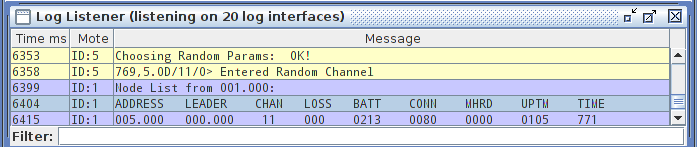
The last two items, Log Listener and Timeline, show what’s going on. The Log Listener displays any text output via what would be the Sky’s USB interface (think of printf statements). They’re timestamped by the simulation and the device ID is also referenced.
The Timeline, shows the physical state of the mote as a function of time. For example you can see here the state of the LEDs and the radio chip (on/off, receive/transmit, etc).
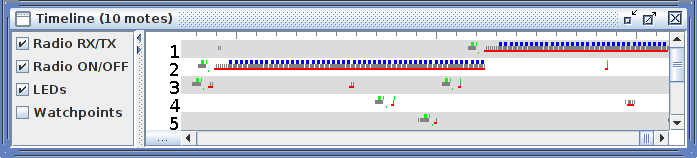
The image below shows a snapshot at 23.243 seconds.

Links
There are a few links which should help you with using the Cooja simulator.
- http://www.sics.se/contiki/wiki/index.php/An_Introduction_to_Cooja
- http://www.sics.se/contiki/wiki/index.php/Get_started_with_the_Cooja_simulator
- http://www.contiki-os.org/