
A penny stove is often called a Pepsi can stove or a hobo hob. It is a very simple liquid fuel burner that can be built with very few tools at all. This page details how to build the Penny Stove. It becomes apparent why it is called a penny stove later.
What You Need
There are no hard and fast tools required. The images on this page show what I’ve used to perform each task, but it really doesn’t matter too much. Nothing about this is in any way critical, it’s all a bit “that will do” – Just how I like my creations!
 |
 |
To make the stove, then you will require the following tools (or similar):
- 2 Cans – Soft drink cans or beer cans are fine. They need to be the same diameter.
- Sharpie – to mark on the cans with
- Scissors – to cut the metal of the can
- Swiss Army Knife – to make holes with
- 10 pence coin – to cover the filling hole
- Book – or anything about 3cm thick
To use the stove, you will need:
- Fuel – I used Mentholated Spirits, but most ethanol fuels will work. The internet is your friend here.
- Matches – I prefer matches, as a result of the tricky lighting technique needed (see below).
- The Stove – Obviously.
What You Do
This process is very simple, and in 4 stages:
Marking the Can
Using your marker and book, mark a line around both cans about 3cm from the top. The height is not critical, but it does effect how well the burner works. The shorter this distance, the more intense the flame burns, but, the quicker the fuel runs out, and the less fuel you can hold. I think 3cm is ideal. You need to mark two cans, at roughly the same height.
Cutting the Can
Using your craft knife, stab into the side of the can and make a whole. Do this above and away from the line. Cut the top off the can, and then nibble down the metal until you have a uniform line all around (left image). Do this for both of the cans (right image).
 |
 |
Making the Burner
Looking at the cut cans, you should choose the slightly shorter one to become the burner. If you are good at cutting cans, and they are both the same size, choose one at random. You need to make a few holes in the can. The first task is to make a filling hole. This is widened later, but just for now, make a small hole in the center of the burner.
Next, make an array of holes for the flames. I started off by making one hole (left image), marking out another 7 holes (totaling 8), and then making them (right image). Feel free to experiment with the number of holes, and their diameters. I found lots of smaller diameter holes works well. The smaller the hole, the higher pressure and thus bigger flames – However, you run the risk of popping the penny from the top, and having the pressure escape from the filling hole (in the form of a fire-ball).
 |
 |
The filling hole is then widened. I did this using a scissor blade, as shown below.
Joining the halves
Joining the halves is the trickiest part of making the stove, by far. You may have a better method for doing this, and if so, you should use it! This is the best I can come up with. Firstly, taking the side you turned into the burner, run the back of the scissors around the inside to remove any burrs and to open the top the can up a little. Don’t stretch the can too much, as we need a tight fit – just enough to help. See the left image. It also helps if you pleat the bottom half of the stove, as shown in the right image. This helps it to fit inside the burner. Again, not too much, as we need a tight fit. Pleating the metal takes up some of the metal, and the average diameter drops very slightly. I used the scissors to create the pleats, trapping the metal can in between the blades and twisting slightly. Even with the pleats, it will still be tricky. Remember, you want to slide the top over the bottom. The burner should form the outside.
 |
 |
Once you’ve done it, push the two cans together, ensuring you don’t rip the metal.
 |
 |
How You Use It
Please read the Safety and Disclaimer sections below.
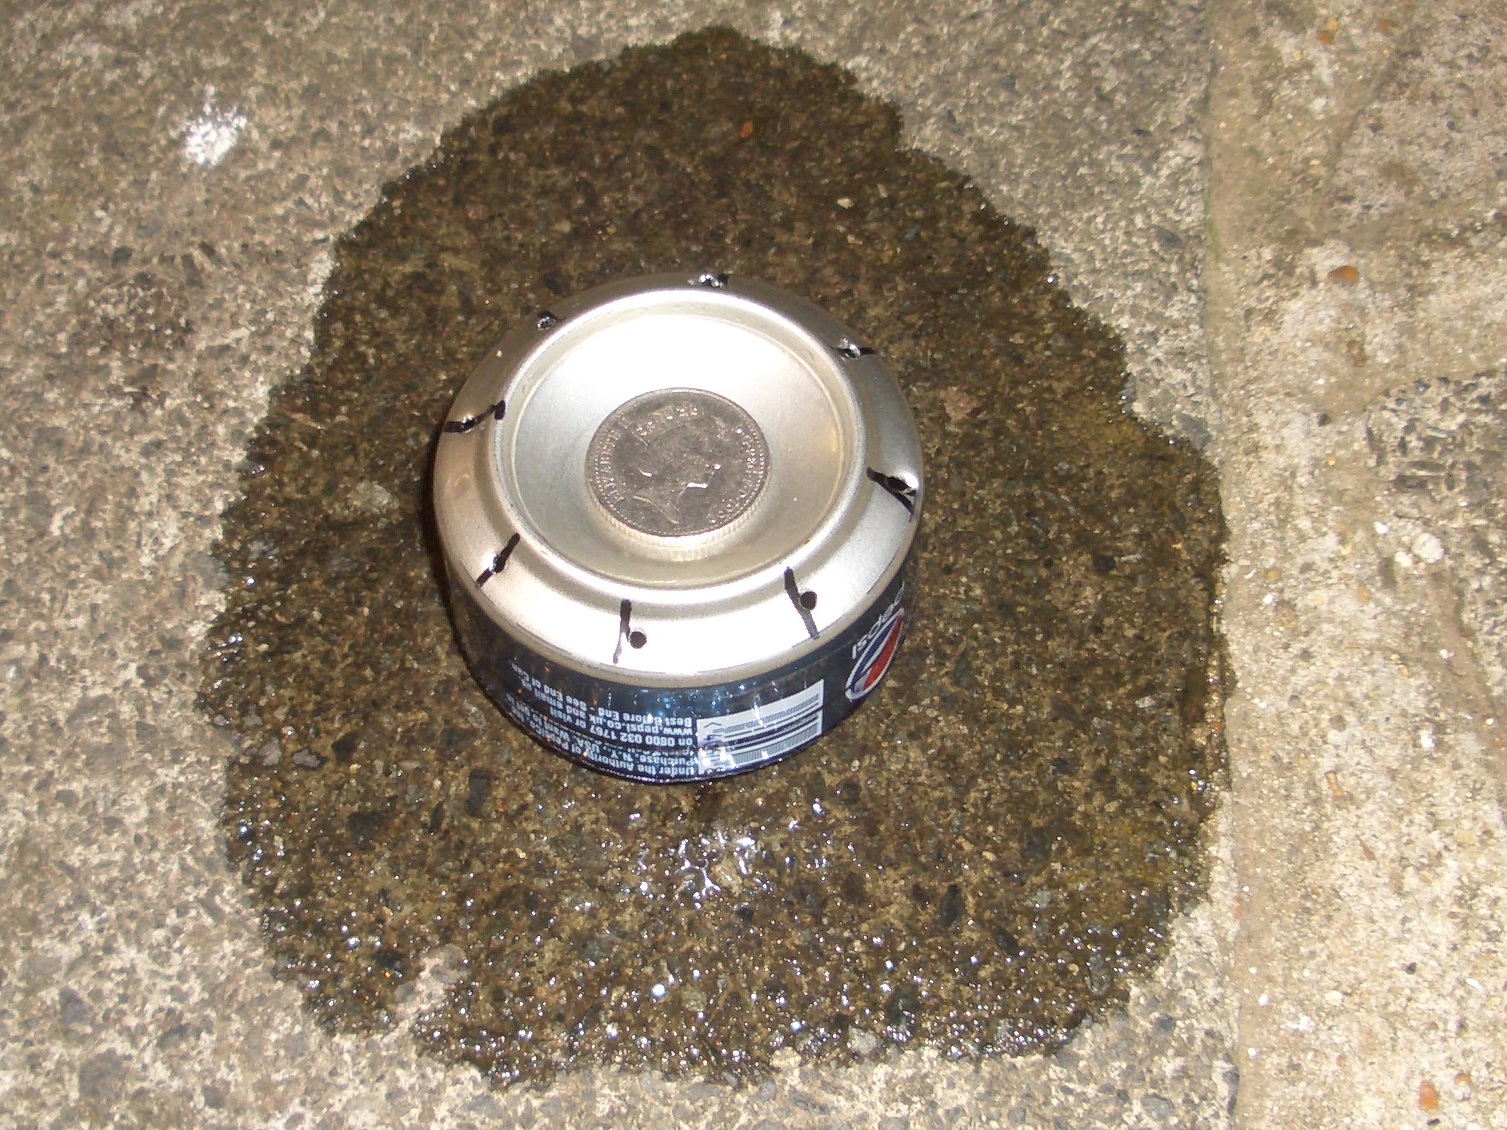
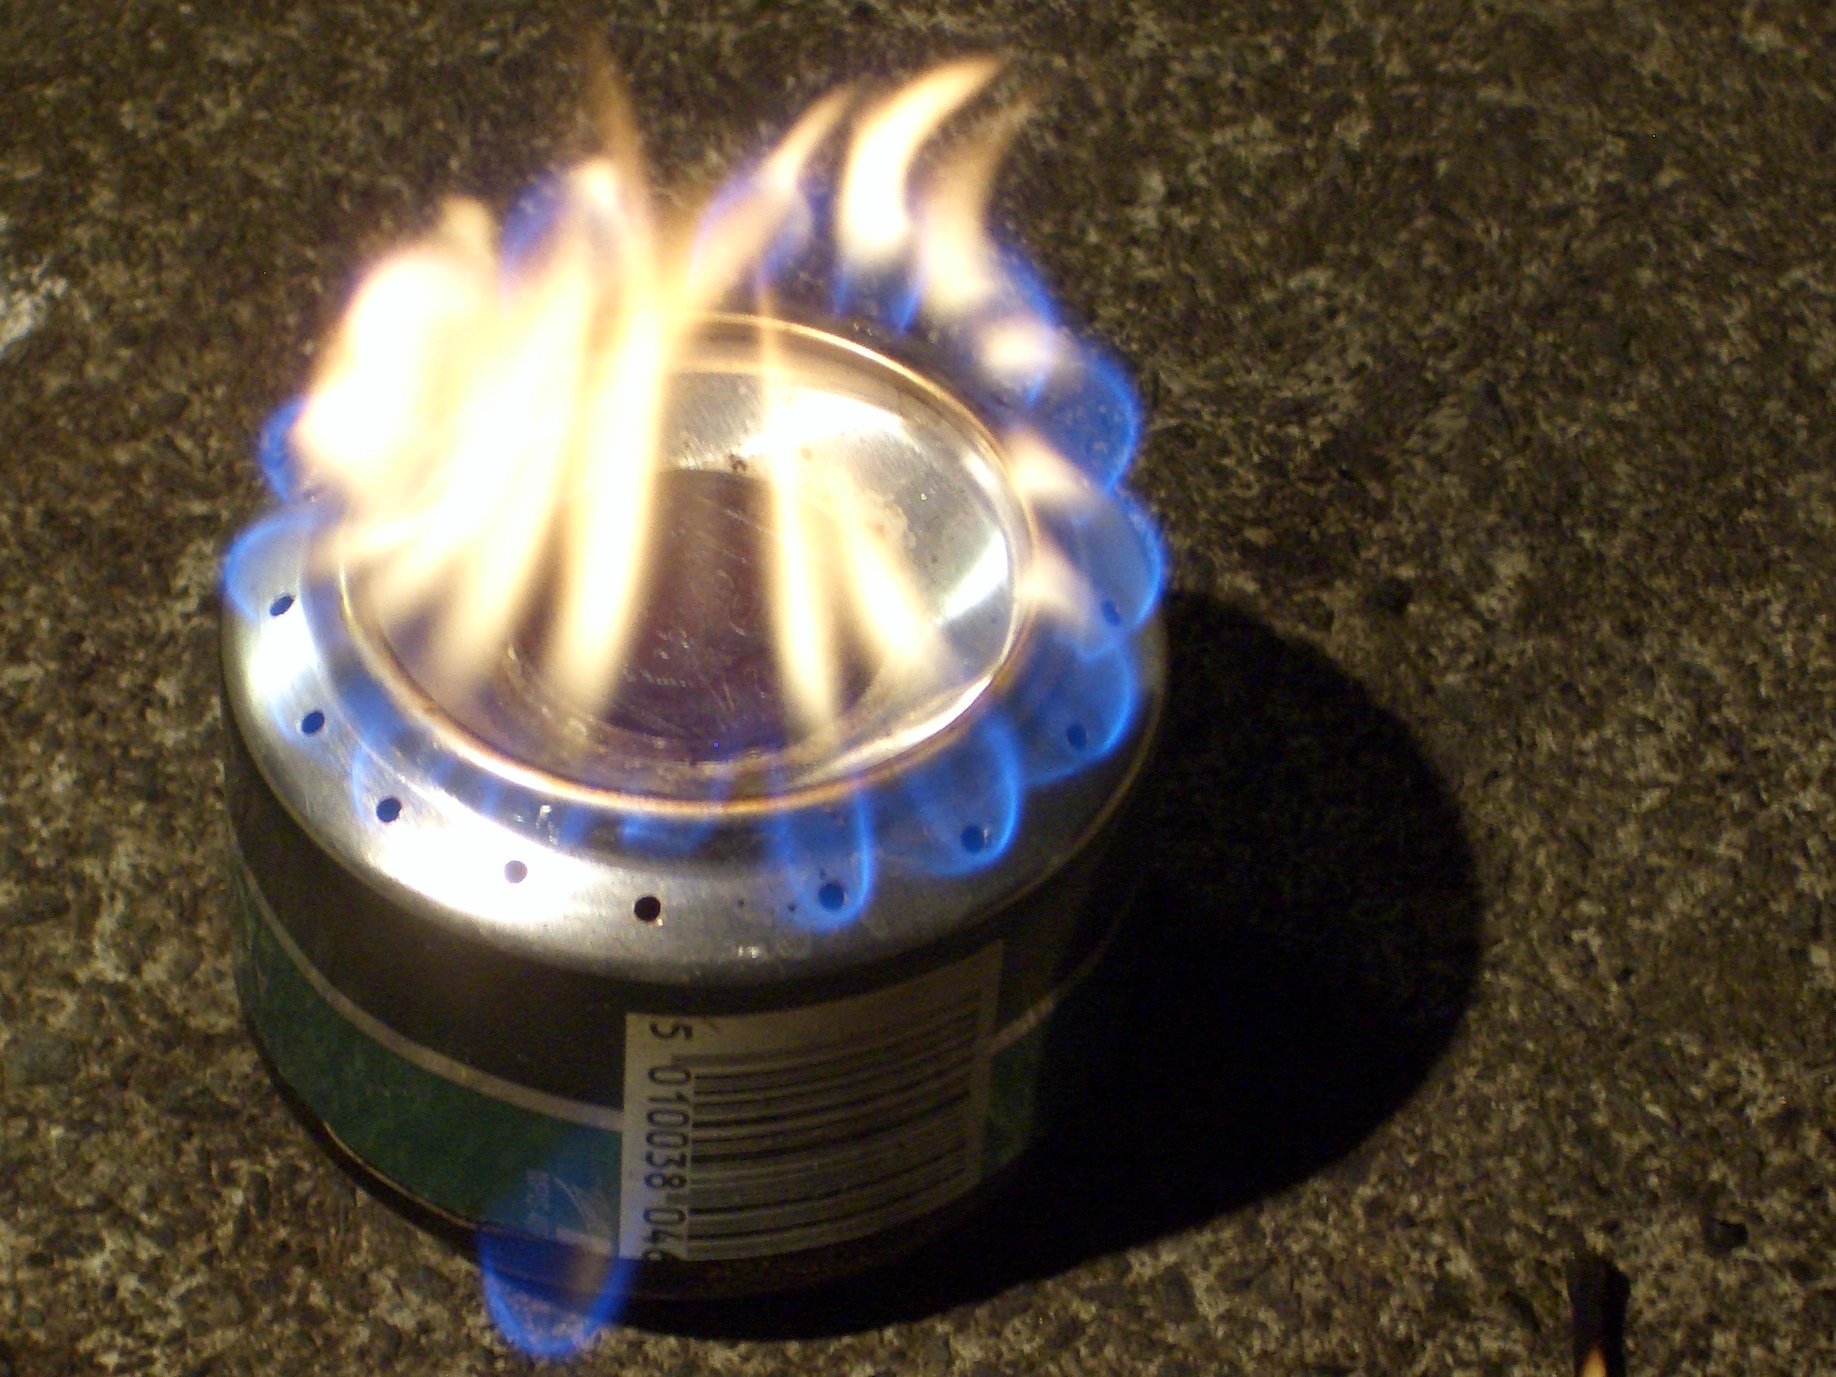
Lighting the stove takes a little skill. First put some fuel into the hob. I would go for about 1cm deep. Maybe less. The stove works by boiling the liquid fuel, and the gas given off is used as a gas in the burner, where it… burns. To light the stove, you need to get the fuel boiling first. Put a little fuel onto the ground too. Sit your fueled stove into the middle of the puddle of fuel (top left image). Set the fuel alight. The fuel on the ground will burn, boiling the fuel inside the stove. When the gas comes out of the burner it will be ignited by the ground fuel, lighting the stove. Once the stove is lit, the burning will keep the fuel burning. Once the ground fuel has burned out, it may take a moment or so for the burner to self regulate, and the flame to become stable (top right).
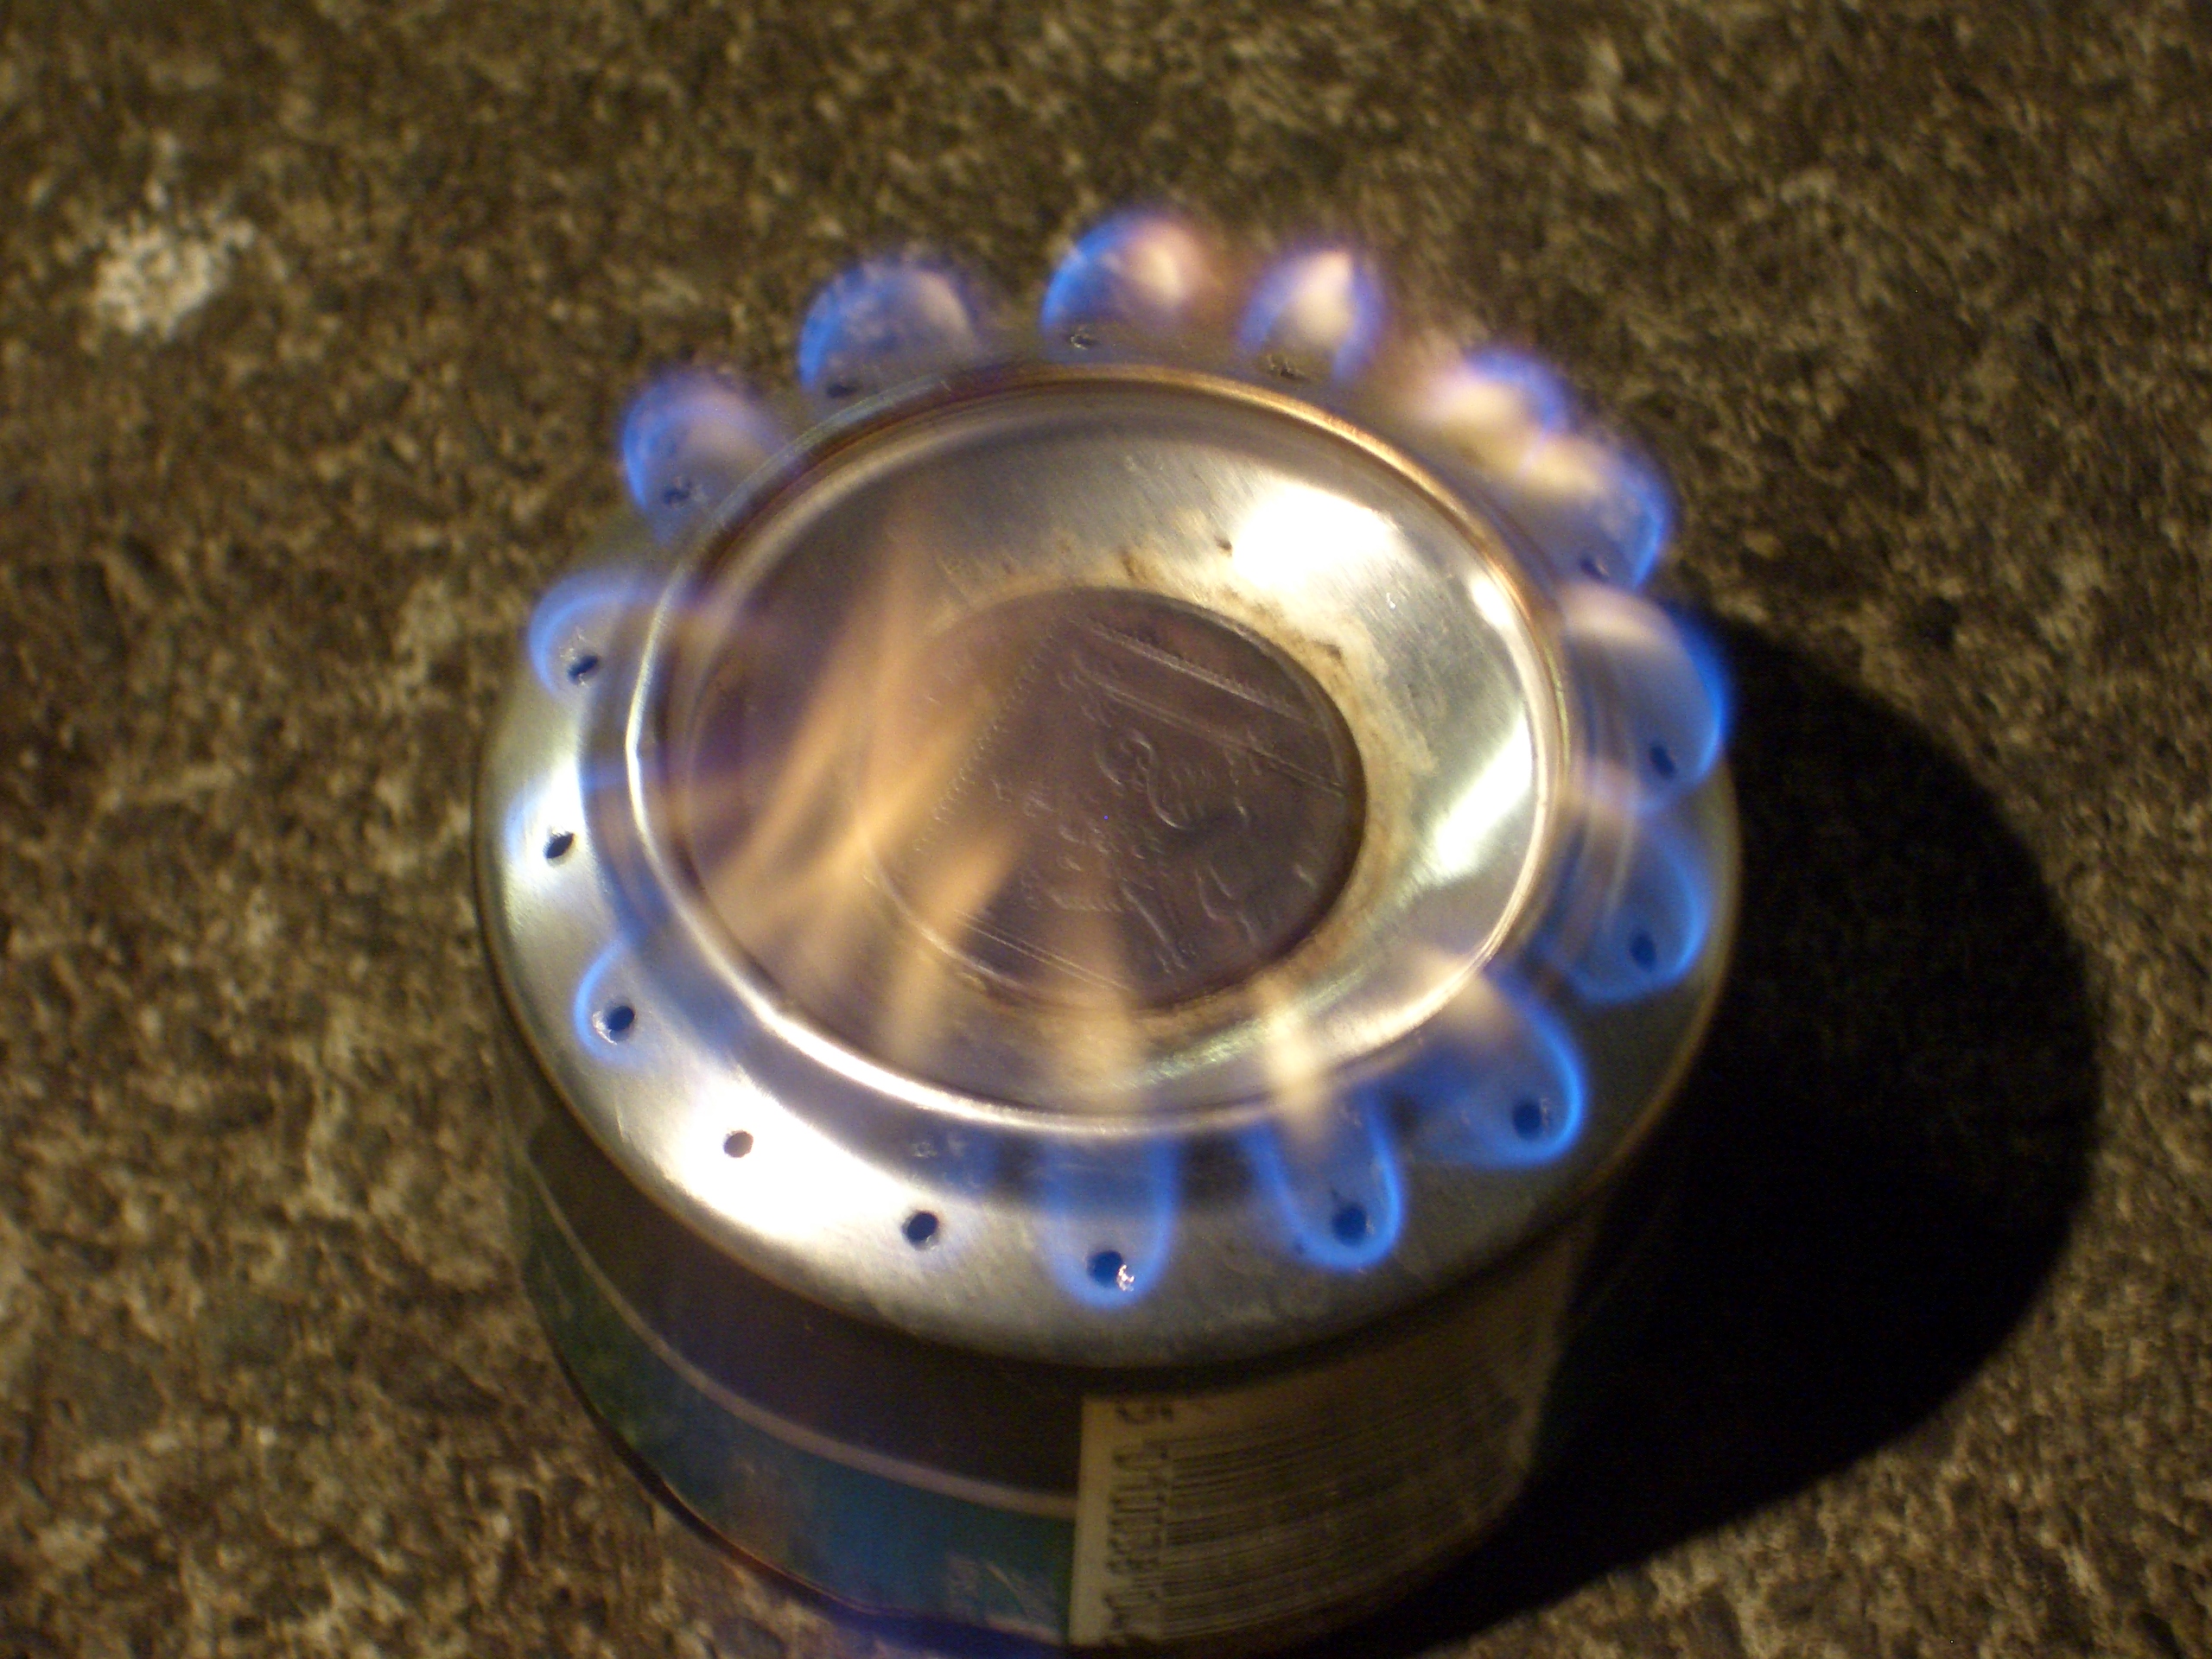
As the stove starts to run out of fuel, the flame intensity starts to die down (bottom left). The bottom right shows the stoves cooling down after the photoshoot!
 |
 |
 |
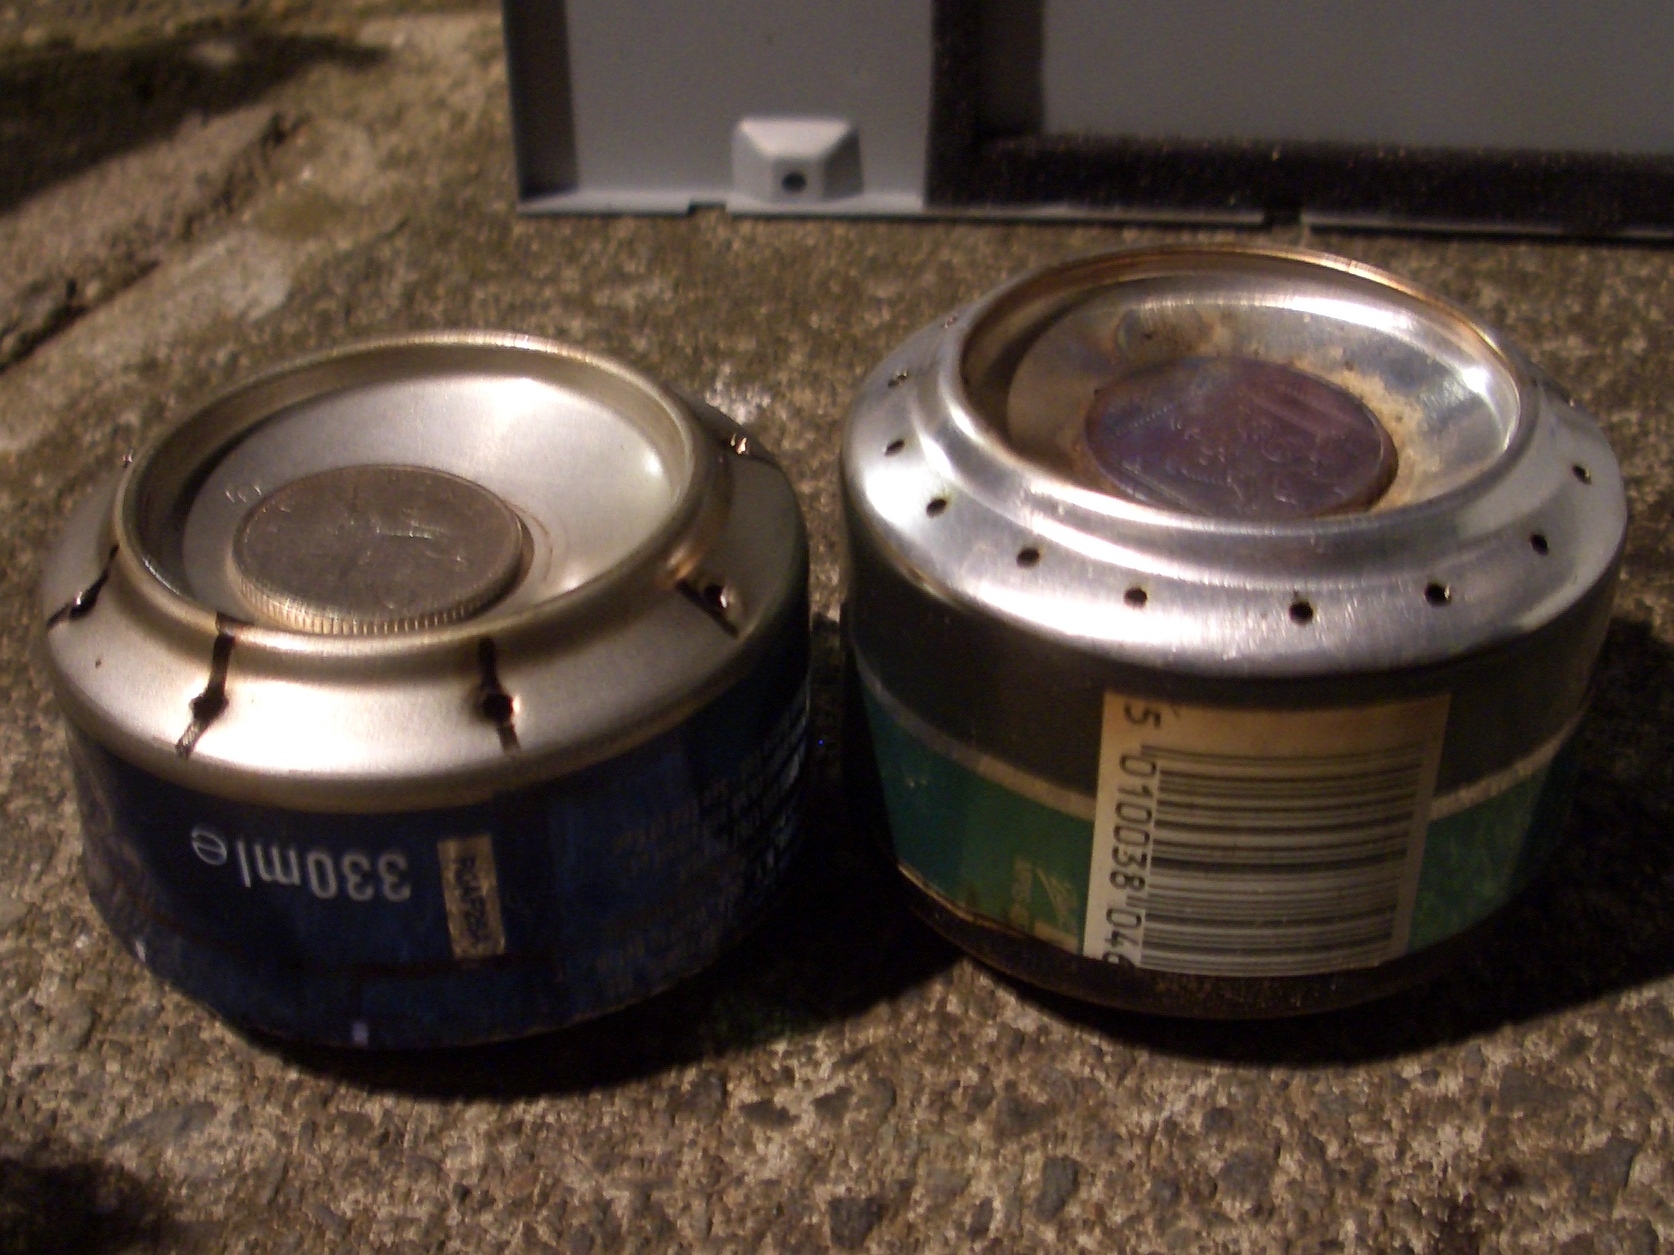 |
Note, the above images are of different stoves. There is no reason for this, other than they were the better pictures. The video’s section below shows both this stove and others working.
Safety
Playing with fire is dangerous (and kind of magical) – That’s why it’s fun. However, it also hurts… A lot! Always play with fire outside, never near anything valuable, and ensure you have a bucket of water or some other “backup plan” for controlling things. As you would expect, the cans get very hot when running, and continue to be after the fuel has burned out. The pennies have a high thermal mass, and stay very hot for a while. Remember that. They do burn. Please don’t risk anything. It’s not worth it. Be safe!
Don’t forget that animals need you to look out for their safety. They’re not used to seeing Pepsi cans with fire coming from them. And most animals will burn well, though they don’t like it.
Disclaimer
I, George Smart, take no responsibility for any consequence of anything you do, regardless if you find it on my site or not. You’re your own person! If you don’t think it’s a good idea, then don’t do it. That applies to all of your life, not just this! However, as I say, if this “experiment” results in you burning your garden up, it’s your fault – not mine! See also my more general disclaimer.
Resources
For more information, see Wikipedia; Soda Can Stove.