
A few people have asked me about creating a Bluetooth Radio Interface for Yaesu’s CAT standard or Icom’s CI-V system. This page hows a quick test set up which works.
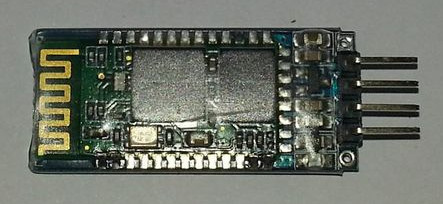
The first thing you will need is a Bluetooth RS232 Module. The version I used for this project was based on a RF-BT0417C chipset. It is similar to WLS123A1M module in terms of hardware but the AT commands are different (see here. The RF-BT0417C was on a breakout board (BT_BOARD_M/S_V1.01). It has a status LED and 4 output wires (TXD, RXD, VCC and GND – 2 data, 2 power).
The first thing to do is to program the Bluetooth module to be what you want it to be, and say what you want it to say.
Programming The Bluetooth Module
I guess that you’ll want to change the default name of the Bluetooth module to be your callsign or something similar, and to set a pairing pin so that nobody can connect to your radio without the PIN number. Here’s how.
Making a Connection
You’ll firstly need some kind of USB-RS232-TTL interface. You want 0V-5V signals which are inverted, such as those which come from cheap USB/TTL interfaces. Those with D9 connectors for proper RS232 are unsuitable, as they have the data inverted.
Connect the Bluetooth module to the USB Serial TTL interface, such that the power (3.3V-6V on the breakout board, 3.3V only on the module directly) is connected to the VCC (+) and GND (-) pins and the data lines are crossed (serial TX to Bluetooth RX and visa-versa). There should be a total of 4 wires:

The software I am using to communicate with the Bluetooth module via USB Serial is GTKTerm, “a small graphical shell like XTerm”. It is a Linux equivalent to HyperTerminal for Windows. I suspect most people will be using Windows here, and so may benefit from Derek M0XDC’s How To Program A Serial Bluetooth Module written for LEFARS. The information is very similar. If not, you could probably figure it out from this page? After all, how complicated can a serial port be? Hah!
Find the device that was added when you connected your USB/TTL interface. Use dmesg to help you, it will suggest something like /dev/ttyUSB0 or /dev/ttyACM0 or something similar. Once you know, you’re ready to configure your terminal emulator program:
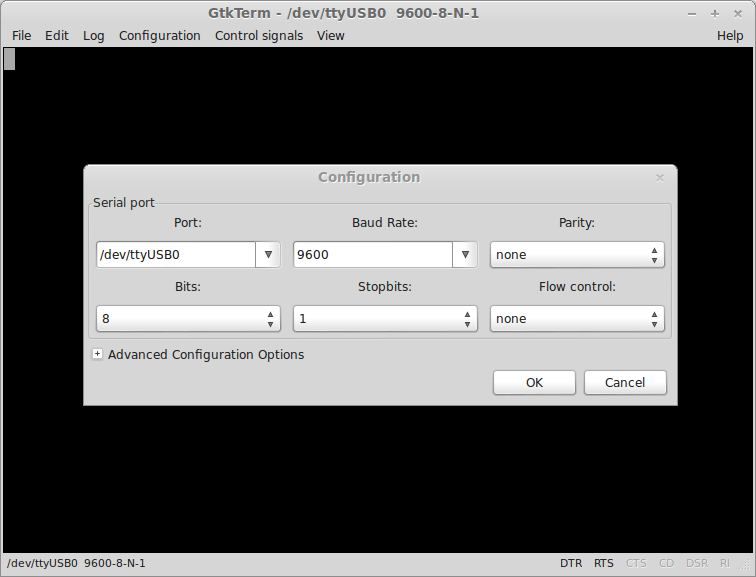
The module defaults to a default speed of 9600. Note that this is the speed for interfacing with the Bluetooth module alone. This does not effect the speed that you can talk though the module to your radio, which is a run-time option discussed more later. The very standard configuration of 8 bits, 1 stop bit, no parity and no flow-control is used. Classically called 9600 8-N-1 as can be seen above.
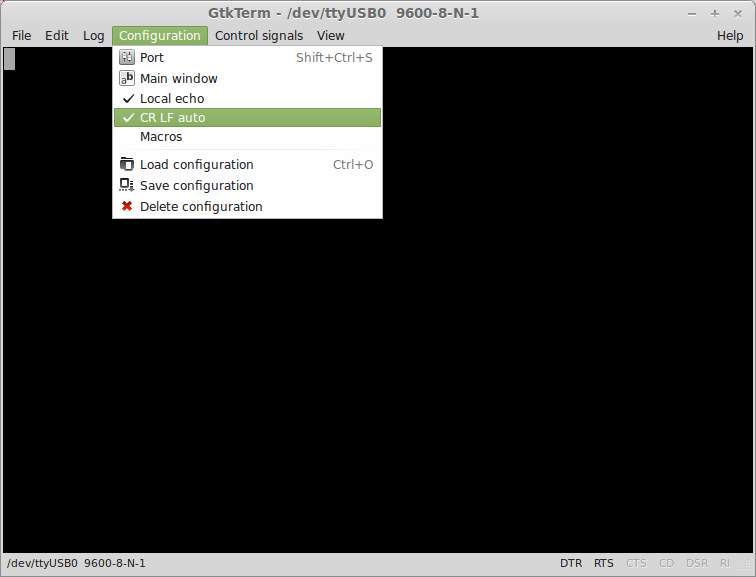
Next you need to make sure that your terminal emulator is sending both carriage return (\r) and line feed (\n) as the Bluetooth module requires both. You’re also advised to enable local echo so you can see what you’re typing. In GTKTerm, the options are found under the Configuration menu.
Once you’re ready, sending ENTER (\r\n) and then “AT” (in capitals) then ENTER again should return “ATOK”. If it doesn’t then something is wrong. Note that you must NOT be connected to the device by Bluetooth at this point, otherwise you’ll not get any response (your typing is sent over Bluetooth and not to the controller). Fiddle and play until you can get “ATOK” back. AT is the command set you’ll be using, and the OK tells you that the Bluetooth module is ready and understands the input. I found it sometimes helped to send a double ENTER before each command. As in “ENTER ENTER AT ENTER” from above.
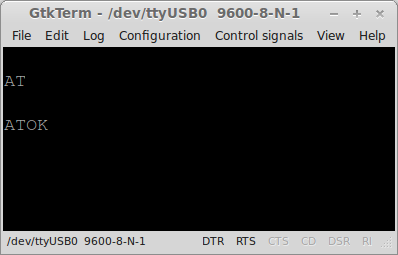
Once you get “ATOK” back then you’re in business.
As you will see, the text gets a little jumbled up as there is no flow-control. One disadvantage of GTKTerm is that it sends the characters as you type them and the Bluetooth module (for simplicity sake) doesn’t have flow control. This means that it waits a certain period of time after you stop typing before interpreting what you’ve typed. Unless you can type very quickly (like seriously quickly) or you have a program where you can input a whole line of data then send it in one go, I suggest you compose your input somewhere else, then copy/paste it into the terminal program to be sent. This yielded the best results for me by far!
Setting The Bluetooth Name
The AT command you will need to set the name of the Bluetooth module is AT+NAMEname where name is the name you want to use. An example may be to use your callsign, for example AT+NAMEM1GEO to use M1GEO (obviously you put your callsign and not mine, unless it’s a tribute!). Copy/paste AT+NAMEM1GEO should do the trick and the device should confirm the result: Notice your input and the “OKsetname” output get muddled together due to the lack of flow control.
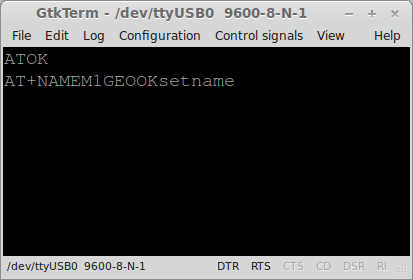
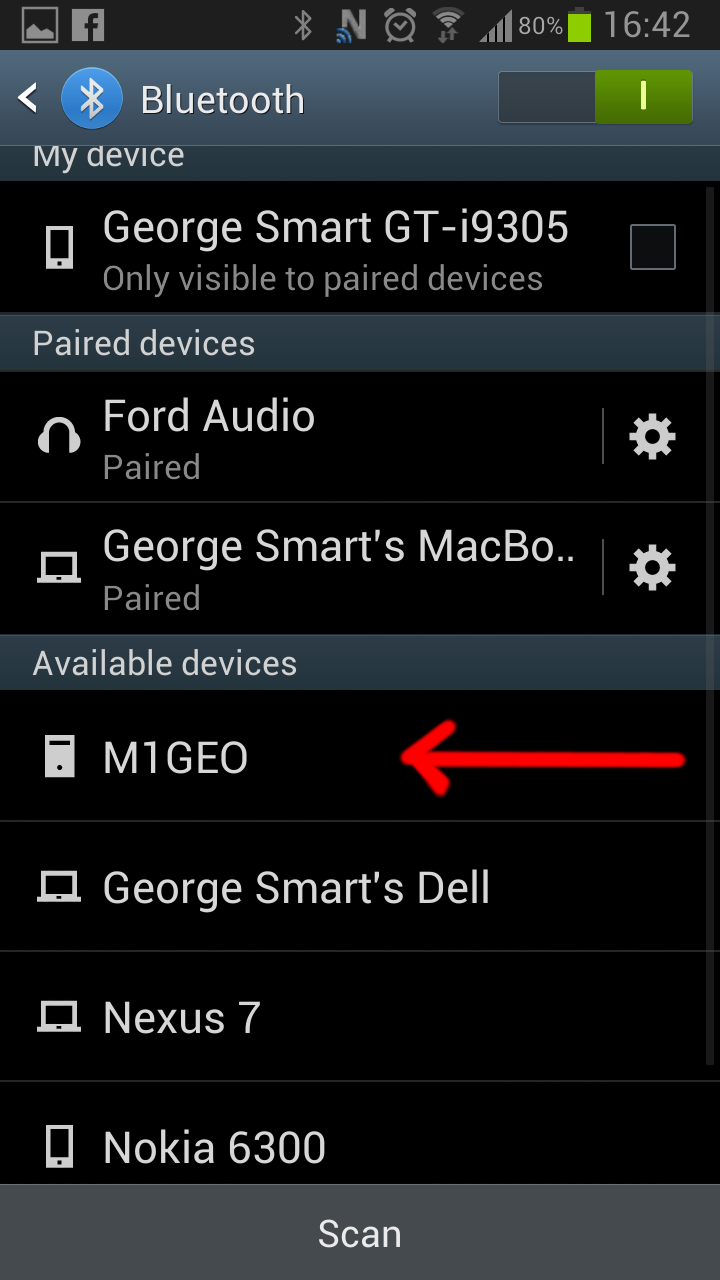
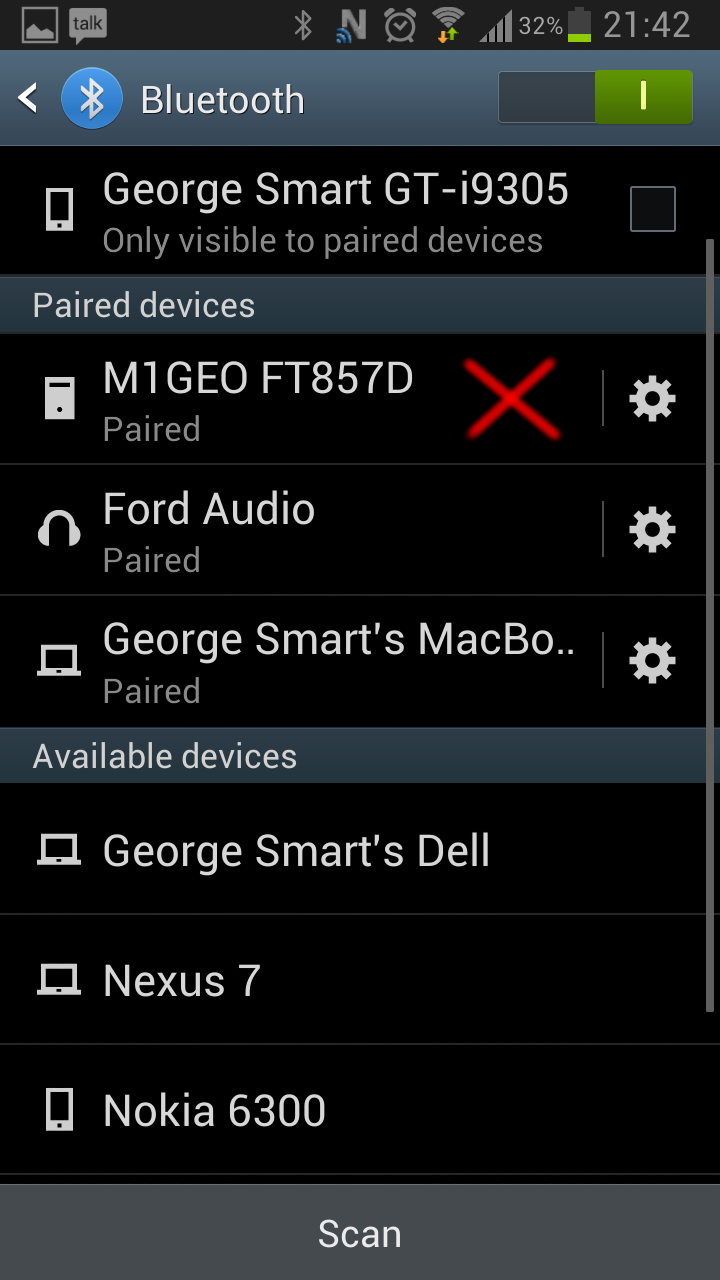
Once you see “OKsetname” then something has happened. You should be able to see the changes by restarting the Bluetooth module. Disconnect the power (VCC) wire wait a moment and reconnect to see the new name being beaconed. If not, then try again. Here’s my Android phone showing the Bluetooth devices in range, where we can see “M1GEO Car Rig”.
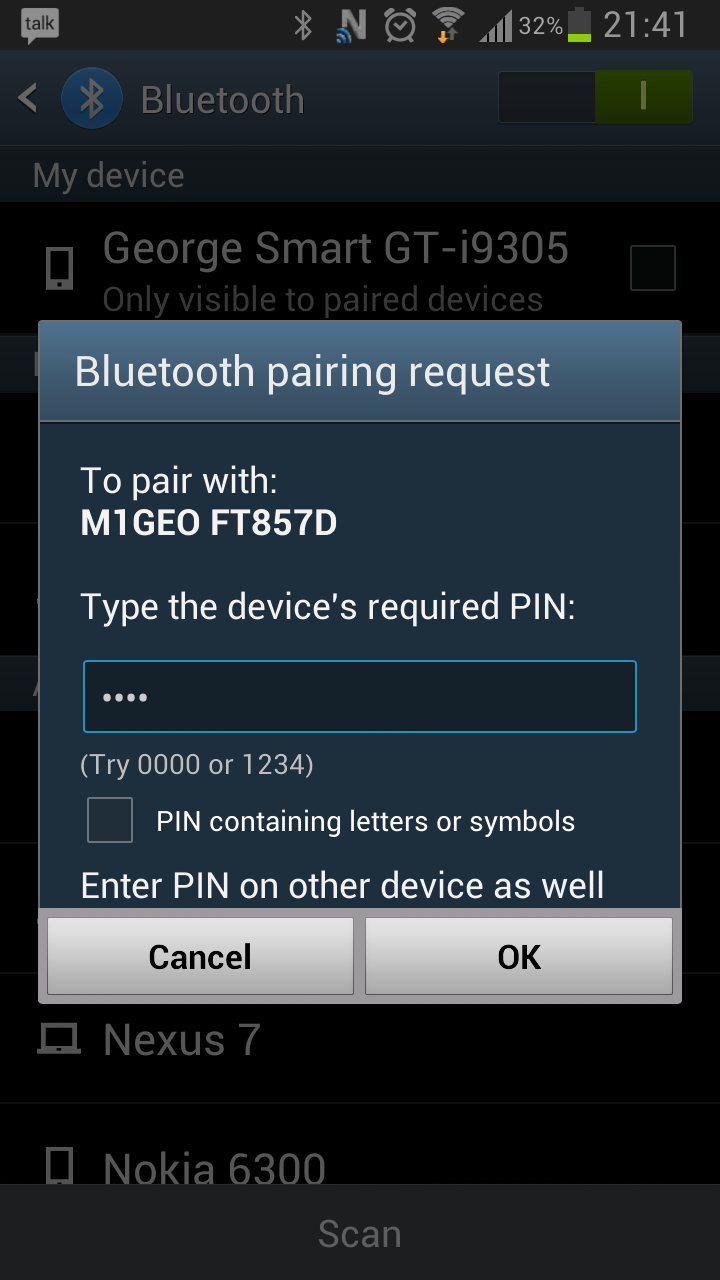
Finally, I settled on the name “M1GEO FT857D” detailing the model of radio in my car.

Setting The PIN
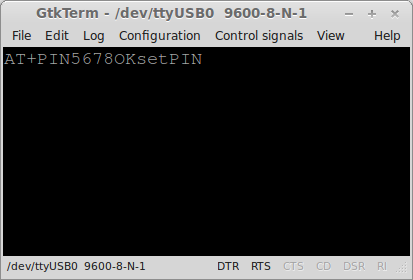
The AT command to set the PIN is AT+PINnumber. It’s a 4-digit number, so for example AT+PIN5678 would set the pin to 5678. Again, copy/paste the string into GTKTerm and you should receive “OKsetPIN” to confirm:
You see that when you attempt to pair with the device, you are asked for a passcode, which is the PIN you entered above:
 |
 |
| Asking for the PIN key. | Successfully paired with the Bluetooth module |
Connecting Up
I intend for this project to live in my car as my Yaesu FT-857D is in the boot. I have already made interfaces before, such as the Yaesu CAT Interface which serve for the purpose of interfacing to the computer but I figured this Bluetooth adapter would allow me to try digital modes in the car, by providing a serial port. However, I test here on the Icom IC-7000 because it was on the desk next to me! Icom’s CI-V interface is slightly simpler than the Yaesu CAT interface, but not much.
The Yaesu interface requires that you connect the TXD and RXD cables into the ACC connector of your radio. These are connected directly. The ACC socket also provides power (12V) which should be regulated to 5V by an 78L05 (or similar) regulator. Essentially, the 2 data and 2 power cables connect to the radio as expected, with the addition of some voltage regulation. For Yaesu, the following links details exactly what is to be done:
- CTR-BlueLync-Yaesu (used with permission)
- CTR-BlueLync-Yaesu_6-pin (used with permission)
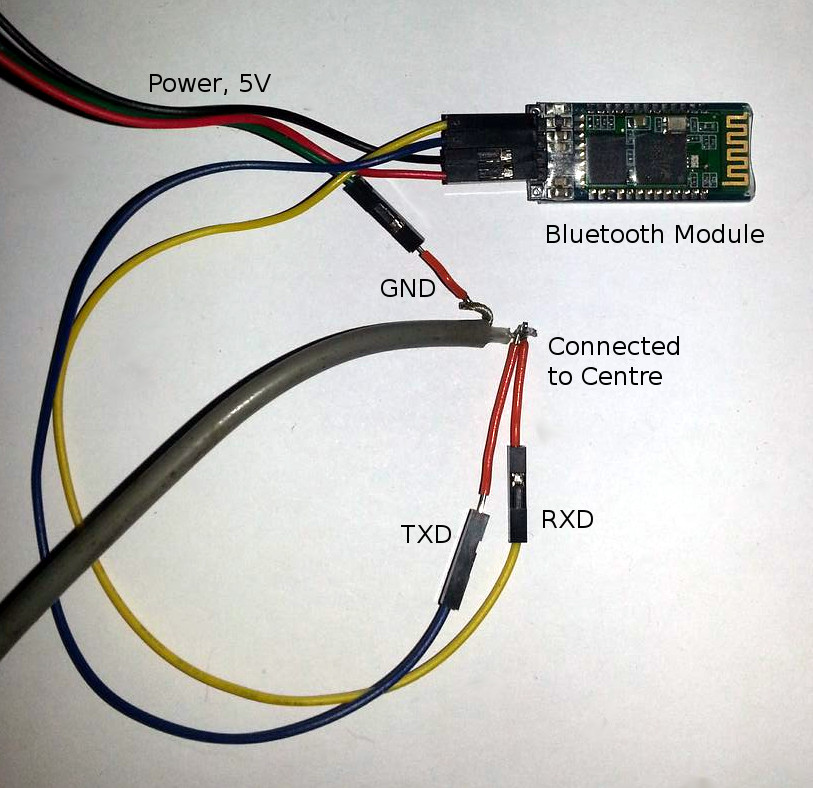
The Icom interface requires that you connect TXD and RXD together and solder the “DATA” line to the centre of a 3.5mm mono jack plug. The ring of the jack is soldered to ground. Then you simply need to supply power (5 volts) to the Bluetooth Module, and you’re done. The Icom IC7000 can provide power from the ACC socket, but this is another cable to have hanging around. It’ll do for testing though! Here is the Icom CI-V interface I fashioned quickly for testing:
The rest is down to the software you will be using. For ease of writing this article, I use a Linux computer and rfcomm to interface with the Bluetooth module to provide a serial port and then GRIG to provide a simple CI-V example.

You now have a device node, /dev/rfcomm0 which you can use like any other serial port device. You can open the port at whatever speed you like (providing it is supported by the Bluetooth device). This is done by the application you’re using. Typically for Icom 19200 baud and for Yaesu 38400 baud, but this is usually set in your radio settings. You should also notice that your Bluetooth module’s LED has turned from flashing to solid, indicating a connection.
Here I run the grig command, calling radio model IC7000 (-m 360) at path /dev/rfcomm0 (-r) and speed 19200 bauds (-s).
sudo grig -m 360 -r /dev/rfcomm0 -s 19200
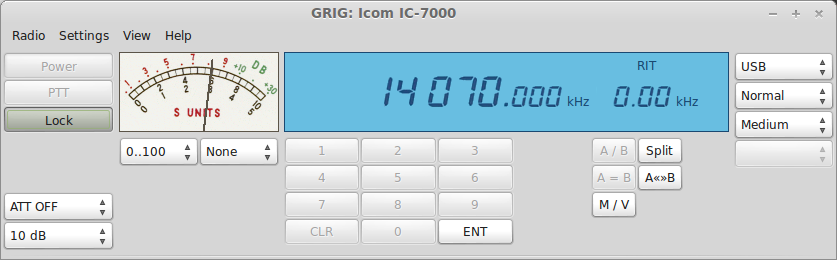
After lots of text thrown at the terminal, you can see that GRIG has opened and that my radio is setup for PSK31 on 20 meters! The final picture shows the hardware and software together. I spun the dial up from 14.070.000 MHz to show they keep track:
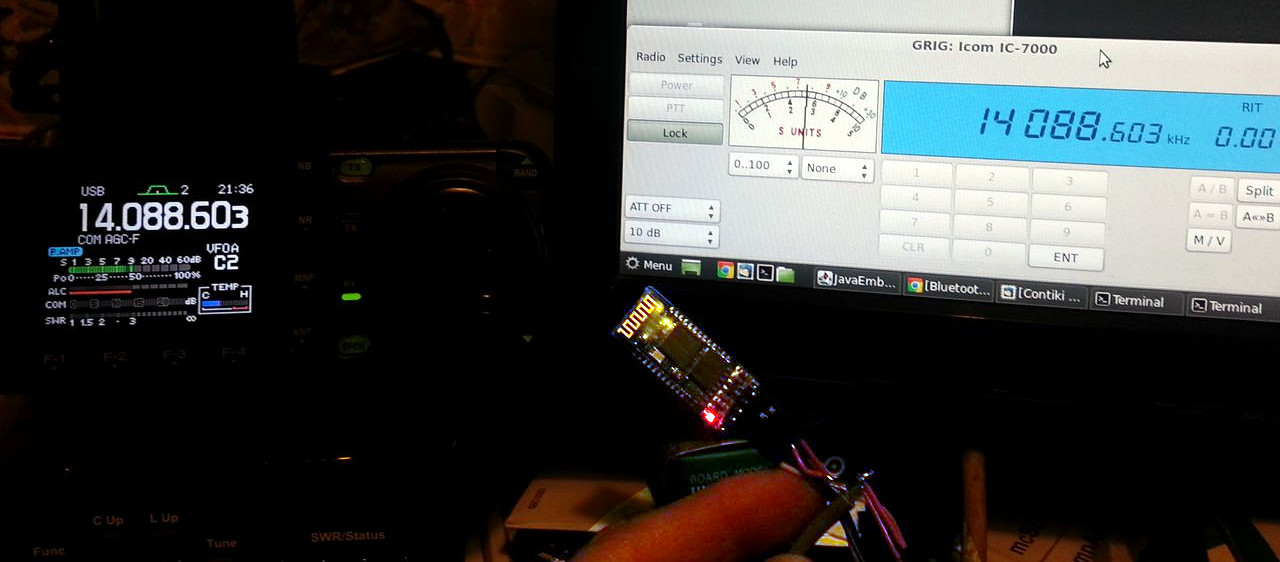
And there you have it! Fully working!