Edit: For the benefit of anyone ending up here, The pyMultiMonAPRS Project is the preferred solution to this problem. At the time of writing the below article, this project was not available. With that, on to the original article…
I was wondering how I could APRS to work with the FunCube Dongle under Linux.
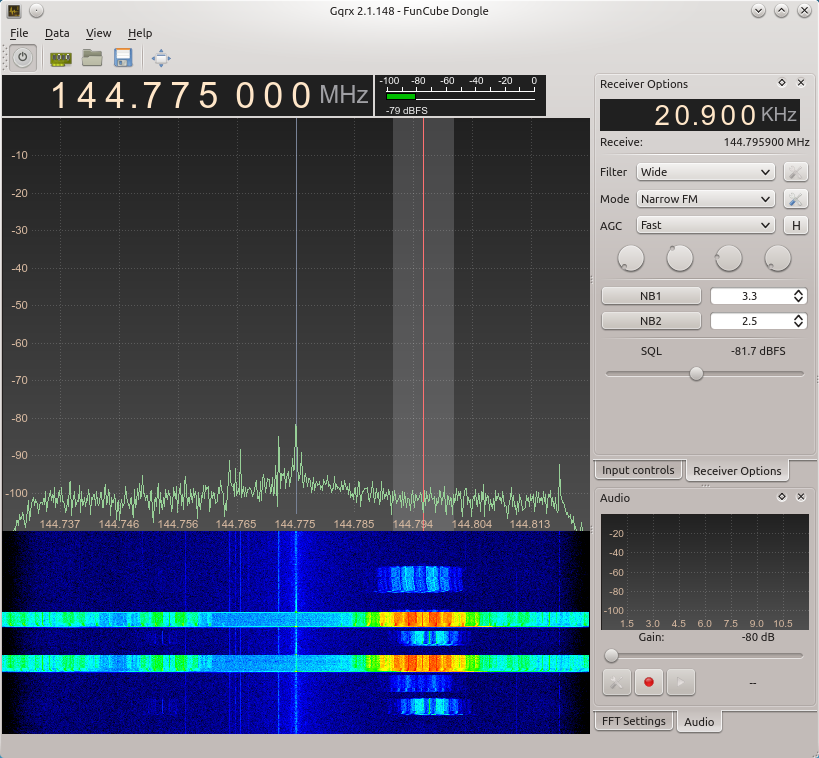
While experimenting with the FunCube Dongle under Linux, I settled on using GQRX by Alexandru Csete. Most of the newer versions have a built in AFSK1200 modem, and the version I use here, Version 2.1.148, is no exception.
When GQRX is running with the AFSK1200 modem enabled, all of the decoded data is dumped to the program’s standard out. By redirecting the standard out to a file, I was able to get a copy:
./gqrx > raw.txt
The file raw.txt then contains a copy of all of the data output on stdout by the GQRX binary. Once GQRX has started, selecting Data and then AFSK1200 Decoder from the menu enables the software modem. Tune your SDR to an appropriate channel with AX.25 AFSK 1200 baud, such as APRS (144.8000 MHz in Europe) and you will begin to receive data. The two screens may look something like below:
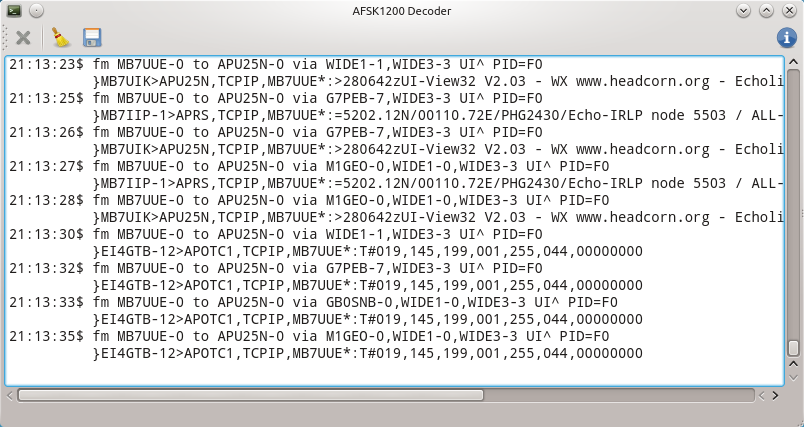
As well as being shown in the decoder window, the AX.25 data is also output onto the commandline via stdout and piped to our raw.txt file as discussed above. The decoder window shows the received data too:
Using some standard UNIX commands, we can filter out the modem information and the AX.25 frames and then create a TCP connection which XASTIR can connect to.
So first of all, we need to read the raw.txt file. As the file is constantly changing, we use tail -f to follow the file. Without tinkering too much with the data, we can only use data that’s already in the correct format; i.e. data that’s been digipeated already. It needs to have the format:
MB7IIP-1>APRS,TCPIP,MB7UUE*:=5202.12N/00110.72E/PHG2430/Echo-IRLP node 5503 / ALL-Star Node 2498
The GQRX software modem precedes frames of this time with a }, so we can use grep to filter those lines out for us by running grep ^} which allows through only lines starting with }.
As the } is inserted by GQRX’s AFSK modem and isn’t part of the APRS protocol, we must remove it. We use sed -e “s/^}//” to remove the } from the beginning of each line.
Finally, we use socat to create a TCP stream from stdin which allows us to connect XASTIR to an Internet Server on our PC and receive the data from the FCD. Running socat STDIN TCP-LISTEN:14580 tells socat to take input from stdin and listen to TCP port 14580 for a connection for the output. Port 14580 is the standard APRS-IS connection port – It can be whatever port you want. Notice that it isn’t an APRS-IS server, and doesn’t accept any kind of control, filtering, duplicate checking, etc.
One last note. The UNIX/Linux (Bash) shell likes to buffer any inputs that are not interfacing with real terminals (ttys). When we pipe the data through the chain of commands, buffering optimises the CPU usage of the commands, but, it kills the timing as it gathers data (usually 4K at a time) together. This isn’t really what you want (although it works fine), so the unbuffer command stops this. Unbuffer comes with expect-dev on Ubuntu. Unbuffer -p passes the standard input along the chain to the command you’re unbuffering… Sounds complicated, all that, but here’s the command:
unbuffer tail -f raw.txt | unbuffer -p grep ^} | unbuffer -p sed -e “s/^}//” | socat STDIN TCP-LISTEN:14580
Here, all the commands are linked together. Notice that the final command, socat, is buffered, so it can control the stream speed.
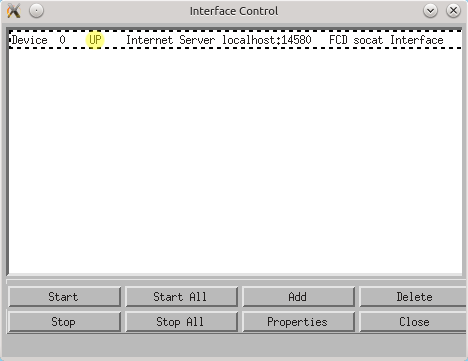
Next we connect up XASTIR with socat. I assume that XASTIR is installed and running okay. From there, click Interfaces and then Interface Control and then Add, select Internet Server and Add again. Unless you’re doing something smart, the Host will be localhost, Port will be as above (14580). Untick Allow transmitting? as there’s no support for it with socat. Leave passcode empty as socat won’t care, and remove the filter so the box is empty.
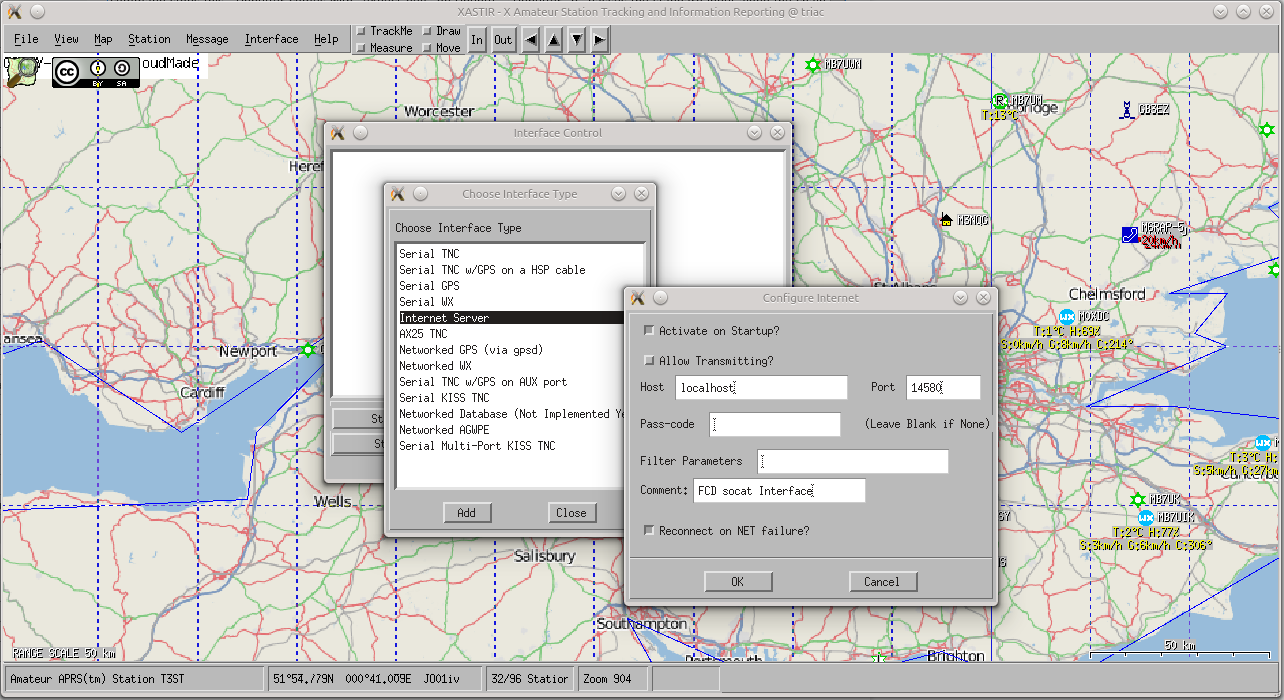
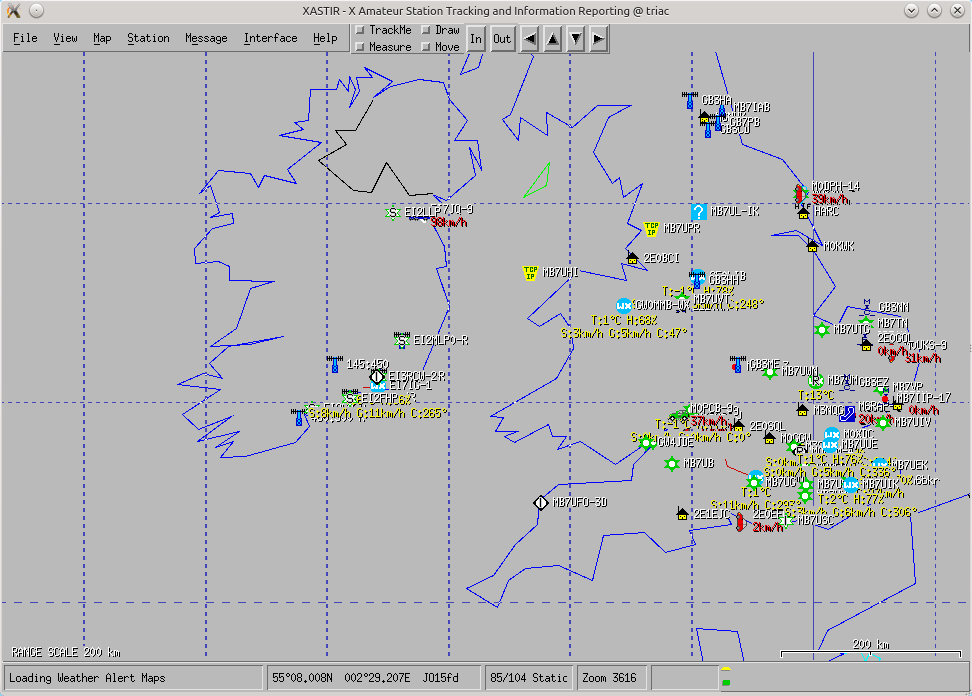
Once done, you’ll have the interface in Interface Control. Select the interface you just configured and then click Start. If it all went correct, and the previous command is running, you’ll see UP next to the interface:
Now as soon as valid frames come through, you will receive them on the XASTIR map. Note that this only works for stations that have been digipeated already, because of the crude nature of the dataflow above. If you were to write a small bash script to fix the un-digipeated data into the correct format, you could receive all the stations heard. The data is there, just unusable in the format from the AFSK decoder.