With the outbreak of the novel coronavirus (COVID-19) in late 2019 and spreading through Europe early 2020, a lot of tech and IT media wrote to encouraging people to take up Folding at Home (FAH, F@H). I decided to join in, which for the most part was pretty easy, just a case of installing the software – more on this later. But on my larger PCs, I wanted to make use of my Nvidia GeForce GTX 1070. Using a GPU adds another workhorse to the project, and is often faster/more suited to some of the computation tasks (called Work Units or WU).
Installing the Software
The Folding at Home software comes in 3 parts: the client (FAHClient) which does the computation work; the controller (FAHControl) which provides a GUI for the client; and a viewer (FAHViewer) which renders pictures and illustrations of the molecules being computed, albeit at the expense of some compute performance.
The FAH Downloads Page has the files you need to get started. On Linux, you’ll need the following files:
- fahclient_7.5.1_amd64.deb
- fahcontrol_7.5.1_amd64.deb (or my version with fixed dependencies: fahcontrol_7.5.1_amd64_m1geo_deps.deb)
- fahviewer_7.5.1_amd64.deb
These should be installed with the following command:
$ sudo dpkg -i <package_deb_file>
$ sudo apt --fix-missing install
The first line installs the package and the second will obtain any dependencies for the package. You may see errors after installing the first package, but after the second, you should have any dependencies met. You may need to tinker around and help the package manager fix any missing issues.
You’ll notice that I have supplied a modified version of FAHControl. This has one of the dependencies removed, which means it is possible to install on newer Ubuntu versions.
Once you have the programs installed, the client will start. You can stop and start it with:
$ sudo service FAHClient stop # stop the client
$ sudo service FAHClient start # start the client
You’re ready to go. Use the control program to make changes to settings, etc. You’re ready to start folding on your CPU!
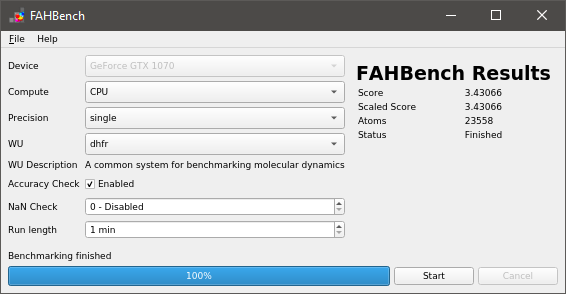
You may be interested to benchmark your machine with FAHBench. The process takes a little over a minute to run a 1 minute test, and it reports if everything is working correctly. Fror
Setting up the Nvidia GPU
The more tricky part, for me at least, was getting the environment set up for the Nvidia display.
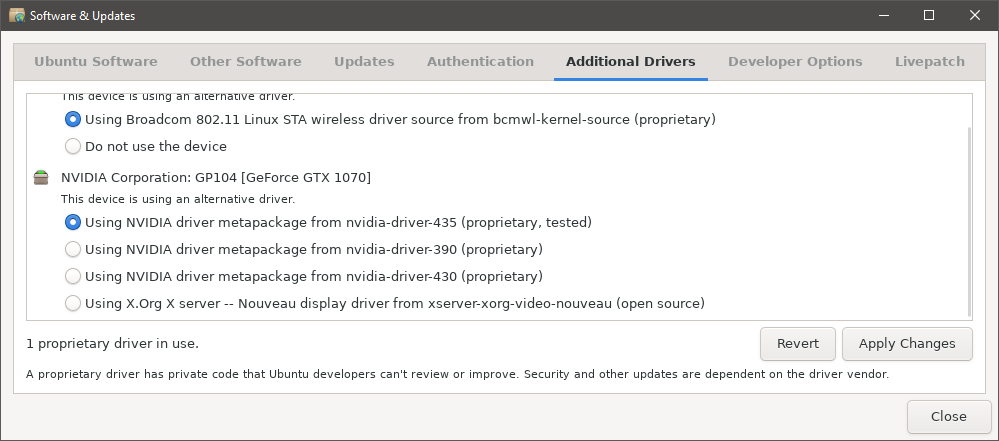
The first thing to do is to open the “Additional Drivers” dialogue box from the “Software and Updates” menu. You can jump directly to this by running the following in a terminal:
$ software-properties-gtk --open-tab=4
Typically, you should select the newest driver available. At the time of writing, “nvidia-driver-435”. If you are not running an X server and just want to install the driver without the requirement for X, you can install “nvidia-headless-435”. You may also care to install “nvidia-utils-435”.
After pressing Apply Changes, the system will download the latest drivers and install them with the required dependencies. We’ll add some extra packages of our own too:
- nvidia-opencl-dev
- ocl-icd-opencl-dev
Install the above libraries using the following:
$ sudo apt install nvidia-opencl-dev ocl-icd-opencl-dev
At this point, you should be ready to go…
Advanced GPU Tinkering
You may also wish to tinker with the GPU a little bit, choosing to either underclock or overclock the GPU to get either better reliability or improved performance. One thing to note with overclocking is that while the occasional glitch or artefact is acceptable during gameplay, it will cause a FAH WU to fail.
Initially with my configuration, I fount the factory overclock on my Asus ROG Strix GTX1070 O8G to be slightly unstable in FAHBench. I found that the GPU would fail at at between 7% and 9% of the way through the test.
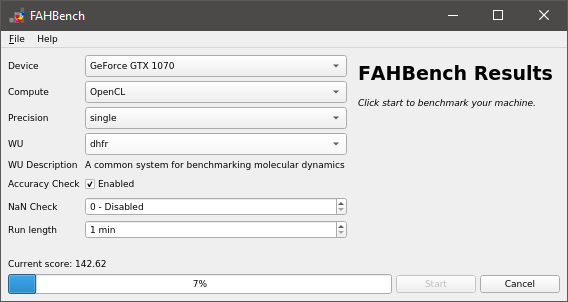
GPU Benchmark Starts 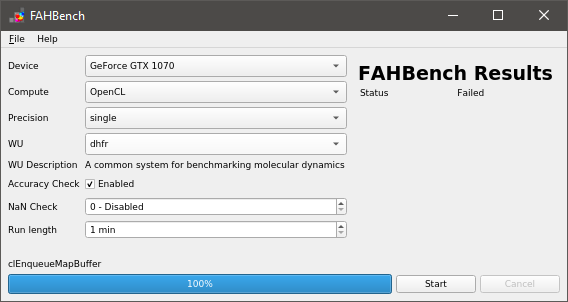
GPU Benchmark Fails
Further investigation using the Unigine Superposition as a GPU stress test allowed me to tinker with the settings to find a reasonable GPU Core and Memory overclock parameters, as well as appropriate power limits. The Asus ROG Strix GTX1070 has good cooling and so I was able to get away with increasing the power limit and adjusting the clocks for long-term stability. Bear in mind that stability is way more important than getting that last couple of percent from the card.
Overclocking and tinkering was done using a mix of Green With Envy and the “nvidia-settings” tool on Xubuntu 19.10 which come with the driver and “nvidia-smi” which comes with the “nividia-utils-xxx” package.
Other Considerations
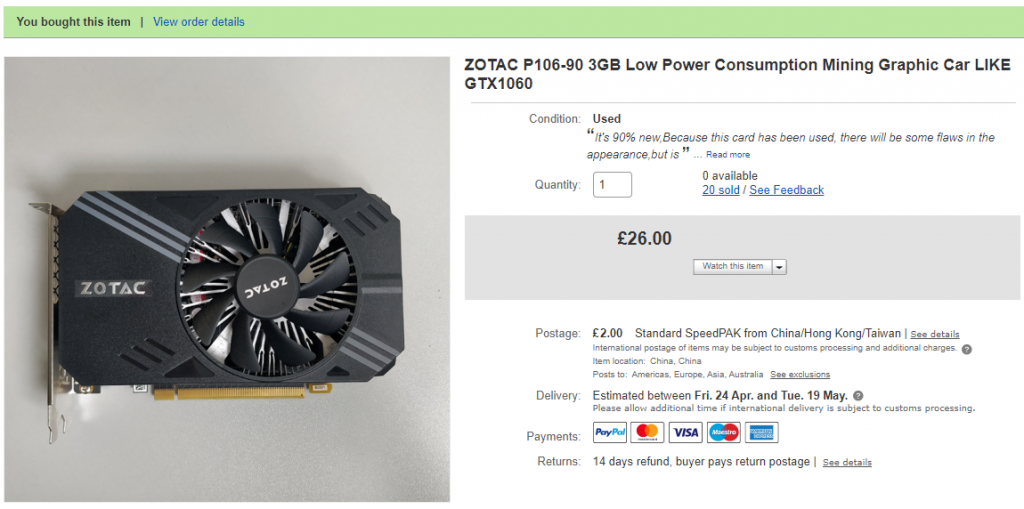
If you don’t fancy pushing your expensive graphics card hard, you may be able to find a custom GPU card previously used for mining crypto-currencies. These cards feature the same GPU chipsets, but are crippled such that they cannot easily (although it is possible) generate video. The Nvidia P106 offers features similar to the GTX 1060, while the Nvidia P104 offers features similar to the GTX 1070.
Since GPUs are no longer viable to generate crypto-currency, they’re often sold second hand on eBay and similar sites for relatively cheap prices. While a modest Nvidia GTX 1060 with 3GB of VRAM costs around £150 on eBay at the time of writing, an Nvidia P106-90 (GTX 1060 with 3GB VRAM) costs as little as £26 each or £20 in bulk! At a once off, that’s nearly a sixth the price.
Watch this space for an update on how these perform…