
On Sunday 12 October 2014, I was informe of a software project called Digital Speech Decoder (DSD). The project claims that “Digital Speech Decoder is an open source software package that decodes several digital speech formats” — http://wiki.radioreference.com/index.php/Digital_Speech_Decoder_%28software_package%29
At the time of writing (version 1.7) supported the following
- P25 Phase 1
- ProVoice EDACS Digital voice
- X2-TDMA – Motorola public safety TDMA system with P25 style signaling (mostly based on DMR)
- DMR/MOTOTRBO – Digital Mobile Radio standard
- NXDN – 9600 baud (12.5 kHz) NEXEDGE and 4800 baud (6.25 kHz) NEXEDGE/IDAS
- D-STAR – The Github version of dsd/mbelib can parse and play back D-STAR traffic.
- C4FM modulation (such as Yaesu System Fusion)
- GFSK modulation (including GMSK and other filtered 2/4 level FSK)
- QPSK modulation (sometimes marketed as “LSM”)
With a new interest in DSTAR since buying an Icom ID5100, I was keen to give this a try. I sent out a few emails to friends who could be potentially persuaded, and got some interesting replies. Aaron VK3ABX reported compiling DSD1.7 for Raspberry Pi (although he complained about it taking a while). People often say that “DSTAR is not amateur radio” – Personally, I believe the ham spirit is in a person, irrespective of technology – this, I feel, is amateur radio! It’s just swapping compilers for cutters, terminals for transistors; software for solder.
First and foremost. I am doing these experiments on Xubuntu 14.04.1 LTS. There are prebuilt binaries for Windows, which I will also be trying. Early versions of the software two-part; a program to run an RTL SDR and another program to decode the digital speech. Videos show people using the discriminator tap of FT817 receivers to feed data into a sound-card, so we see how that will work too.
The build process on Xubuntu 14.04.1 LTS was very simple, thanks in part to Aaron VK3ABX. It goes a little something like this:
- Update the APT package manager
- Download the basic building essentials
- Build IT++
- Build mbelib
- Build dsd
Getting Started
The first things to do are to update the APT package manager and then get some of the basic compiling tools we will require.
$ sudo apt-get update
$ sudo apt-get install build-essential git make cmake
I will make a folder in my home directory for the experimentation.
$ mkdir ~/digital_speech
$ cd ~/digital_speech
From there, I will create separate folders for each part of the process.
Building itpp
IT++ is a C++ library of mathematical, signal processing and communication classes and functions. Its main use is in simulation of communication systems and for performing research in the area of communications. It does a lot of the heavy lifting for dsd.
Download and extract it into a folder inside the folder you made above and then change into the newly extracted folder.
$ wget -O itpp-latest.tar.bz2 http://sourceforge.net/projects/itpp/files/latest/download?source=files
$ tar xjf itpp-latest.tar.bz2
$ cd itpp-4.3.1/
You should hopefully get the latest version of the IT++ library (called itpp) extracted and be inside the extracted folder. ON my computer the path is ‘~/digital_speech/itpp-4.3.1’
Now make a build directory and change into it
$ mkdir build && cd build
Finally we run the cmake command to write our make-script and check our make environment. You should get no errors. The ‘..’ at the end is important, since this refers to the parent directory.
$ cmake ..
Once you have got the above command to finish without errors, you are ready to start the build process. The -j flag tells make to use all the cores it can. It took just over a minute on my work’s PC.
$ make -j
Finally, you need to install the libraries
$ sudo make install
Once this is done, proceed to the next step.
Building mbelib
mbelib is a written description of how certain voice encoding/decoding algorithms could be implemented. It comes with the following patent notice:
This source code is provided for educational purposes only. It is a written description of how certain voice encoding/decoding algorithms could be implemented. Executable objects compiled or derived from this package may be covered by one or more patents. Readers are strongly advised to check for any patent restrictions or licensing requirements before compiling or using this source code.
We go back to the experimentation directory.
$ cd ~/digital_speech/
We can this time use Git to download the source code for us.
$ git clone https://github.com/szechyjs/mbelib.git
$ cd mbelib/
Again, we create a build directory and change into it
$ mkdir build && cd build
We again run the configure script on the parent directory (..).
$ cmake ..
And again, as with IT++, we run the make command.
$ make
On the work PC this took 19 seconds. We install these libraries into the system with the following
$ sudo make install
And then we progress on to the next step.
Building DSD
DSD is able to decode several digital voice formats from discriminator tap audio and synthesize the decoded speech. Speech synthesis requires mbelib, which is a separate package. DSD is the program we will interact with to decode our digital speech.
Before we can compile the DSD binaries, we need to get a few other libraries in addition to the two we have just built and installed. If you get errors about portaudio19-dev needing libjack-dev, then a sly way around this is to install libjack-jackd2-dev too (just paste it on the end of the following line). It’s not needed, but for odd reasons, portaudio sometimes wants jackd development files.
$ sudo apt-get install libsndfile1-dev fftw3-dev liblapack-dev portaudio19-dev
Once downloaded and installed we go back to the experimentation directory
$ cd ~/digital_speech/
We can again use Git to download the source code for us.
$ git clone https://github.com/szechyjs/dsd.git
$ cd dsd/
Again, we create a build directory and change into it
$ mkdir build && cd build
We again run the configure script on the parent directory (..).
$ cmake ..
And again, as with IT++, we run the make command.
$ make
On the work PC this took 31 seconds. At this point the build is done. You can install them with
$ sudo make install
Using dsd
The ‘official’ operation is described on the dsd wiki operation page.
Getting Help
Running the program with the -h flag prints the help options:
$ ./dsd -h
Digital Speech Decoder 1.7.0-dev (build:v1.6.0-79-g60807e0)
mbelib version 1.2.5Usage:
dsd [options] Live scanner mode
dsd [options] -r Read/Play saved mbe data from file(s)
dsd -h Show helpDisplay Options:
-e Show Frame Info and errorbars (default)
-pe Show P25 encryption sync bits
-pl Show P25 link control bits
-ps Show P25 status bits and low speed data
-pt Show P25 talkgroup info
-q Don’t show Frame Info/errorbars
-s Datascope (disables other display options)
-t Show symbol timing during sync
-v Frame information Verbosity
-z Frame rate for datascopeInput/Output options:
-i Audio input device (default is /dev/audio, – for piped stdin)
-o Audio output device (default is /dev/audio)
-dCreate mbe data files, use this directory Scanner control options:
-r Read/Play saved mbe data from file(s)
-g Audio output gain (default = 0 = auto, disable = -1)
-n Do not send synthesized speech to audio output device
-w Output synthesized speech to a .wav file
-a Display port audio devices
-B Serial port baud rate (default=115200)
-C Serial port for scanner control (default=/dev/ttyUSB0)
-R Resume scan after TDULC frames or any PDU or TSDUDecoder options:
-fa Auto-detect frame type (default)
-f1 Decode only P25 Phase 1
-fd Decode only D-STAR
-fi Decode only NXDN48* (6.25 kHz) / IDAS*
-fn Decode only NXDN96 (12.5 kHz)
-fp Decode only ProVoice*
-fr Decode only DMR/MOTOTRBO
-fx Decode only X2-TDMA
-l Disable DMR/MOTOTRBO and NXDN input filtering
-ma Auto-select modulation optimizations (default)
-mc Use only C4FM modulation optimizations
-mg Use only GFSK modulation optimizations
-mq Use only QPSK modulation optimizations
-pu Unmute Encrypted P25
-u Unvoiced speech quality (default=3)
-xx Expect non-inverted X2-TDMA signal
-xr Expect inverted DMR/MOTOTRBO signal* denotes frame types that cannot be auto-detected.
Advanced decoder options:
-A QPSK modulation auto detection threshold (default=26)
-S Symbol buffer size for QPSK decision point tracking
(default=36)
-M Min/Max buffer size for QPSK decision point tracking
(default=15)
$
Audio feeds
The next question I was struggling to answer was how to get audio in and out of the software. From the help, I can see that the -a flag should “display port audio devices” which it indeed does – you can ignore it complaining about the bluetooth sound bridge and the fact my surround sound system doesn’t play nicely:
$ ./dsd -a
Digital Speech Decoder 1.7.0-dev (build:v1.6.0-79-g60807e0)
mbelib version 1.2.5
ALSA lib pcm.c:2239:(snd_pcm_open_noupdate) Unknown PCM cards.pcm.rear
ALSA lib pcm.c:2239:(snd_pcm_open_noupdate) Unknown PCM cards.pcm.center_lfe
ALSA lib pcm.c:2239:(snd_pcm_open_noupdate) Unknown PCM cards.pcm.side
bt_audio_service_open: connect() failed: Connection refused (111)
bt_audio_service_open: connect() failed: Connection refused (111)
bt_audio_service_open: connect() failed: Connection refused (111)
bt_audio_service_open: connect() failed: Connection refused (111)
Cannot connect to server socket err = No such file or directory
Cannot connect to server request channel
jack server is not running or cannot be startedPortAudio version number = 1899
PortAudio version text = ‘PortAudio V19-devel (built Feb 25 2014 21:09:53)’
Number of devices = 12
————————————— device #0
Name = HDA Intel: ALC888 Analog (hw:0,0)
Host API = ALSA
Max inputs = 2, Max outputs = 8
Default sample rate = 44100.00
————————————— device #1
Name = HDA Intel: ALC888 Alt Analog (hw:0,2)
Host API = ALSA
Max inputs = 2, Max outputs = 0
Default sample rate = 44100.00
————————————— device #2
Name = sysdefault
Host API = ALSA
Max inputs = 128, Max outputs = 128
Default sample rate = 48000.00
————————————— device #3
Name = front
Host API = ALSA
Max inputs = 0, Max outputs = 8
Default sample rate = 44100.00
————————————— device #4
Name = surround40
Host API = ALSA
Max inputs = 0, Max outputs = 8
Default sample rate = 44100.00
————————————— device #5
Name = surround41
Host API = ALSA
Max inputs = 0, Max outputs = 128
Default sample rate = 44100.00
————————————— device #6
Name = surround50
Host API = ALSA
Max inputs = 0, Max outputs = 128
Default sample rate = 44100.00
————————————— device #7
Name = surround51
Host API = ALSA
Max inputs = 0, Max outputs = 8
Default sample rate = 44100.00
————————————— device #8
Name = surround71
Host API = ALSA
Max inputs = 0, Max outputs = 8
Default sample rate = 44100.00
————————————— device #9
Name = pulse
Host API = ALSA
Max inputs = 32, Max outputs = 32
Default sample rate = 44100.00
————————————— device #10
Name = dmix
Host API = ALSA
Max inputs = 0, Max outputs = 2
Default sample rate = 48000.00
————————————— device #11
[ Default Input, Default Output ]
Name = default
Host API = ALSA
Max inputs = 32, Max outputs = 32
Default sample rate = 44100.00
———————————————-
$
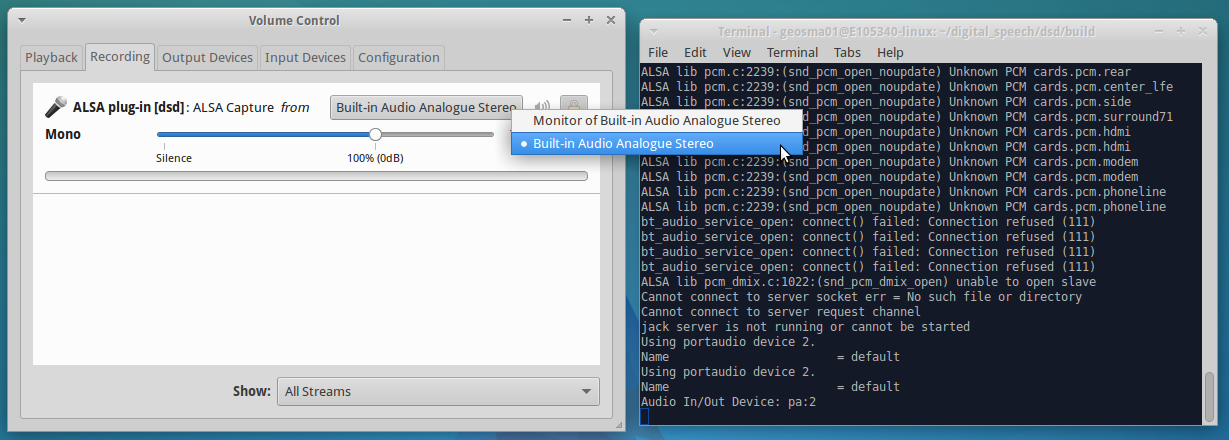
I prefer to use the generic “default” device and then let PulseAudio configure everything in a nice graphical way. The “[ Default Input, Default Output ]” device is given as “device #11”
To select the device, you need to specify the use of PulseAudio, such as below:
$ ./dsd -i pa:11 -o pa:11
You will see something like the following:
Digital Speech Decoder 1.7.0-dev (build:v1.6.0-79-g60807e0)
mbelib version 1.2.5
Initializing portaudio.
### Some warnings removed ###
jack server is not running or cannot be started
Using portaudio device 11.
Name = default
Using portaudio device 11.
Name = default
Audio In/Out Device: pa:11
Which the software then sits at it receives data. On another system, PulseAudio decided to show the defaults as device #2. Once dsd is running, you can use the PulseAudio volume control (usually click the speaker in the system tray, sound settings). You can route the audio from whatever device to whatever program. This is outside the scope of this page, but it’s pretty easy.
As a side note, I couldn’t get dsd to play audio out via pulse audio, so I used padsp as a wrapper for dsd and used /dev/dsp as the output device.
(Edit 22 Aug 2016) Gilles LX3GR has done some further reading about the audio feeds on newer Linux distributions. He writes that, he had struggled with ‘/dev/audio’ and the missing OSS system. Gilles preferred to install OSS, rather than using ALSA or PulseAudio. He followed instructions found here, which are included here.
Install alsa-oss:
sudo apt-get install alsa-oss
Load the installed OSS modules:
sudo modprobe snd_pcm_oss
sudo modprobe snd_mixer_oss
This information from Gilles is untested, but may help others…
Example Sounds
Some example sounds are given on W2SJW’s Radio Sounds page. You may try using an mp3 player to play those back into the dsd software, to test. I have not had any luck with this – yet! Now I’m off to make a cable for the FT817 to grab audio from my local DSTAR repeater.
First Glimpse of Success
Following some initial experiments with the Icom IC7000 and Yaesu FT817, I then moved on to the RTL-SDR receiver (via gqrx). This worked better, but I was still missing something. I made some test recordings, but I still felt that the system wasn’t performing quite right
I also cut about a few recordings from my local D-STAR repeater, GB7OK:
- Some recordings from GB7OK
- Myself and G1HEQ as I drive to get some food
- 2W0CLJ and N3SBP talk about changing train loco tyres
Using GQRX and DSD
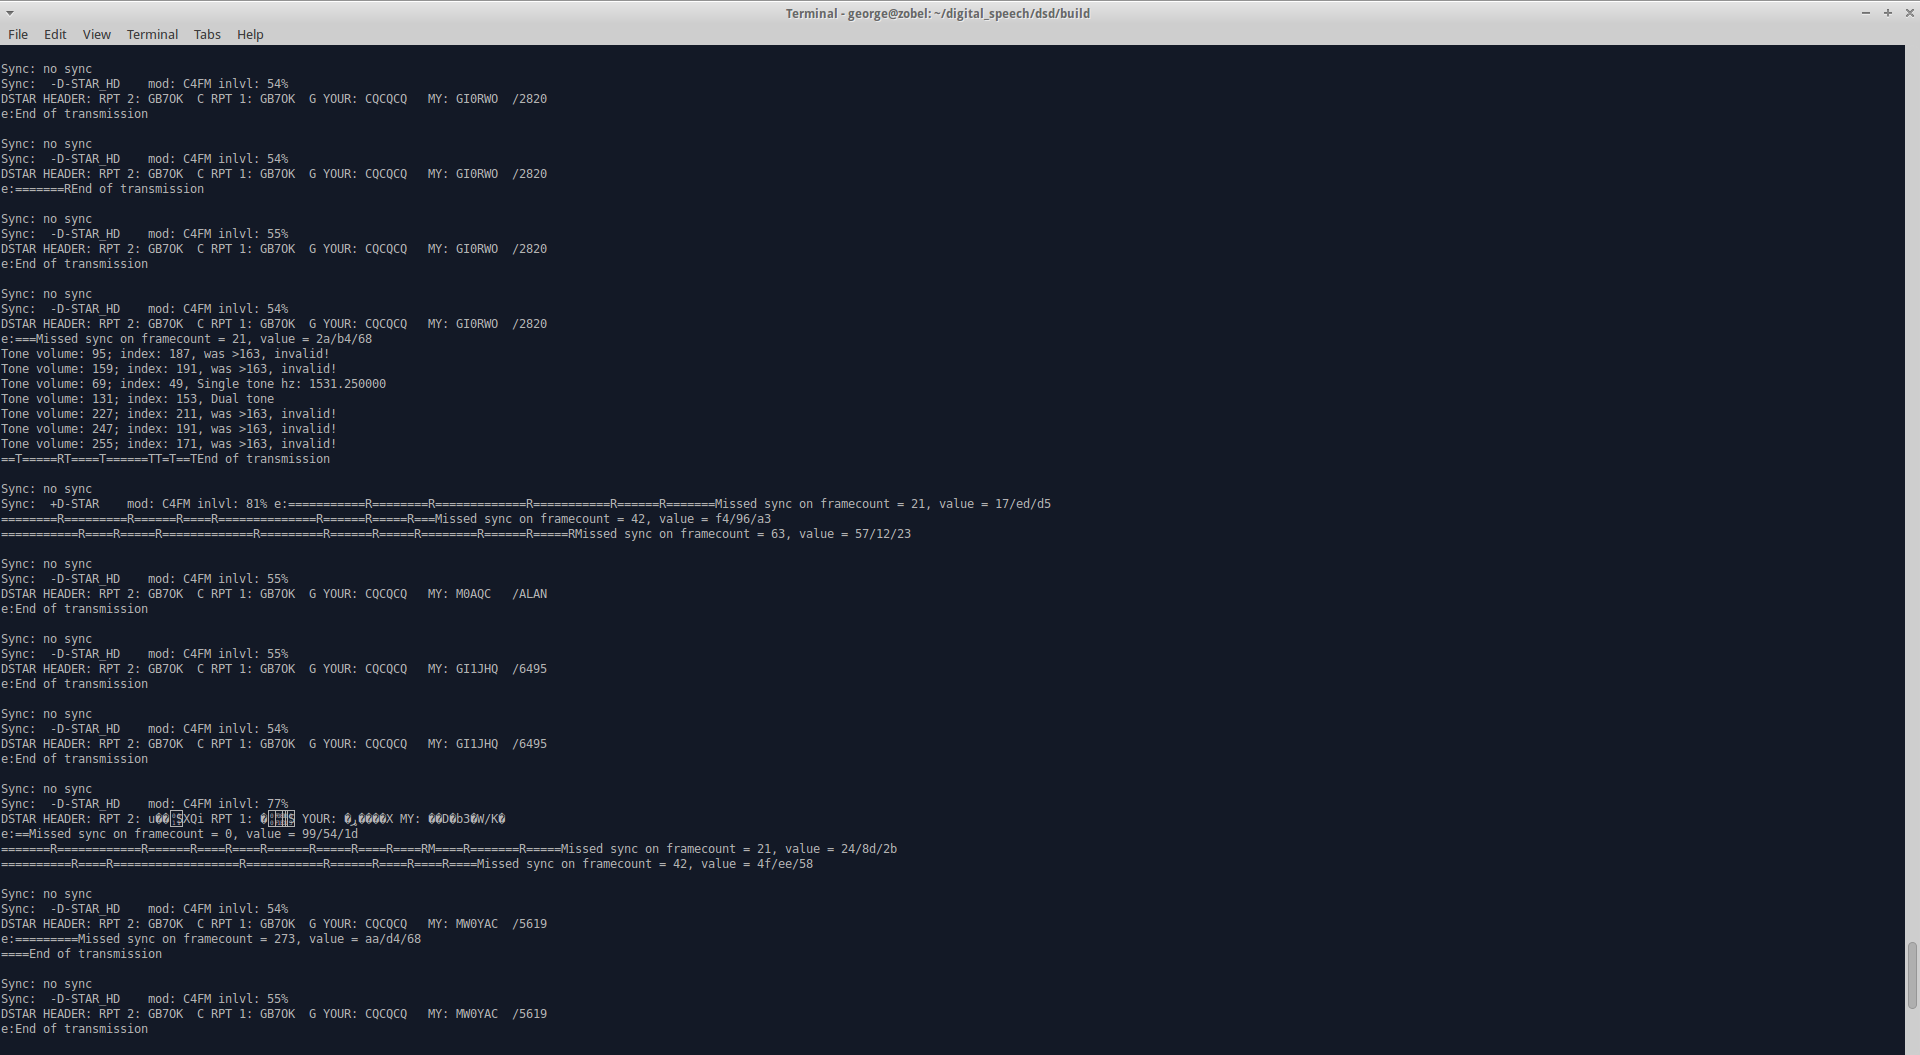
Over the course of a week or so, I finely honed the receiving until I can now easily receive the local DSTAR repeater and all of the control/callsign data too. I am at a stage where there are no re-syncs and the voice is as good as any DSTAR radio.
The basic approach is a little Heath-Robinson, but it was the best/most reliable way of working. The RTL SDR is controlled by gqrx. Getting this to work is outside the scope of this guide, but it is assumed that this works reliably. I then use the UDP network interface of gqrx to output the received datastream. This UDP data is then connected to via socat, which pipes data into DSD using STDIN. Works like magic! Here’s how in more detail;
GQRX
Firstly, as I mention above, you must have GQRX working correctly on your Linux PC. Get the receiver tuned to the local DSTAR/DMR repeater. In the examples here, I use GB7OK and GB7PI as DSTAR repeaters, and GB7CT as DMR example (although GB7CT is a little weak with me). I have calibrated the receive frequency of my RTL SDR carefully, so it is on frequency, but if you haven’t you’ll need to tweak about and get tuned in.
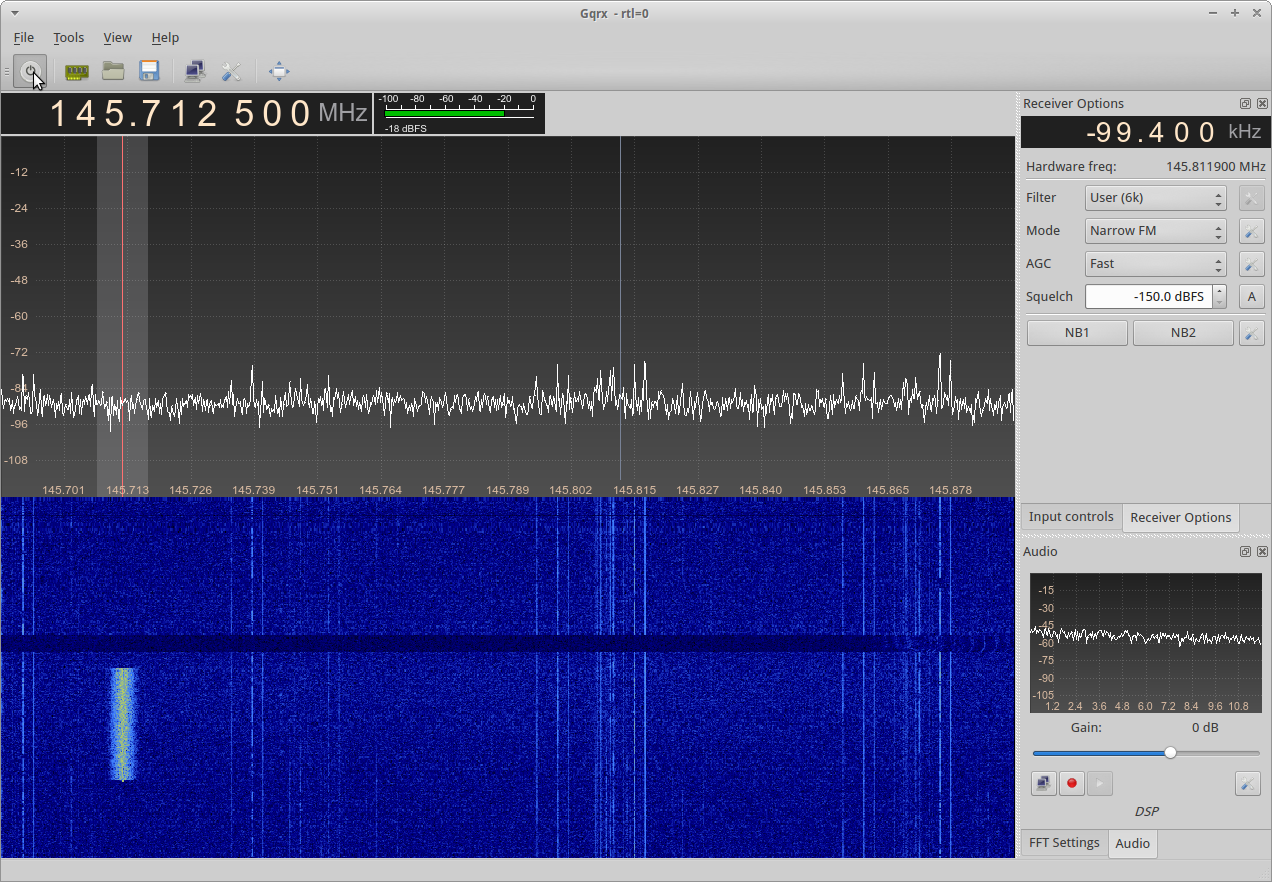
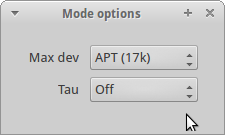
Next we need to configure the FM demodulator. Firstly, we select “Mode: Narrow FM”, then click the gear associated to the right, to bring up “More options”. Inside, we select Max Dev as APT (17k) – in reality, we need much less than that, but more than the 5k that the default of Voice allows. We also set the Tau option to Off.
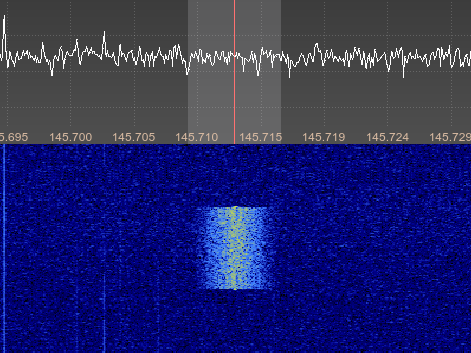
Next we must set our filters to be of appropriate bandwidth for the receive signal. DSTAR, for example, shows up around 6 kHz wide, so I use a filter of around 6.6 kHz. Not too critical. Just pull the sides in on the waterfall until their snug. At the time of writing the repeater wasn’t too busy so it was hard to get a picture showing this in detail.
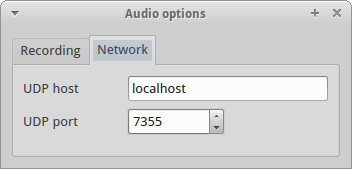
Once you have the filtering selected, I use 6.6 kHz here, as it best fits the received signal from GB7OK, you need to configure gqrx to gqrx stream audio over UDP. First click on the gear/spanner below the audio passband spectrum, this opens Audio options. On the networking tab, enter “localhost” for the UDP host, and “7355” for the UDP port.
Once you’ve got that, then toggle the network streaming with the two computer screen buttons.
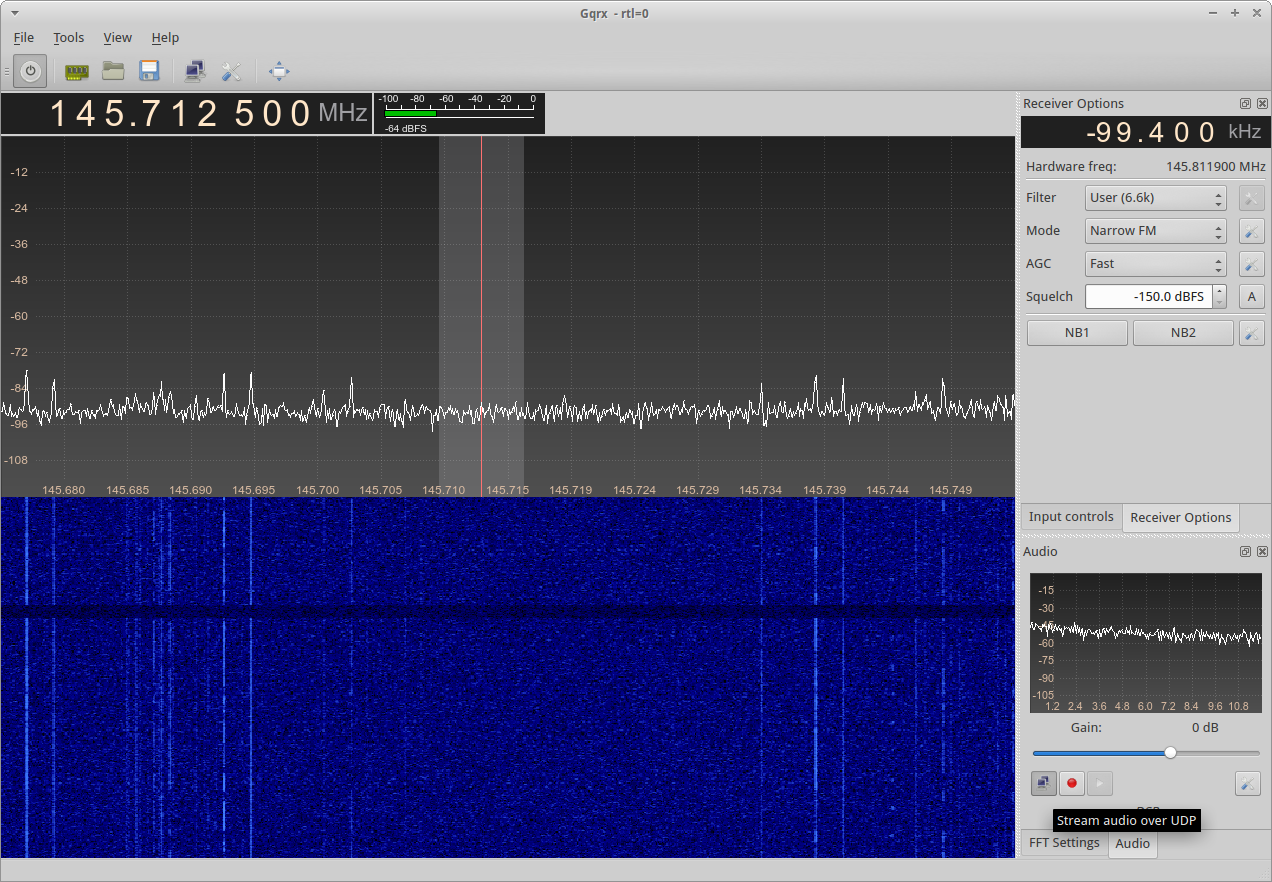
Once you reach here, you’ve got GQRX ready to output data to the DSD software.
SOCAT
Socat is a multipurpose relay. We use it here to connect to the UDP port that GQRX makes us, and then pipe the data into DSD for decoding. All of this happens without any notion of audio, and so there is no bandwidth limiting or sample rates.
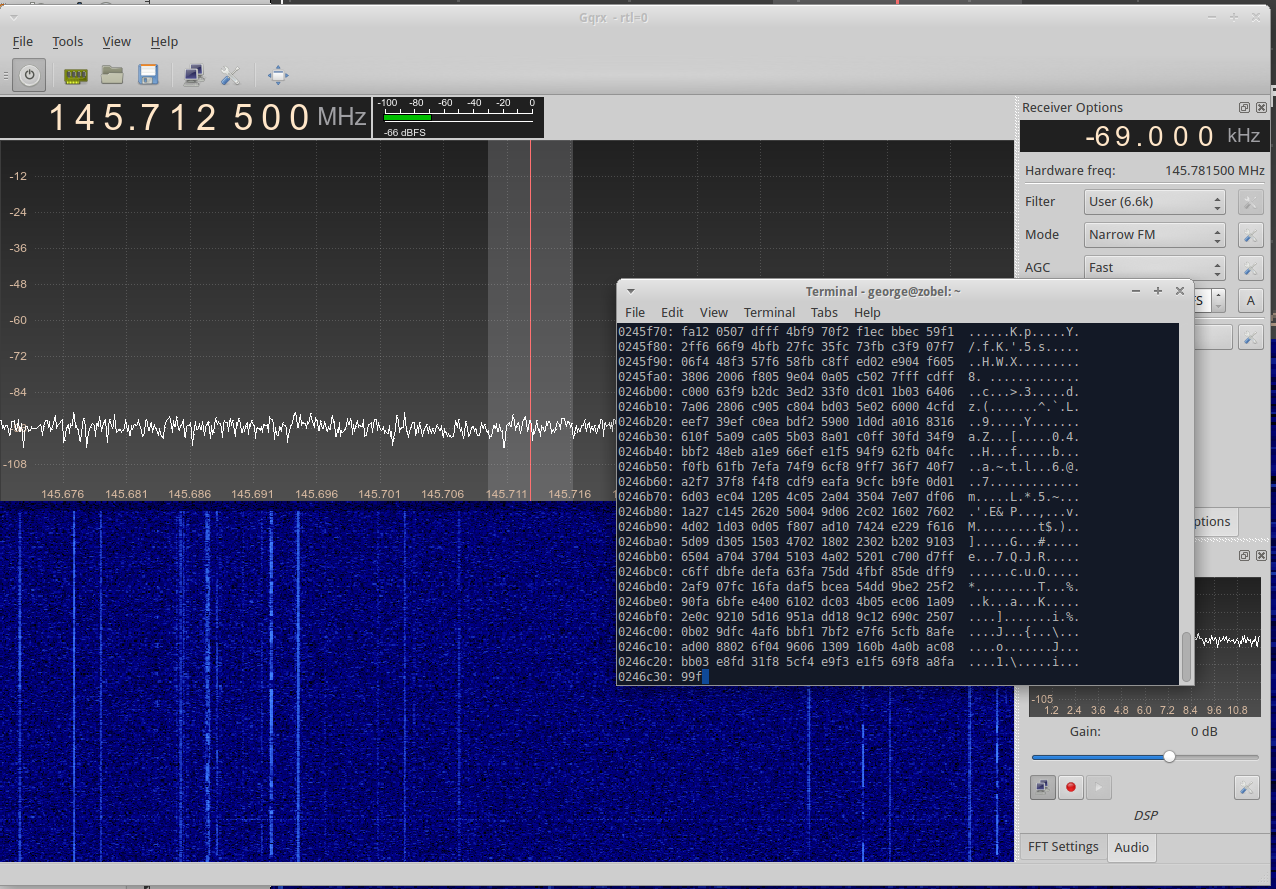
It’s easy to test and see if gqrx is outputting data. Run the following in the command line, using CTRL + C to stop it.
socat stdout udp-listen:7355 | xxd
See the socat manual for more information about that. xxd just presents the data nicely as hex-view output, so that the terminal doesn’t see all the binary data. You’ll get something that looks like this, only moving very quickly. That’s the data…
DSD
If you’re getting data above, then you just replace the xxd command with dsd and the decoder receives the data instead. A few options to explain to the dsd decoder software what we want and we’re away.
If you look at the options for dsd, shown above, you’ll see that the -i option takes a hyphen (-) which is usually used to represent stdin. Specifying “-i -” informs dsd that we want to take our input signal from standard in. All of the other options then apply as you would expect. I found that the output to audio in real time caused some problems, so instead, I write the output to a file with “-w filename.wav”.
The complete command I use on the decoder side is shown below. Obviously you can specify other options to fix DSTAR, DMR, etc.
socat stdout udp-listen:7355 | ./dsd -i – -w dsd_output.wav
You’ll find that you can get better results by tinkering with a nice string signal and adjusting the bandwidth on the receiver, etc.
DSTAR
 (Ed: need to get off laptop)
A much better recording of GB7OK can be found here: DSD_GB7OK_Recording_M1GEO.mp3 (Ed: need to get off laptop)
DMR
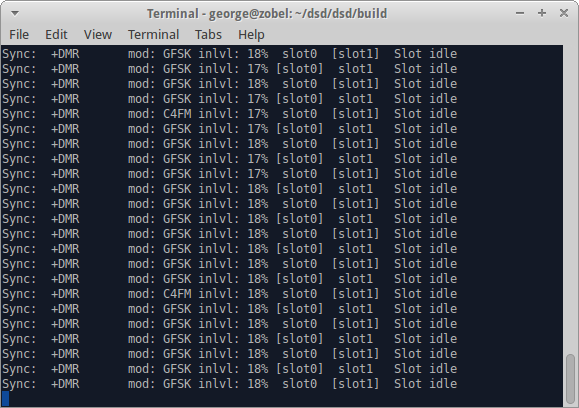
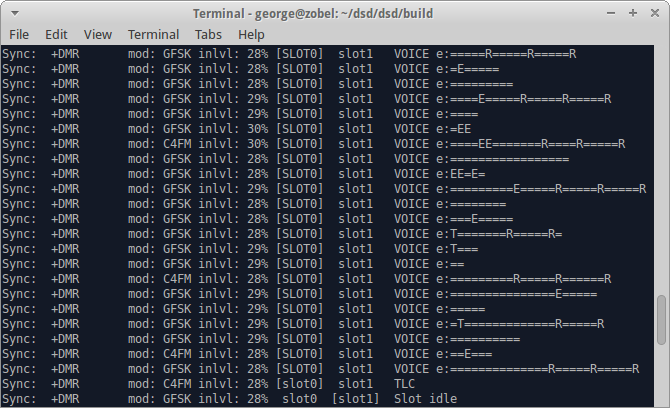
Of course, when you come to demonstrate, there’s never anything happening. The first image shows the stronger repeater with no traffic (empty slots) and the second is a more distant repeater that’s weak (about S2 on the meter) with a few re-syncs and errors
A recording of GB7CT was made using DSD and is available here: DSD_GB7CT_Recording_M1GEO.mp3
I also took a wander just above the 70cms band. In the UK, there is A LOT of DMR around on 440-470 MHz. Have a look! This snippet was recorded from 440.965 MHz, the first transmitter I found with voice data (often it’s just binary data, or idle slots): DSD_DMR_Recording_1_M1GEO.mp3
I made a video showing the basics, and decoding DMR from the UK UHF PMR section of the spectrum from Central London using an RTL-SDR.
Raspberry Pi (without GQRX)
For various reasons, it is convenient to avoid using GQRX. When using the Raspberry Pi, or other embedded device, commands like rtl_fm are able to provide samples out as with socat connected to GQRX, but without the software library requirements of GQRX and the graphics and overhead. Another big plus is avoiding compiling GNURadio on the Raspberry Pi, which doesn take some years 😉
Aaron VK3ABX reports good success with rtl_fm with the data piped into dsd as with above, although he does say “it takes around 3 seconds to stabilise and lock, and leaves room for further improvement”:
rtl_fm -f 145.125M -M fm -g 100 -s 70K -r 48K -E dc| dsd -i – -w test.wav
Clearly you substitute your own frequency, taking into account any inaccuracy in the RTL SDR. You may also wish to tinker with the sampling rates and bandwidths (linked) to get the correct filter bandwidth around the signal.
I have not personally tested the rtl_fm commands, but Gilles LX3GR confirms they are also working for him.